Agram Arena Summer 2015 Report

Andrija Jurišić, 20th July 2015

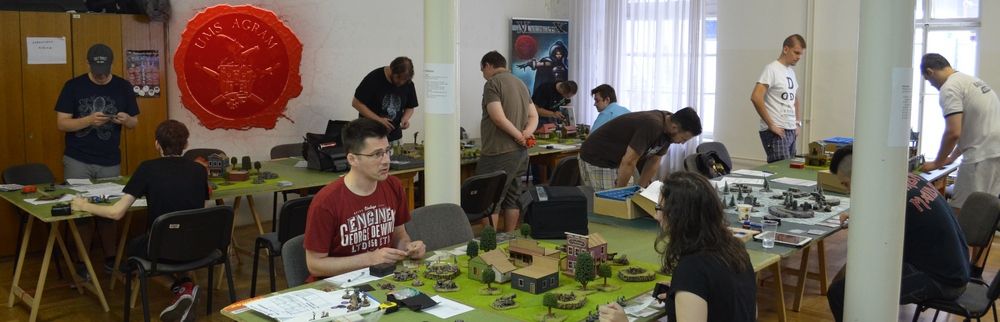
July in Zagreb is always time for wargaming extravaganza. UMS "Agram" has been organizing an annual event called Agram Arena Summer for thirteen years running. This year, we organized this event to stretch over two weekends, saturdays and sundays 9:00-19:00.

Click for enlarged picture

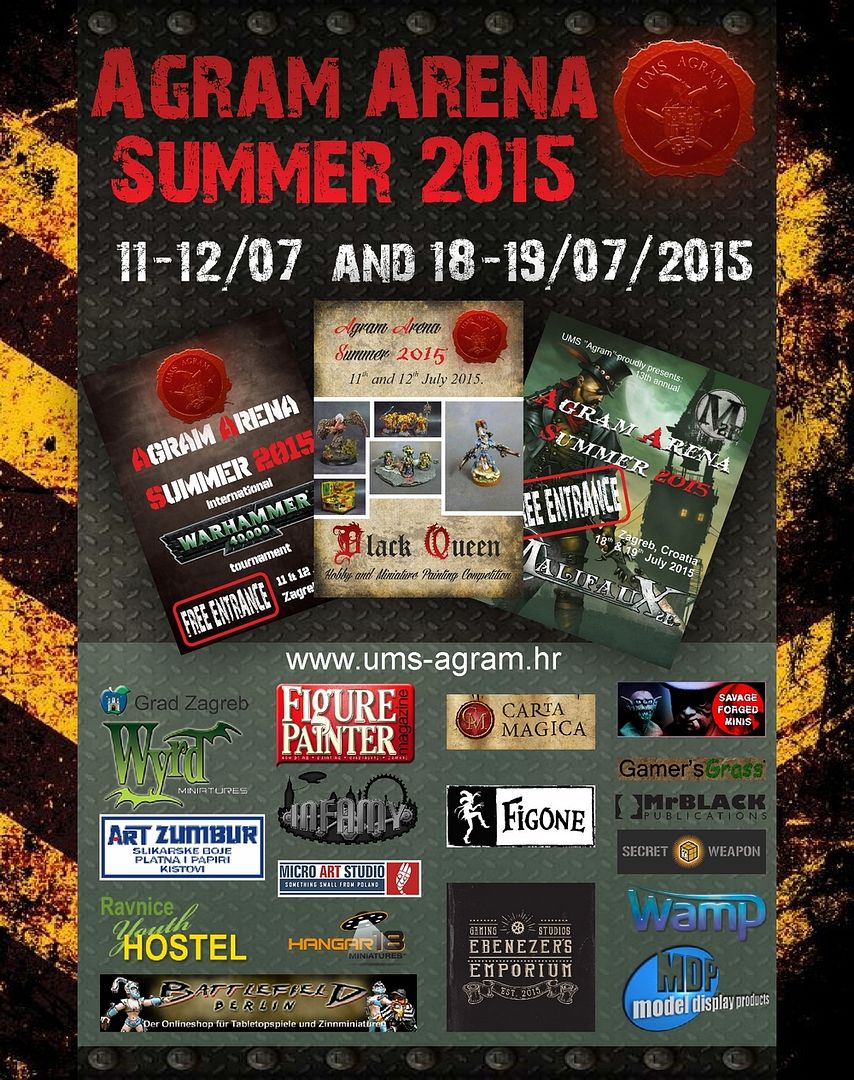
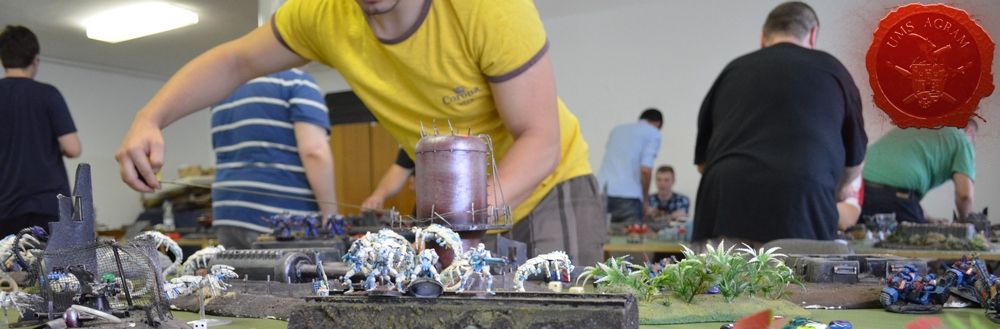
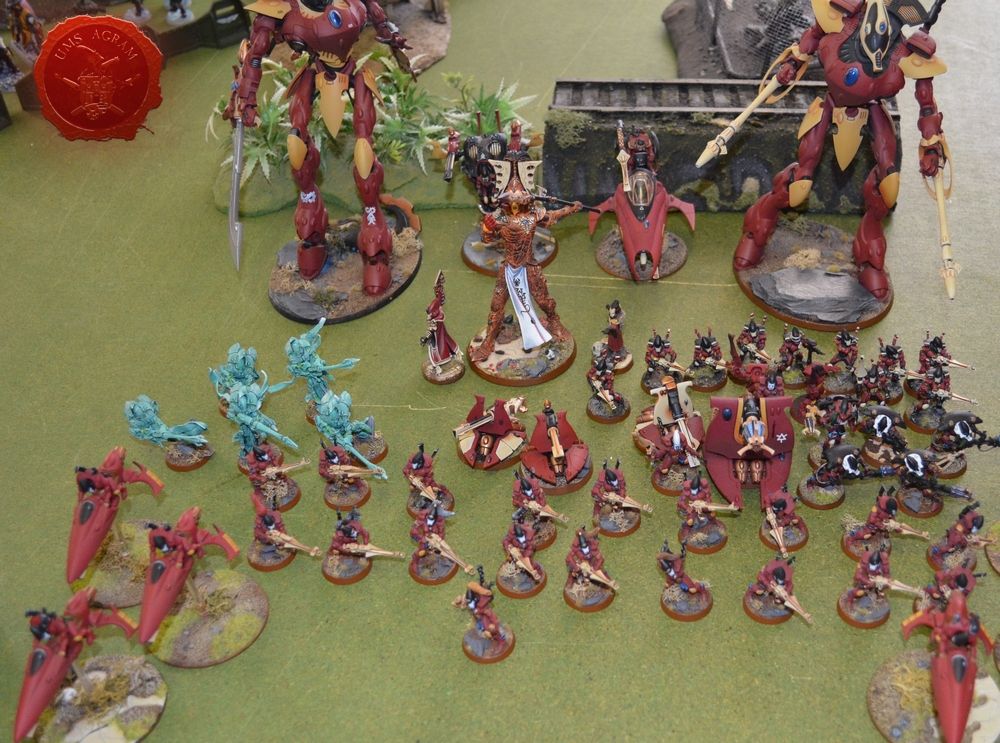
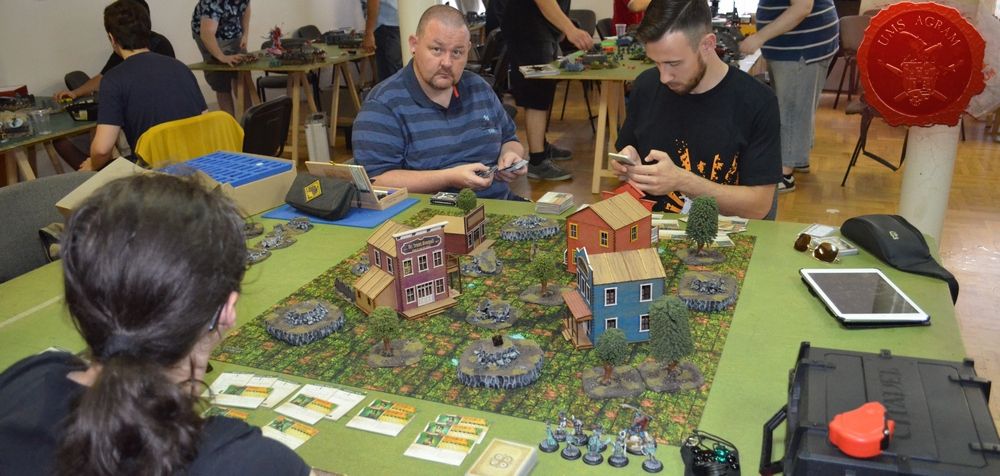
On July 11th and 12th as the first part of Agram Arena Summer, UMS "Agram" organized two parallel competitions, an international Warhammer 40.000 tournament and Black Queen Hobby and Miniature Painting competition. Players and painters from Croatia and many neighbouring and not-so-neighbouring countries like Slovenia, Germany, UK and Poland attended this year's competition.


Click for enlarged picture

Click for enlarged picture

Click for enlarged picture

Frederic "Athenys" Eysell from Germany and one of the main 40k referees on the last European Team Championship (ETC 2014):
First of all, I like to thank the Club UMS Agram for hosting the event and supplying so many (and high quality) prices. The (free!!!) catering was good as always and there was enough to drink for everyone and all the time- Really outstanding! The tables this year had more terrain and I never felt , that it was placed in a bad way or that they weren't enough Line of sight blockers. The schedule was pretty good and I never felt to be in rush. Pauses were reasonable and so were the game lengths.

Aljoša Sodec, SLO:
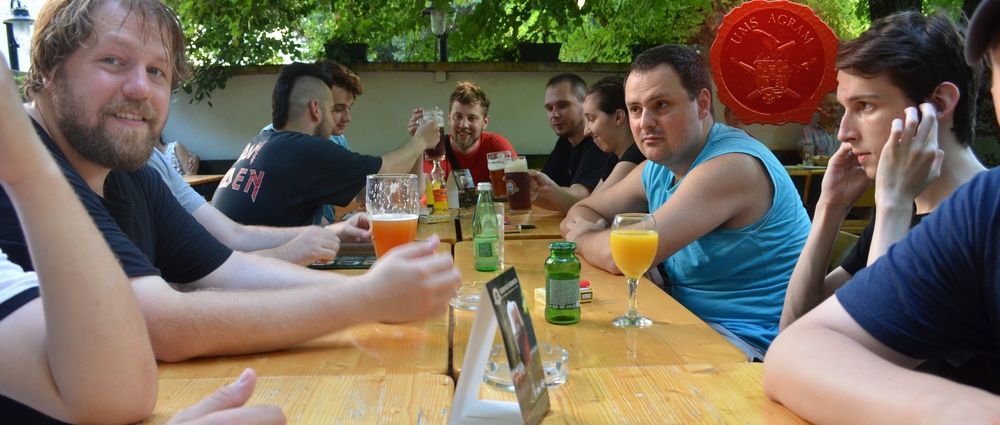
Naturally thanks to the organizers, the tournament was really fun, was very fluid, cold drinks and good atmosphere.. so what could one ask for more? and yet you guys also threw in consolation prizes. So yeah definitely going to be back next year (even if there won't be any prizes), plus we'll try to nag other Slovenians to come with us

Final Results of the 40k tournament:

1. Frederic Eysell, GER
2. Domagoj Mitrović, CRO 
3. Ivan Katić, CRO
Best Painted Army: Frederic Eysell, GER

Click for enlarged picture

Click for enlarged picture

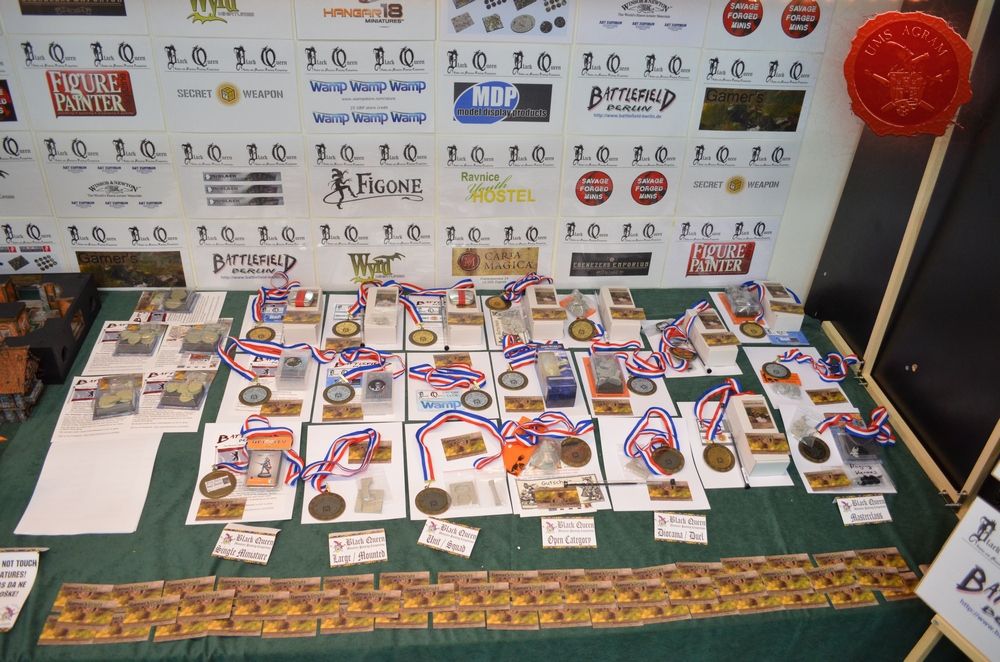
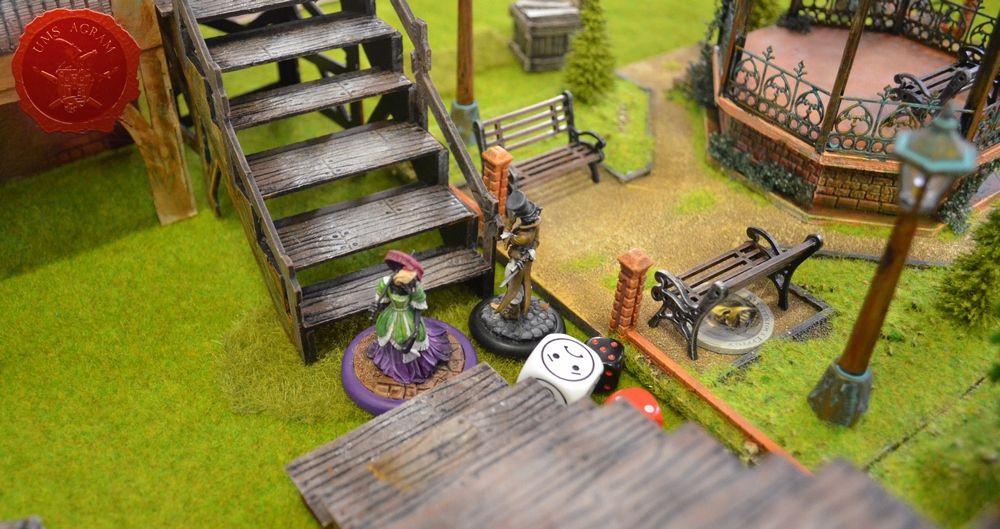
While the battle in the 41st millenium raged in one part of the hall, the other was reserved for the more quiet part of the event - the painting competition. It was judged by our pannel of judges over several categories, and as usual, all of our visitors and participants could decide one of the prestigious awards - the People's Choice Award.

Click for enlarged picture

Click for enlarged picture

Click for enlarged picture

Click for enlarged picture

Click for enlarged picture

Click for enlarged picture

Click for enlarged picture

Click for enlarged picture

Click for enlarged picture

Click for enlarged picture

Click for enlarged picture

Click for enlarged picture

Click for enlarged picture

Click for enlarged picture

Click for enlarged picture

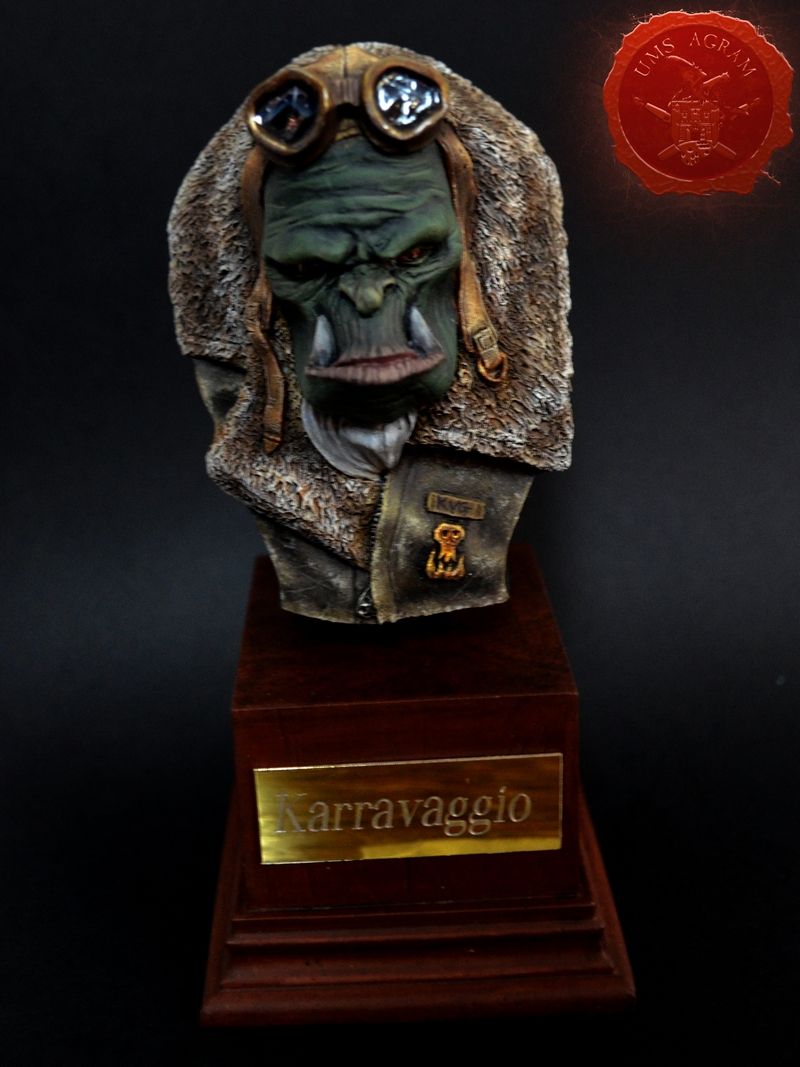
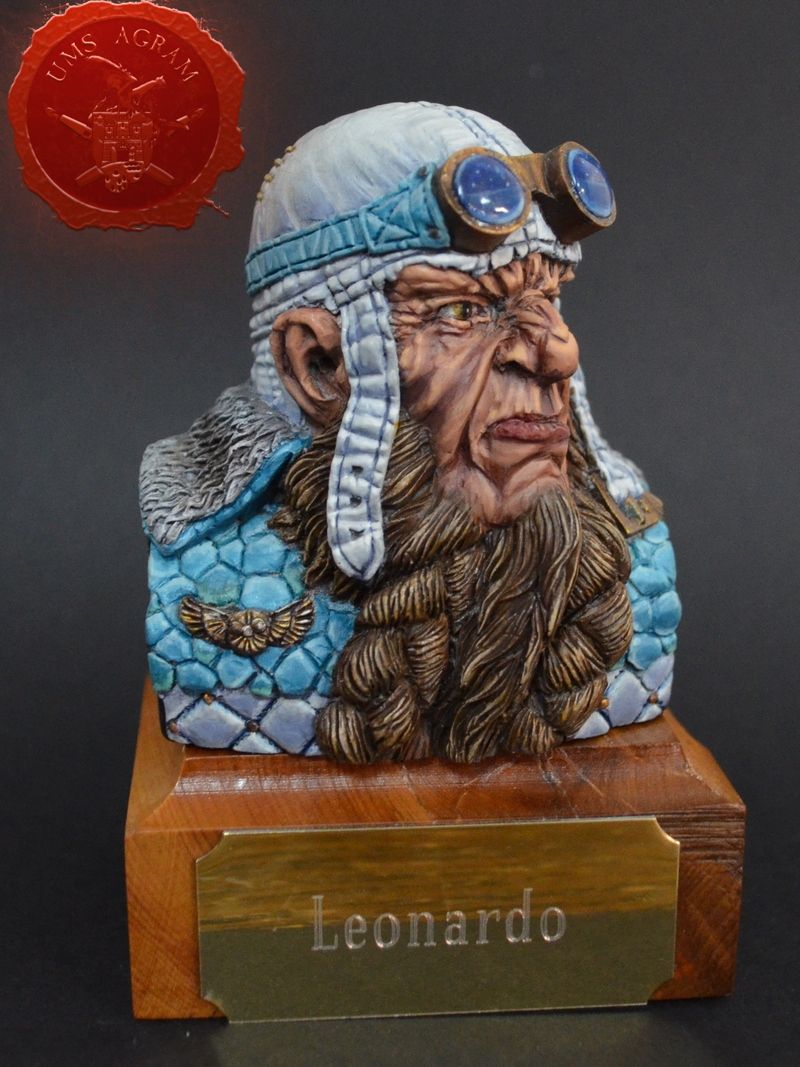
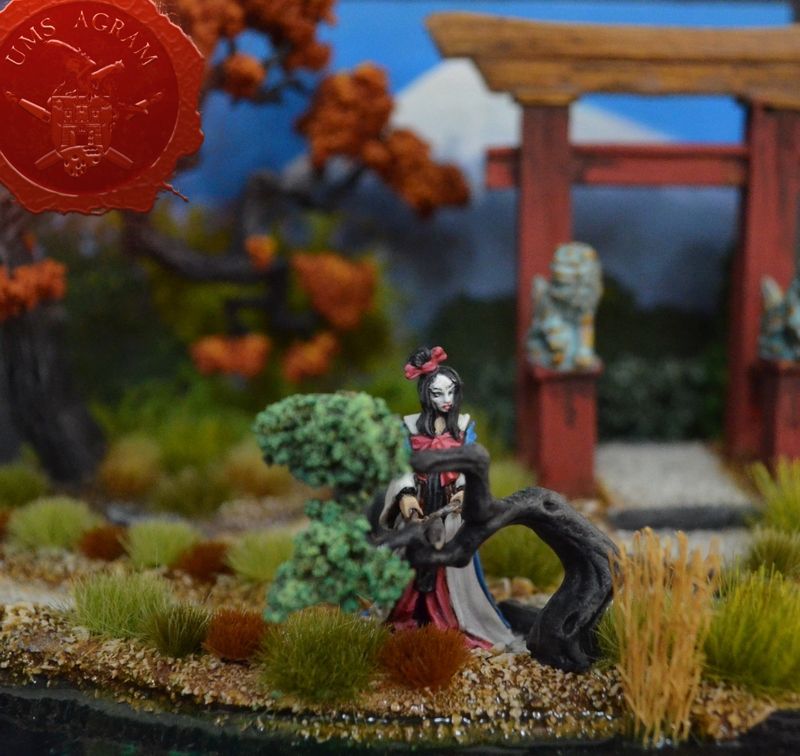
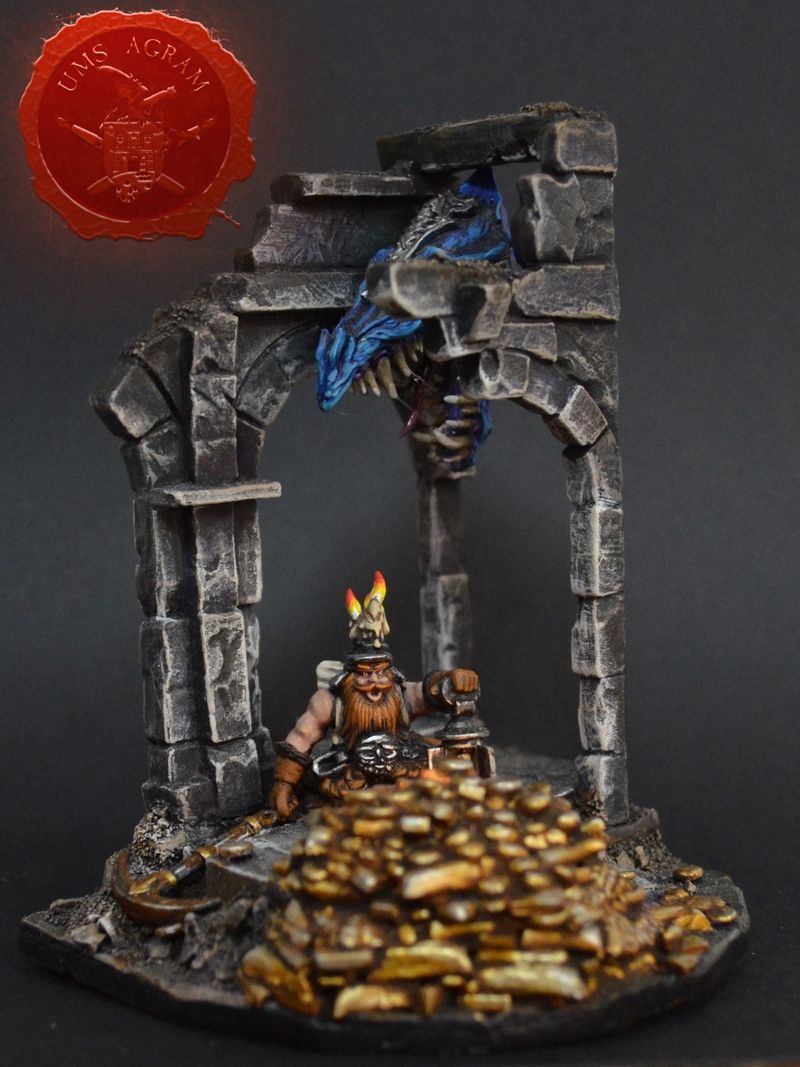
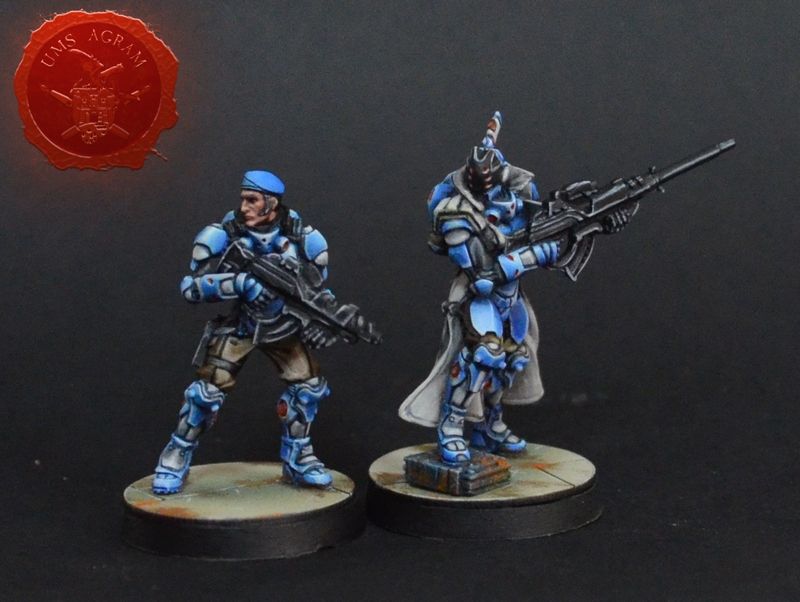
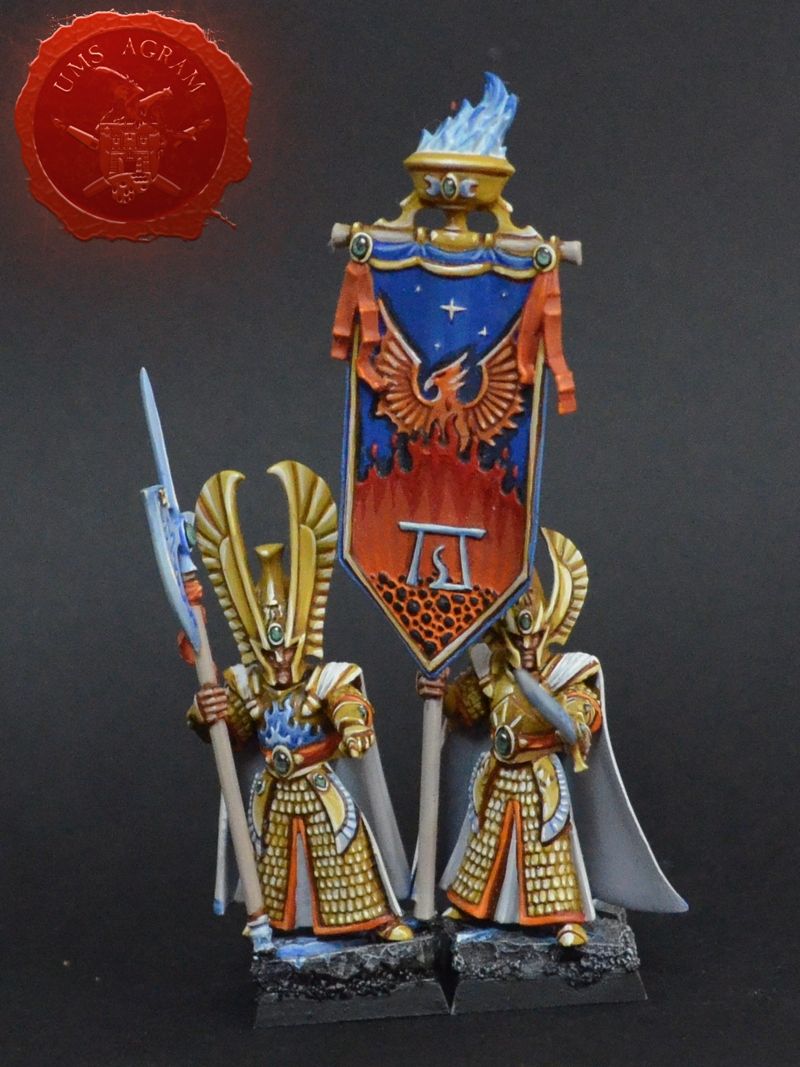
Final Results of the Black Queen Hobby and Miniature Painting Competition:
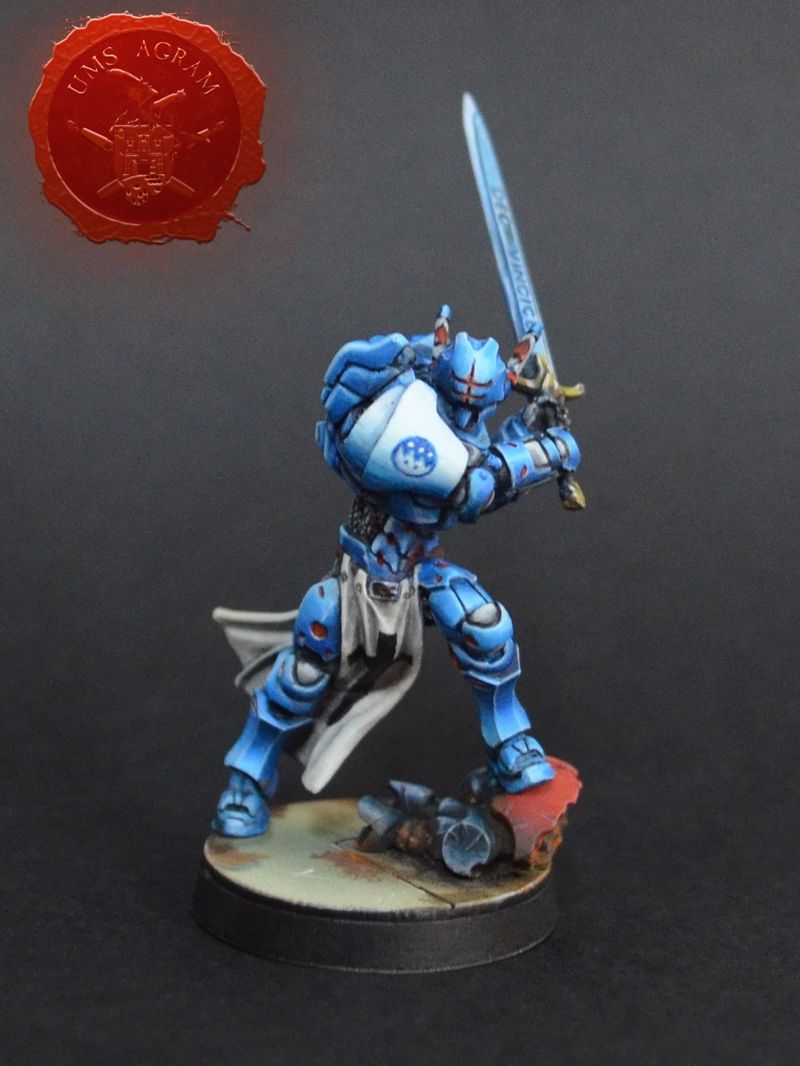
Single Miniature:
1. Wojtek Tekielski, POL
2. Ana Polanšćak, CRO
3. Norman Ealand, UK

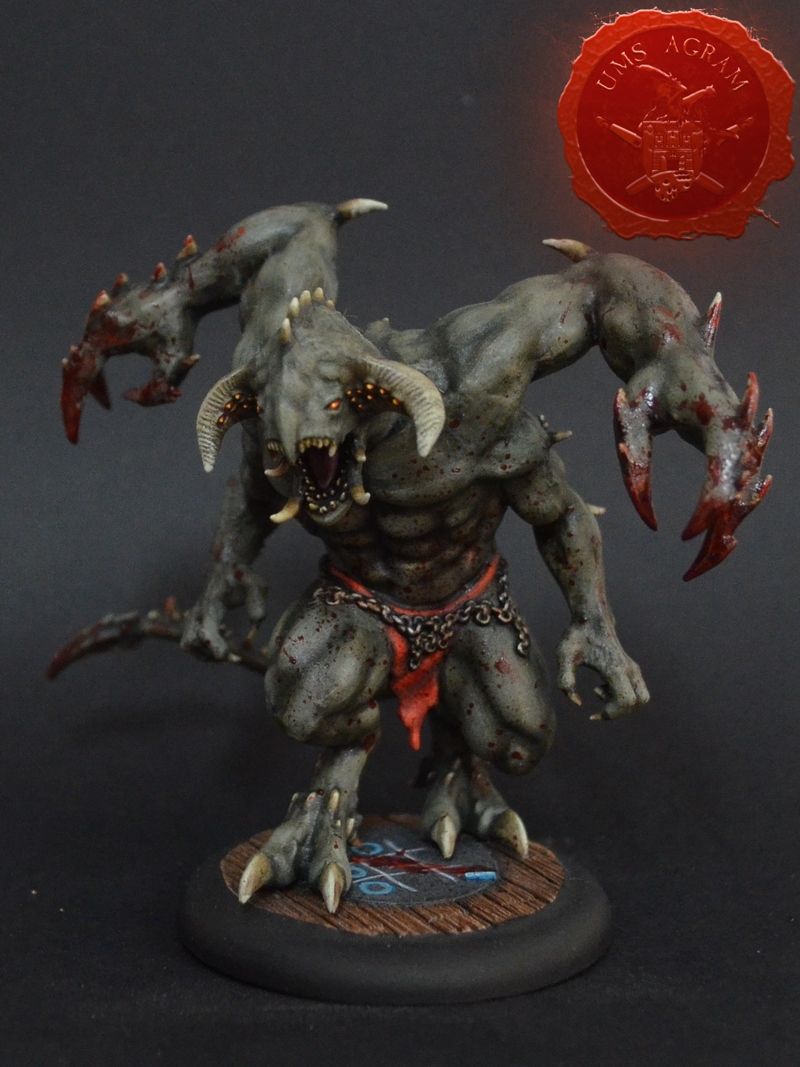
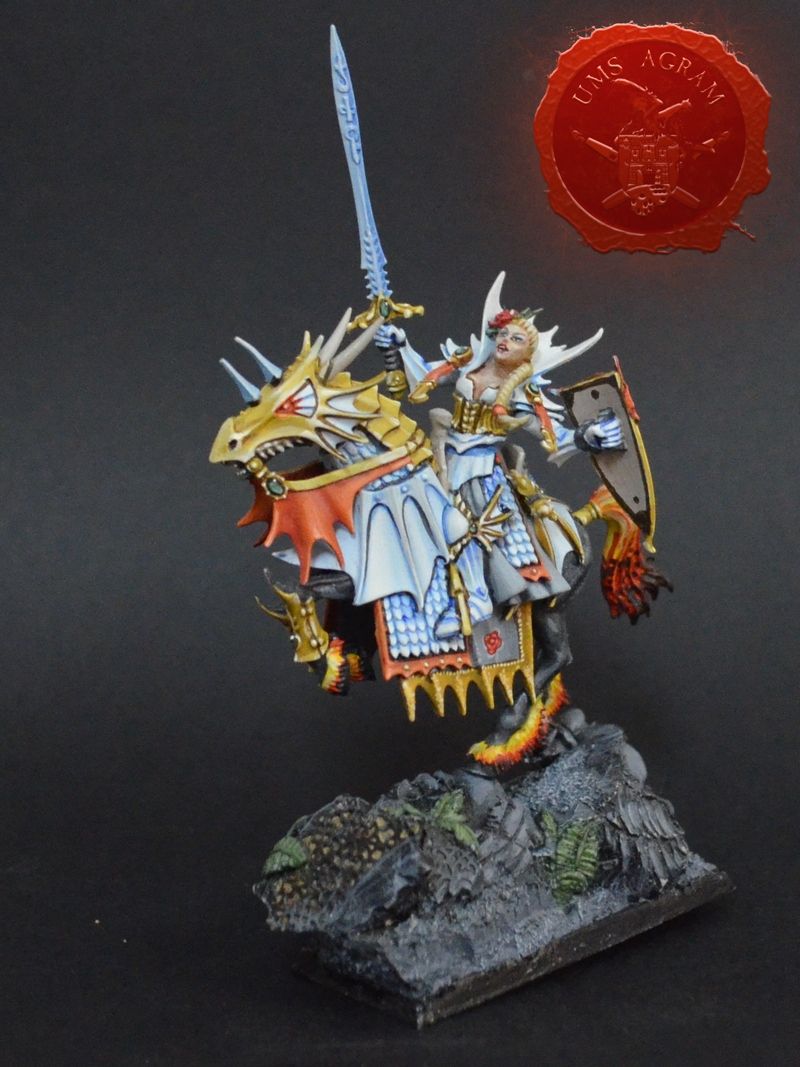
Large/Mounted Miniature:
1. Wojtek Tekielski, POL
2. Domagoj Mitrović, CRO
3. Ana Polanšćak, CRO

Unit/Squad:
1. Mario Ogrizek-Tomaš, CRO
2. Wojtek Tekielski, POL
3. Ana Polanšćak, CRO

Open
1. Norman Ealand, UK
2. Marko Paunović, CRO
3. Adam Parkhouse, UK
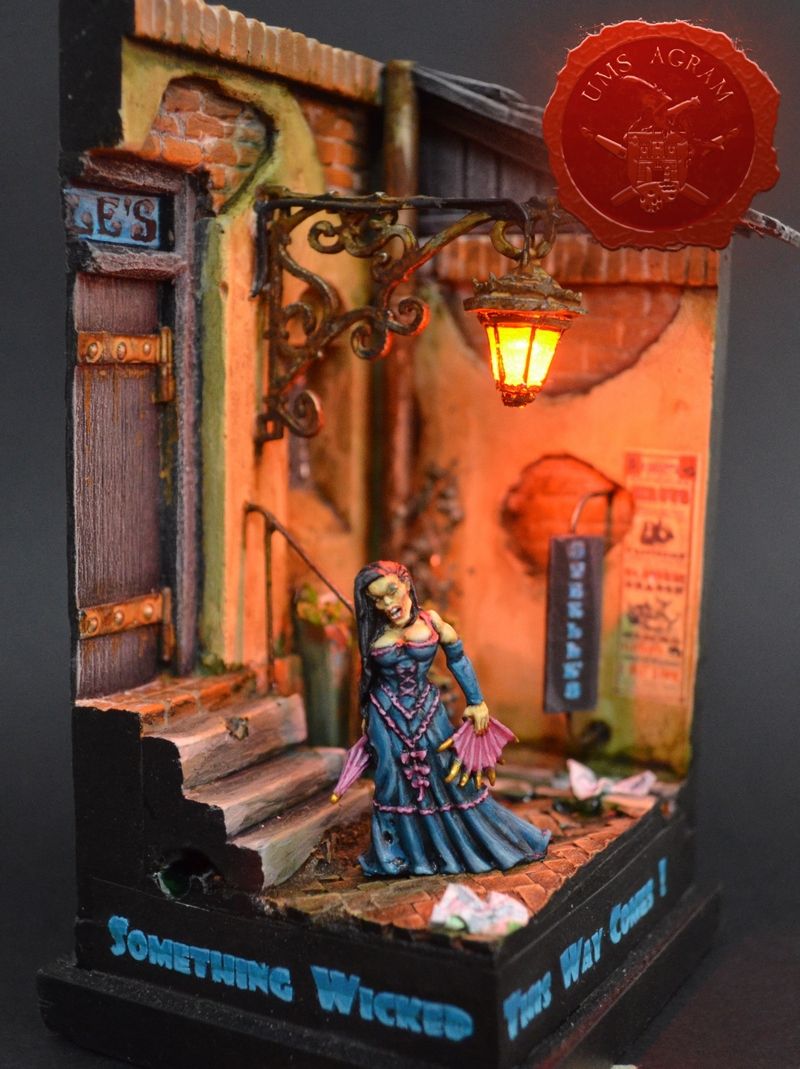
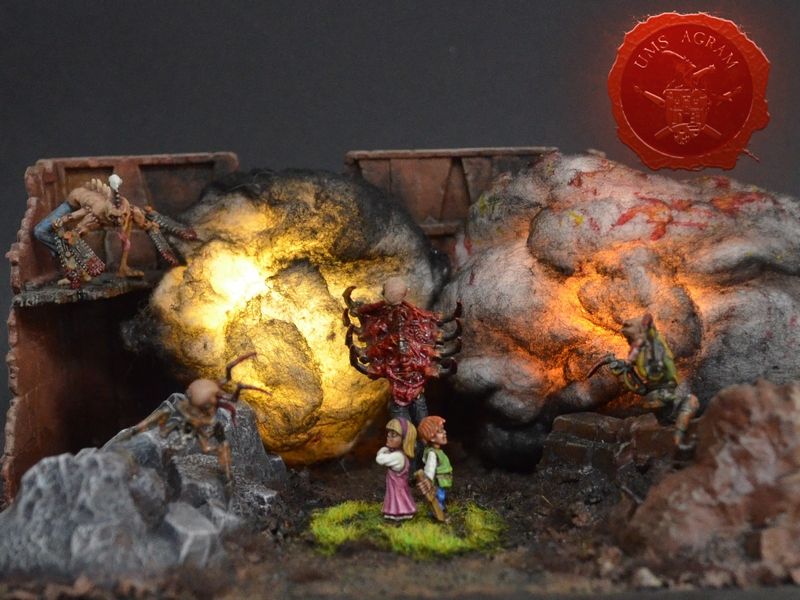
Diorama/Duel
1. Marko Paunović, CRO
2. Norman Ealand, UK
3. Wojtek Tekielski, POL

Best of Wyrd
1. Marko Paunović, CRO

People's Choice
1. Miljenko Jurjević, CRO

Masterclass
1. Norman Ealand, UK
2. Marko Paunović, CRO
3. Mario Ogrizek-Tomaš, CRO


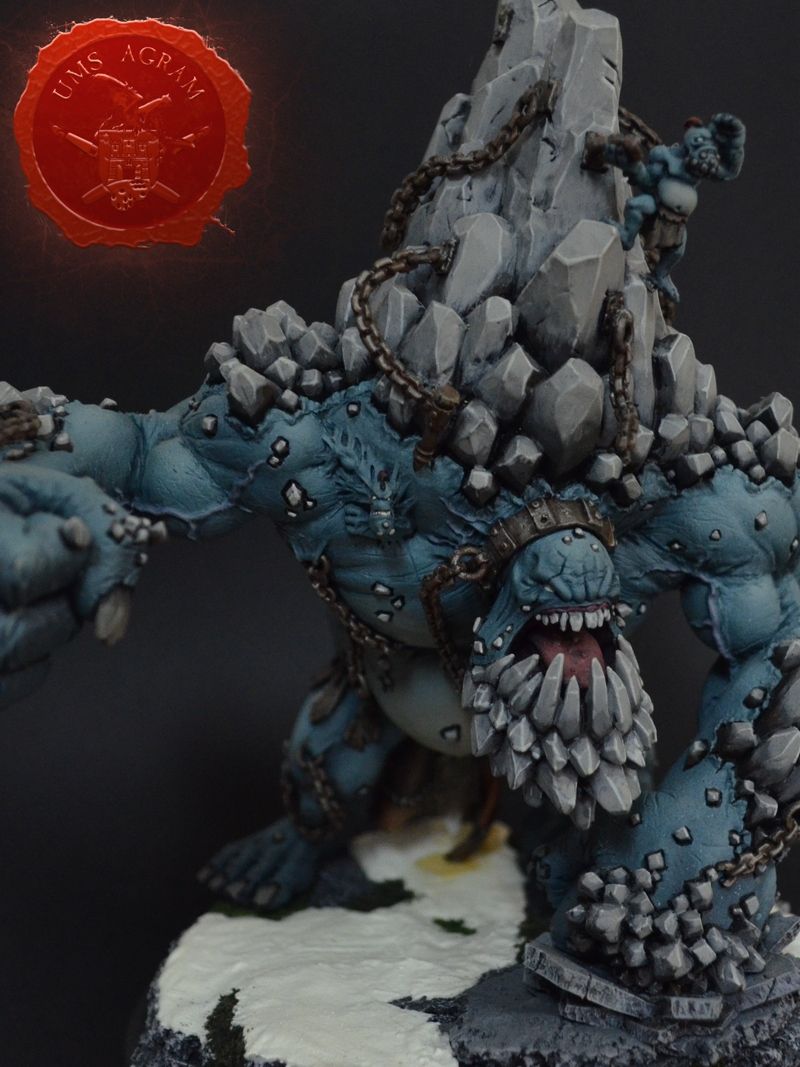
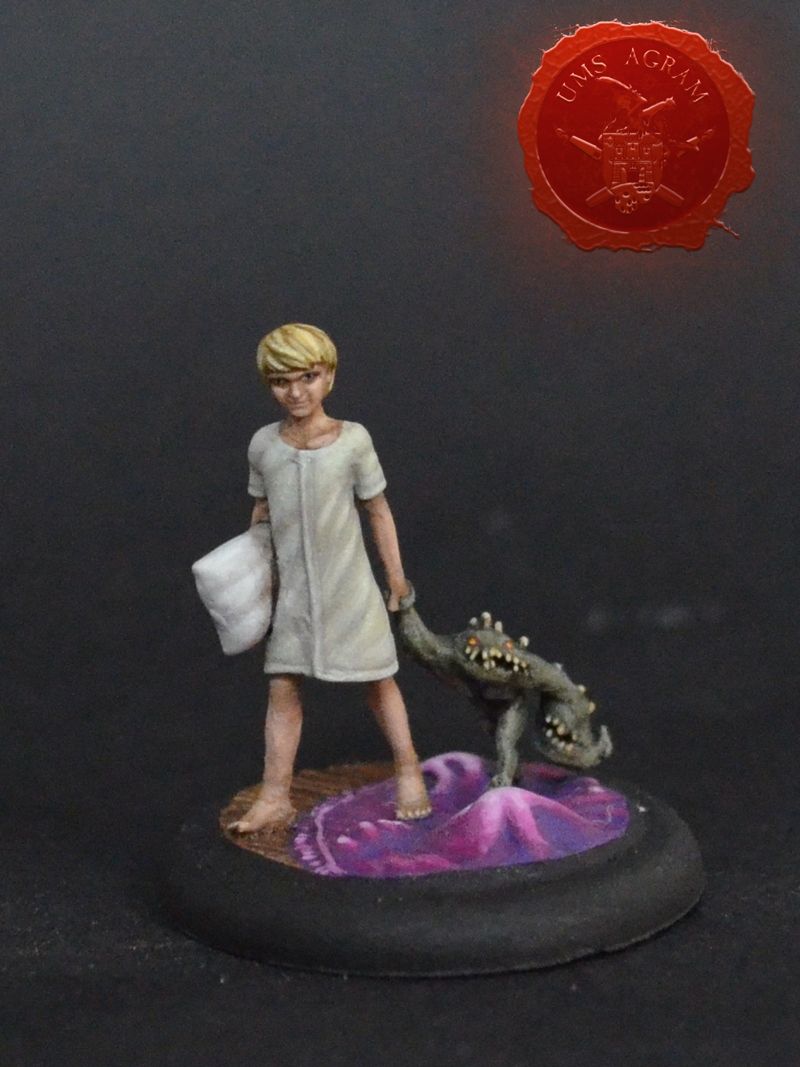
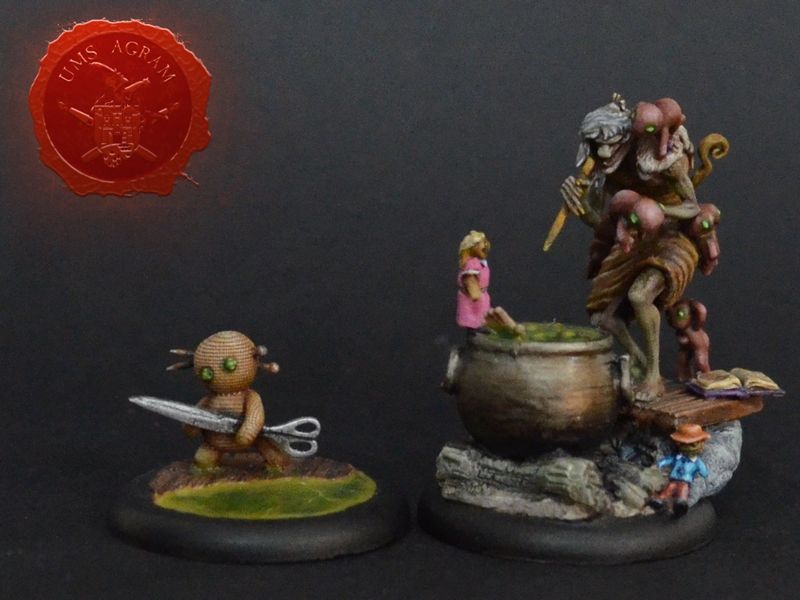
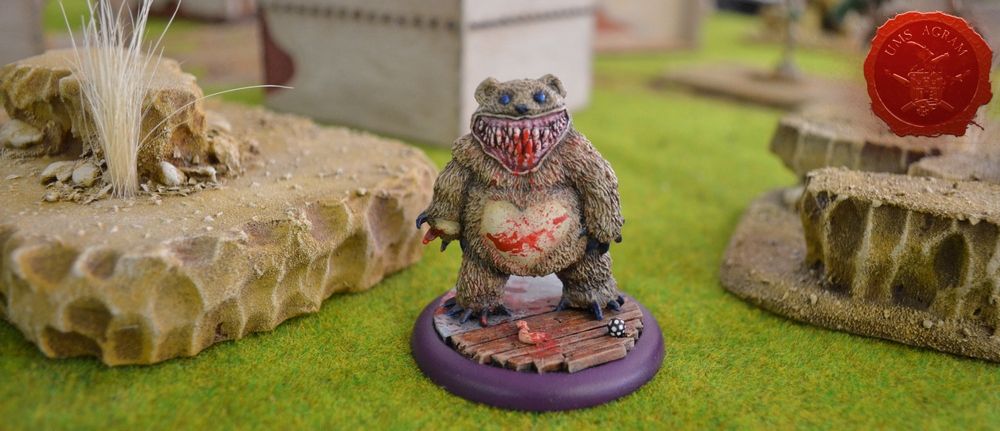
Wojtek Tekielski, Poland, better known as Viruk from the Whatthefaux site, who participated in the Black Queen Hobby and Miniature Painting Competition:

This year I had my second opportunity to take part in the Black Queen international painting competition organized by a Croatian club UMS Agram. I was unable to attend the event in person as I have a two-month old baby girl at home so travelling to Zagreb was out of question. However, the organizers were once again kind and flexible and I was allowed to send my entries in by post. I had some success last year but knew the competition wasn't going to be any weaker this time round. I prepared entries for 5 categories and... managed to place in top three in four of them! Two golds, one silver and one bronze is a great result for me. Almost as good as last year but then the competition gets tougher as more great painters develop their skills and take part in the event. Seeing pictures of other works, I feel more than happy with my result and feel motivated to come back stronger in 2016 (I really, really hope I'll be able to show up in person then). Being able to compete with fantastic painters from other countries is a great experience and I am very grateful for the opportunity. Great job UMS Agram, props to all the painters who took part in the competition and my special thanks go to the president of the club, Marko Paunovic. You put your heart and soul into running these events and as we can see from the pictures (both those of superb entries and those of happy participants), they are enormously successful!It took me a few days of hard work and painstakingly slow highlighting to paint Lord Chompy Bits (1st in Large/Mounted Miniature category). Painting the Dreamer was a different story - I finished most of him while watching... "Boyhood". It's a long movie and an enjoyable one but I just thought I'd share this curiosity here...

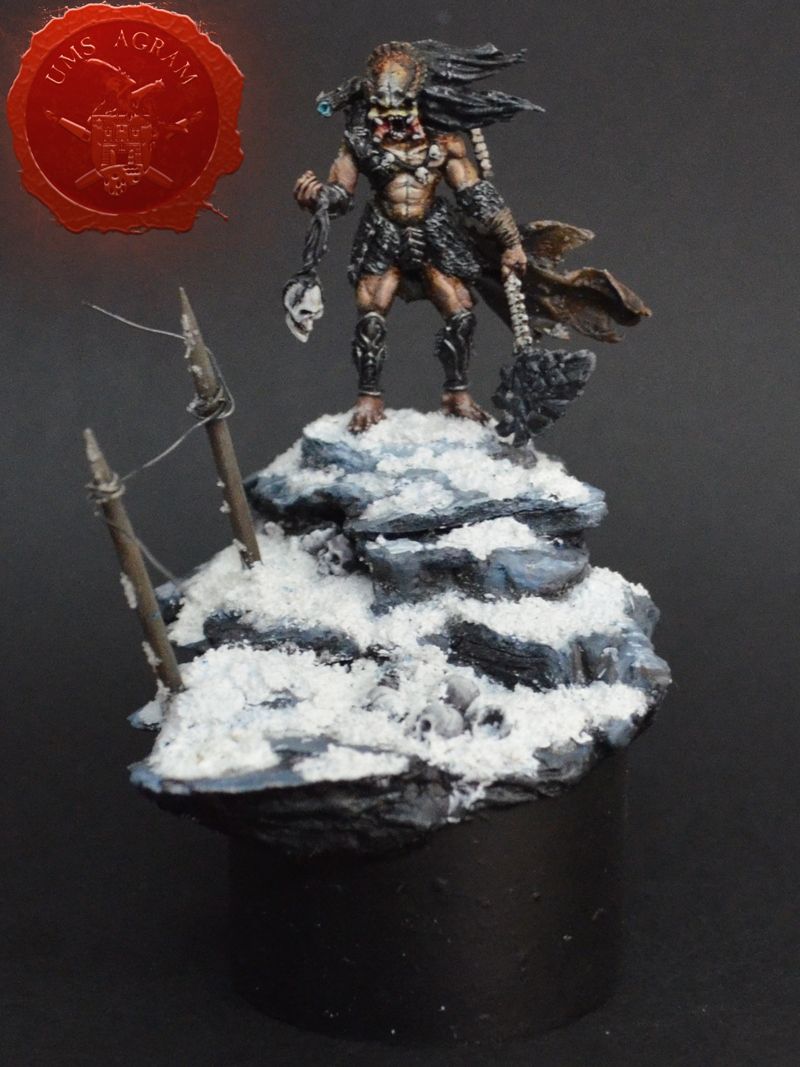
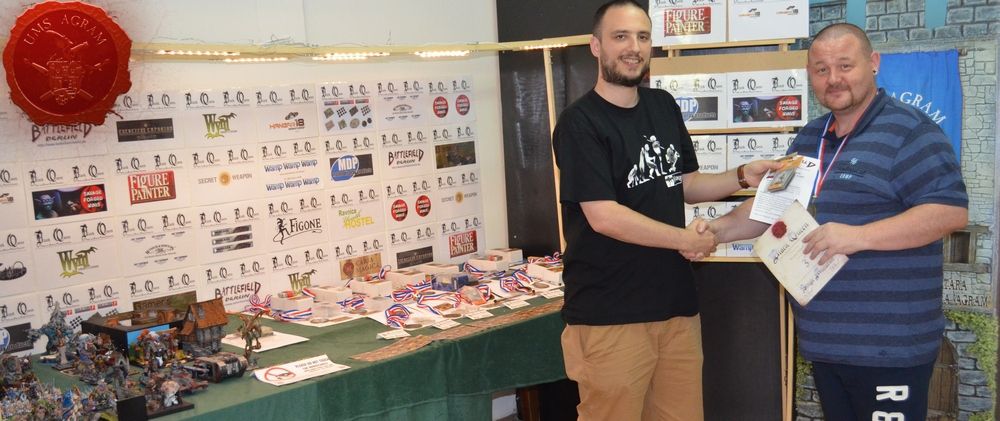
Norman "Normski" Ealand, the winner of the most prestigeous prize - the first place in Masterclass category, had this to say:

Travelling to Croatia to take part in the Black Queen Painting Competition was a great experience; the competition was run alongside the 40K Tournament which had a nice turn out. The Black Queen had over 50 entries and had some really stiff competition. Viruk, Guardian, Gujozec, Demonn and Sparks all offering some quality pieces that had me worried for a place in my chosen categories. So my wins were a nice surprise for sure. I  would like to thank the whole UMS Agram Club for such a cool welcome and being an awesome bunch. I recommend the Black Queen to anyone wishing to take part and I am sure anyone wishing to travel to take part would be a welcome competitor to the contest.  I would also like to thank all the sponsors for making the prize fund so diverse everyone walked awaywith awesome prizes. The whole event was run very well indeed and I congratulate the UMS Agram staff on such a good event. 

Click for enlarged picture

Click for enlarged picture

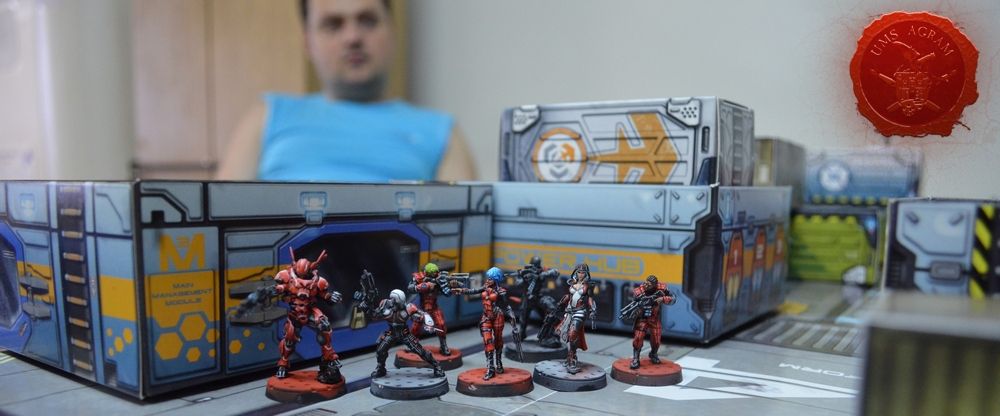
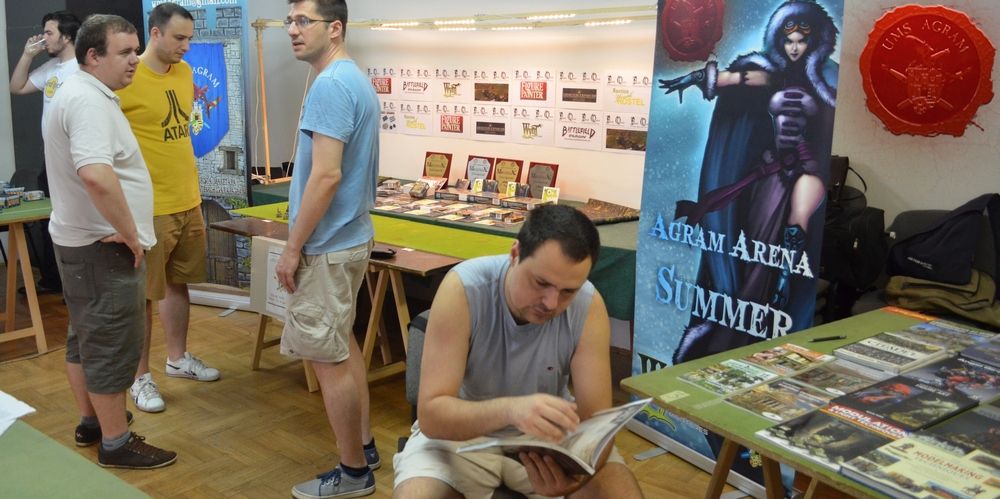
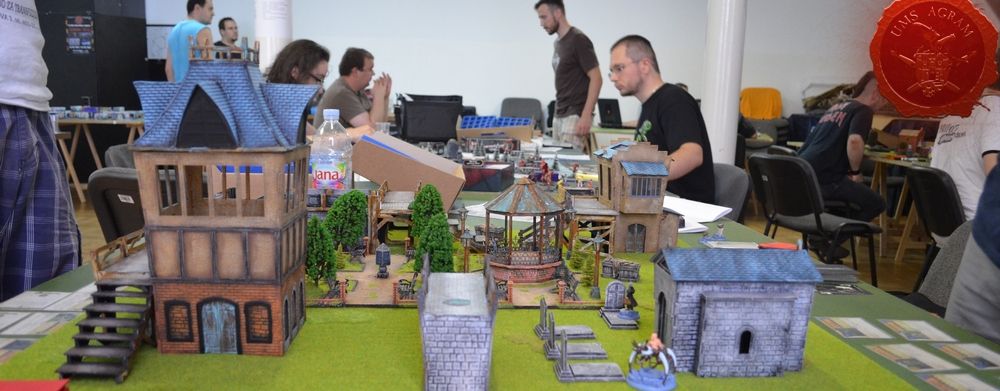
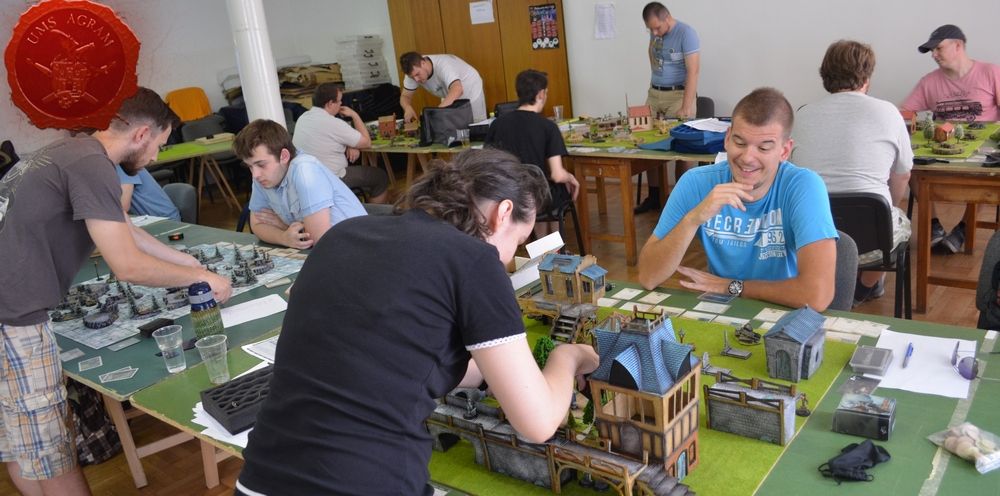
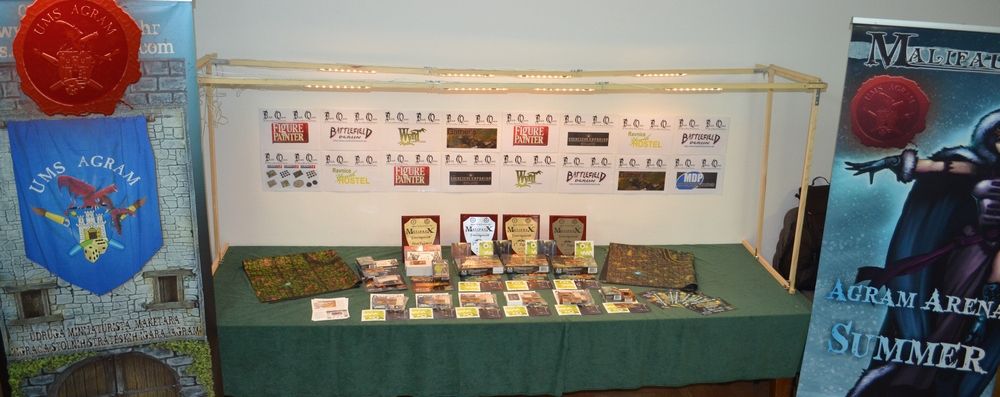
A week later, on July 18th and 19th, a third annual international Malifaux tournament took place. Parallel to this event, loads of demos of various tabletop wargames (like Flames of War, Warmachine/Hordes, Infinity, Warhammer 40.000) were presented as well as all of our programmes with special emphasys on our Library where visitors and competitiors could leaf through or read any and all of the books UMS "Agram" has. 

Click for enlarged picture

Click for enlarged picture

Click for enlarged picture

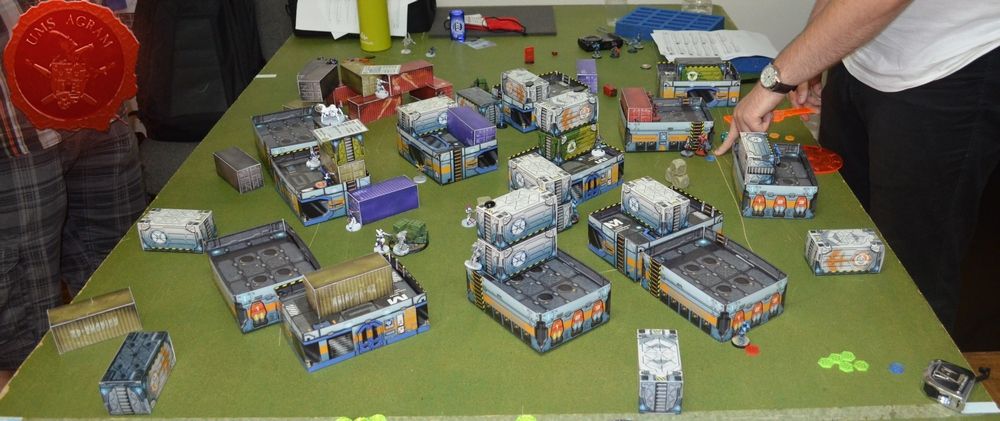
The Malifaux tournament consisted of three 40SS and three 55SS games upon which all the scoring was summed up along with the sportsmanship and painting results. The top two players got to play in the Grand Finale on a mountain top board for the win of the tournament and the rest fought it out for the rest of the placings in two multiplayer game with 5 players per board.

Click for enlarged picture

Click for enlarged picture

Click for enlarged picture

Click for enlarged picture

Click for enlarged picture

Click for enlarged picture

Click for enlarged picture

Click for enlarged picture

Click for enlarged picture

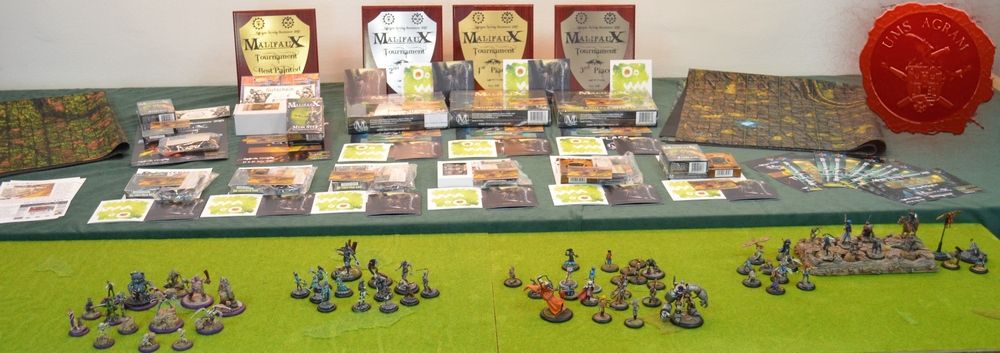
Final Results of the Malifaux tournament:
1. Andras Farago, HUN
2. Peter Csontos, HUN
3. Arpad Ronai, HUN
4. Petar Rimenov, BUL
5. Mario Ogrizek-Tomaš,CRO
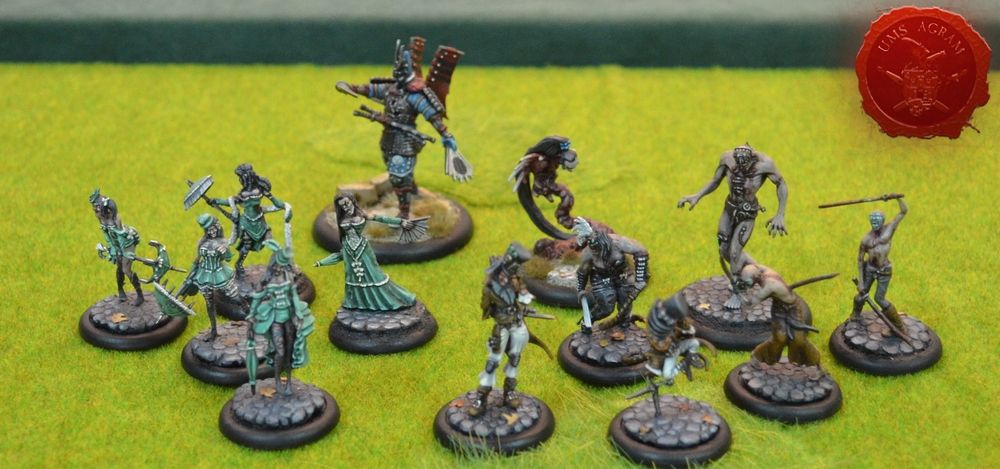
Best Painted Crew: Ana Polanšćak, CRO
Best sportsmanship: Luka Kveštak, CRO


Click for enlarged picture

Click for enlarged picture

In the end, UMS "Agram" would like to thank the sponsors of this event for all the help and providing the prizes: City of Zagreb, Zagreb's Association of Technical Culture, Ravnice Youth Hostel, Carta Magica, Micro Art Studio, Secret Weapon Miniatures, Battlefield Berlin, MDP, Figone, Ebenezer'e Emporium, Savage Forged Miniatures, Infamy Miniatures, Gamer's Grass, Hangar 18 Miniatures, Art Zumbur, Wamp, Mr Black Publications, Wyrd Miniatures and, of course, Figure Painter Magazine for providing media coverage of this event!

See you next year!!

Latest articles

  • Miniature Painting Workshop - Dragon Busts
              array(2) {
      ["Article"]=>
      array(10) {
        ["id"]=>
        string(3) "347"
        ["member_id"]=>
        string(2) "35"
        ["title_eng"]=>
        string(42) "Miniature Painting Workshop - Dragon Busts"
        ["title_hrv"]=>
        string(44) "Radionica bojanja minijatura - biste zmajeva"
        ["mask_eng"]=>
        string(42) "miniature_painting_workshop_-_dragon_busts"
        ["mask_hrv"]=>
        string(44) "radionica_bojanja_minijatura_-_biste_zmajeva"
        ["content_eng"]=>
        string(7498) "

    Click for enlarged picture

    Click for enlarged picture

    Click for enlarged picture

    Click for enlarged picture

    Click for enlarged picture

    Click for enlarged picture

    Click for enlarged picture

    Click for enlarged picture

    Click for enlarged picture

    Click for enlarged picture

    Click for enlarged picture

    Click for enlarged picture

    Click for enlarged picture

    Click for enlarged picture

    Click for enlarged picture

    Click for enlarged picture

    Click for enlarged picture

    Click for enlarged picture

    Click for enlarged picture

    Click for enlarged picture

    Click for enlarged picture

    Click for enlarged picture

    Click for enlarged picture

    Click for enlarged picture

    Click for enlarged picture

    Click for enlarged picture

    Click for enlarged picture

    Click for enlarged picture

    Click for enlarged picture

    Click for enlarged picture

    Click for enlarged picture

    Click for enlarged picture

    full res photos on our social media!

    " ["content_hrv"]=> string(9507) "

    Click for enlarged picture

    Tijekom vikenda, 16.-17.9.2023., održali smo novu vikend radionicu bojanja minijatura pod nazivom Biste zmajeva. Time vođeni, organizatori su izabrali prikladne biste zmajeva poznatog minijaturista Karola Rudyka koje su svi polaznici bojali. Svaki polaznik dobio je unikatnu bistu iz njegovog seta bisti limitiranog na 100 primjeraka. U sklopu radionice, primarno su korištene akrilne boje, ali mogli su se koristiti i uljni efekti. 

    Click for enlarged picture

    Click for enlarged picture

    Click for enlarged picture

    Polaznici su naučili kako pravilno pripremiti rezinsku figuru/bistu prije bojanja te su potom od balze izradili unutrašnju bazu za okvir u koje su na samom kraju radionice smjestili svoje zmajeve.

    Click for enlarged picture

    Click for enlarged picture

    Click for enlarged picture

    Click for enlarged picture

    Click for enlarged picture

    Na kraju prvog dana, podružili smo se uz osvježavajuća pića-

    Click for enlarged picture

    Click for enlarged picture

    Ovog puta svaki polaznik je mogao istraživati kroz svoje bojanje razne efekte po vlastitom nahođenju. Izbor “color sheme” ili pak da li želi koristiti efekte OSL-a ili bilo čega drugoga, prepušeno je samom polazniku. 

    Click for enlarged picture

    Click for enlarged picture

    Click for enlarged picture

    Click for enlarged picture

    Click for enlarged picture

    Click for enlarged picture

    Click for enlarged picture

    Click for enlarged picture

    Prvo, predavač sjedi za svojim stolom te objašnjava i demonstrira pojedini korak u bojanju biste na svojem primjerku. Njegov rad se preko kamere i projektora prikazuje na platnu što polaznici slušaju, gledaju, ali i postavljaju pitanja. Potom, polaznici sjedaju za svoje stolove i primjenjuju stečeno znanje. Voditelj zatim kruži između polaznika i provjerava kako svakom polazniku ide. Na taj način, može se prilagoditi svakom polazniku ponaosob.

    Click for enlarged picture

    Click for enlarged picture

    Click for enlarged picture

    Na kraju vikenda, imali smo pregršt predivnih i raznolikih zmajeva!

    Click for enlarged picture

    Click for enlarged picture

    Click for enlarged picture

    Click for enlarged picture

    Click for enlarged picture

    Click for enlarged picture

    Click for enlarged picture

    Click for enlarged picture

    Click for enlarged picture

    Click for enlarged picture

    Fotografije u visokoj rezoluciji pogledajte na našim socijalnim mrežama!

    " ["created"]=> string(19) "2023-09-19 07:29:59" ["modified"]=> string(19) "2023-09-19 07:40:16" } ["Member"]=> array(10) { ["id"]=> string(2) "35" ["group_id"]=> string(1) "1" ["first_name"]=> string(5) "Marko" ["last_name"]=> string(9) "Paunović" ["first_name_mask"]=> string(5) "marko" ["last_name_mask"]=> string(8) "paunovic" ["username"]=> string(5) "marko" ["password"]=> string(40) "3bd37b326d19d1880d3b93a4b32e8fb3a90fa122" ["born"]=> string(19) "2033-03-07 20:35:00" ["created"]=> string(19) "2009-06-02 20:37:03" } }
    Marko Paunović, 19th September 2023
  • We visited: CK 2023
              array(2) {
      ["Article"]=>
      array(10) {
        ["id"]=>
        string(3) "346"
        ["member_id"]=>
        string(2) "35"
        ["title_eng"]=>
        string(19) "We visited: CK 2023"
        ["title_hrv"]=>
        string(22) "Posjetili smo: CK 2023"
        ["mask_eng"]=>
        string(18) "we_visited_ck_2023"
        ["mask_hrv"]=>
        string(21) "posjetili_smo_ck_2023"
        ["content_eng"]=>
        string(16831) "

    The second Saturday in September means a new edition of the Zagreb Modeling Cup CK 2023, organized by HUVM.

    Click for enlarged picture

    As in all competitions, the morning begins with submissions of works, placing them by category and greeting friends, both domestic and foreign. And if you're lucky, a drop of something nice will come your way.

    Click for enlarged picture

    Click for enlarged picture

    Click for enlarged picture

    Marko: "The social aspect of the competition is the best in my opinion! See (live) your hobby friends with whom you communicate most often through messages or the occasional call. In places like this, you can not only see their works live, but also comment, exchange experiences, advice. Fantastic!"

    Click for enlarged picture

    Click for enlarged picture

    Click for enlarged picture

    Click for enlarged picture

    After the obligatory club coffee, it was time to see the exhibits and "check the competition".

    Click for enlarged picture

    Click for enlarged picture

    Click for enlarged picture

    Click for enlarged picture

    Click for enlarged picture

    Click for enlarged picture

    Click for enlarged picture

    Click for enlarged picture

    Click for enlarged picture

    Click for enlarged picture

    Click for enlarged picture

    Click for enlarged picture

    Click for enlarged picture

    Click for enlarged picture

    Click for enlarged picture

    Click for enlarged picture

    Kruno: "This year's Black Queen was my first competition. It was exciting to compare my skills and work with other hobbyists. I got some ideas and a desire to try some new techniques."

    Click for enlarged picture

    Click for enlarged picture

    Click for enlarged picture

    Click for enlarged picture

    Click for enlarged picture

    Click for enlarged picture

    Click for enlarged picture

    Click for enlarged picture

    Click for enlarged picture

    Click for enlarged picture

    Click for enlarged picture

    Click for enlarged picture

    Click for enlarged picture

    Click for enlarged picture

    Click for enlarged picture

    After carefully viewing the works from "our" categories, it was time for lunch. This time we took our Italian colleagues from Club Modellistic San Giusto to the nearby tavern Didov san. Belly full, we went back to the competition, checked the other categories, looked at what was offered from the workshops and did the obligatory shopping!

    Click for enlarged picture

    Click for enlarged picture

    Click for enlarged picture

    Click for enlarged picture

    Click for enlarged picture

    Click for enlarged picture

    Click for enlarged picture

    Click for enlarged picture

    Click for enlarged picture

    Click for enlarged picture

    Click for enlarged picture

    Click for enlarged picture

    Mario: "The event is big and diverse. Every year I am surprised by the imagination of model makers and I am delighted by the dioramas they make. I managed to refrain from big purchases this time, which I'm proud of, but the stalls had some really tempting things for hobbyists.

    Click for enlarged picture

    Click for enlarged picture

    Click for enlarged picture

    Click for enlarged picture

    Click for enlarged picture

    Click for enlarged picture

    Click for enlarged picture

    Click for enlarged picture

    Click for enlarged picture

    Click for enlarged picture

    Click for enlarged picture

    Click for enlarged picture

    As always, at the end comes the awards ceremony. Both of our members who competed won medals - a total of 2 silver and 1 bronze.

    Click for enlarged picture

    See photos in higher resolution on our social networks.

    " ["content_hrv"]=> string(16927) "

    Druga subota u rujnu znači novo izdanje Zagrebačkog maketarskog kupa CK 2023 u organizaciji HUVM.

    Click for enlarged picture

    Kao i na svim natjecanjima, jutro počinje prijavama radova, postavljanjem po kategorijama te pozdravljanje sa prijateljima, domaćim i iz inozemstva. A ako ste sretni, potekne i koja kapljica.

    Click for enlarged picture

    Click for enlarged picture

    Click for enlarged picture

    Marko: “Socijalni aspect natjecanja je po meni najbolji! Vidjeti se (uživo) sa prijateljima iz hobija s kojima najčešće komunicirate preko poruka ili povremenog poziva. Na ovakvim mjestima, mogu se ne samo uživo pogledati njihovi radovi, već i komentirati, razmjenjivati iskustva, savjete. Fantastika!"

    Click for enlarged picture

    Click for enlarged picture

    Click for enlarged picture

    Click for enlarged picture

    Nakon obavezne udružne kave, došao je red na gledanje izložaka i “provjere konkurencije”.

    Click for enlarged picture

    Click for enlarged picture

    Click for enlarged picture

    Click for enlarged picture

    Click for enlarged picture

    Click for enlarged picture

    Click for enlarged picture

    Click for enlarged picture

    Click for enlarged picture

    Click for enlarged picture

    Click for enlarged picture

    Click for enlarged picture

    Click for enlarged picture

    Click for enlarged picture

    Click for enlarged picture

    Click for enlarged picture

    Kruno: “Ovogodisnja Crna kraljica bila je moja prva natjecateljska. Bilo je uzbudljivo usporediti svoje umijece i radove s drugim ljubiteljima hobija. Dobio sam par ideja i zelju za isprobati neke nove tehnike.

    Click for enlarged picture

    Click for enlarged picture

    Click for enlarged picture

    Click for enlarged picture

    Click for enlarged picture

    Click for enlarged picture

    Click for enlarged picture

    Click for enlarged picture

    Click for enlarged picture

    Click for enlarged picture

    Click for enlarged picture

    Click for enlarged picture

    Click for enlarged picture

    Click for enlarged picture

    Click for enlarged picture

    Nakon pažljivog razgledavanja radova iz “naših” kategorija, došlo je vrijeme za ručak. Ovoga puta smo talijanske kolege iz Club Modellistic San Giusto odveli do obližnje konobe Didov san. Puni trbuha, otišli smo natrag na natjecanje, provjerili i ostale kategorije, pogledali što se nudi od radionica te obavili obavezni shopping!

    Click for enlarged picture

    Click for enlarged picture

    Click for enlarged picture

    Click for enlarged picture

    Click for enlarged picture

    Click for enlarged picture

    Click for enlarged picture

    Click for enlarged picture

    Click for enlarged picture

    Click for enlarged picture

    Click for enlarged picture

    Click for enlarged picture

    Mario: “Događaj je velik i raznolik. Svake godine me iznenađuje maštovitost maketara i oduševljavaju me diorame koje rade. Uspio sam se suzdržati od velikih kupovina ovaj put, na što sam ponosan, no štandovi su imali stvarno primamljive stvari za hobby ljude.

    Click for enlarged picture

    Click for enlarged picture

    Click for enlarged picture

    Click for enlarged picture

    Click for enlarged picture

    Click for enlarged picture

    Click for enlarged picture

    Click for enlarged picture

    Click for enlarged picture

    Click for enlarged picture

    Click for enlarged picture

    Click for enlarged picture

    Kao i uvijek, na kraju dolazi dodjela nagrada. Oba naša člana koja su se natjecala osvojili su medalje – ukupno 2 srebrne i 1 bronca.

    Click for enlarged picture

    Fotografije u većoj rezoluciji pogledajte na našim socijalnim mrežama.

    " ["created"]=> string(19) "2023-09-14 08:36:03" ["modified"]=> string(19) "2023-09-14 08:36:03" } ["Member"]=> array(10) { ["id"]=> string(2) "35" ["group_id"]=> string(1) "1" ["first_name"]=> string(5) "Marko" ["last_name"]=> string(9) "Paunović" ["first_name_mask"]=> string(5) "marko" ["last_name_mask"]=> string(8) "paunovic" ["username"]=> string(5) "marko" ["password"]=> string(40) "3bd37b326d19d1880d3b93a4b32e8fb3a90fa122" ["born"]=> string(19) "2033-03-07 20:35:00" ["created"]=> string(19) "2009-06-02 20:37:03" } }
    Marko Paunović, 14th September 2023
  • Stegaddon Conversion
              array(2) {
      ["Article"]=>
      array(10) {
        ["id"]=>
        string(3) "345"
        ["member_id"]=>
        string(3) "100"
        ["title_eng"]=>
        string(20) "Stegaddon Conversion"
        ["title_hrv"]=>
        string(20) "Stegaddon konverzija"
        ["mask_eng"]=>
        string(20) "stegaddon_conversion"
        ["mask_hrv"]=>
        string(20) "stegaddon_konverzija"
        ["content_eng"]=>
        string(5149) "

    In this article I will describe how I converted my first stegadon from a pug/eng. bulldog into something that looks a little more normal. First disclaimer, I really like this figure, I think this kit is the best that Lizardmen (Seraphon) have to offer at the moment and it has a lot of possibilities for a hobby enthusiast like me. One of them is to turn into one of my favorite lore characters - Mazdamundi.
    This article is the first of a couple of them in which I describe that process, and I intend to write them as they arise; so let's start…

    Step one: since I really like dinosaurs, I also follow their biology. Triceratops, the model from which our mentioned stegadon was created, is much slimmer and looks like a real animal, because it was. The Stegadon, which came from the minds of very creative people, is a fun model, a little goofy, very chunky, but not the "terrible beast" described in the Warhammer Fantasy books. At least not in 2023.

    I came across a post online where someone had extended the legs on their stegadon and immediately fell in love with the idea. Saw an additional couple of pictures on how to do it and started. So the first thing was to cut the legs, on the joints or the practical rings that are on the legs. I then filled all the legs with green stuff and drilled holes for the pins.

    Click for enlarged picture

    Click for enlarged picture

    The next step was to raise the tail, because it is anatomically a strange position for the tail and it reminds us of the depictions of dinosaurs from the first half of the 20th century. Interesting throwback, but I don't care about it. So I sawed off the parts of the tail that connect to the lower half of the body and raised it and filled it with milliput to fix the position around which I can add volume.

    Click for enlarged picture

    Idući korak je bio pinanje spajalicama noge na aproksimiranu visinu koja bi mi bila adekvatna, te postava pinova u cca poziciju noge, koji bi se onda nastavili kroz bazu i savili za čvršći spoj s bazom.

    Click for enlarged picture

    The next step was pinning the leg with staples to an approximate height that would be adequate for me, and placing the pins in the approximate position of the leg, which would then continue through the base and bend for a tighter connection with the base.

    Click for enlarged picture

    The tail, i.e. its lower side, is filled and shaped in a similar way. I decided to fill the upper side with green stuff (with which I have more experience), I used it to shape the bumps on the upper part of the skin.

    Click for enlarged picture

    Once I smoothed out the volume of the tail, I smoothed it out with wet tools and added small nicks to show the folds of skin seen on the rest of the model.

    Click for enlarged picture

    This completes the first part of Mazdamundi's model making - below I make the upper structure on the Stegadon and figure out how to mount the large metal (and heavy!) Slanna model on the plastic drilled stegadon model. To be continued...

    Click for enlarged picture

    Click for enlarged picture

    " ["content_hrv"]=> string(4994) "

    U ovom članku opisat ću kako sam pretvorio svog prvog stegadona iz mopsa/eng. bulldoga u nešto što izgleda malo normalnije. Prvo disclaimer, ja jako volim ovu figuru, mislim da je ovaj kit najbolje što Lizardmeni(Seraphon) imaju trenutno u ponudi i ima hrpu mogućnosti za hobby entuzijasta poput mene. Jedna od njih je da se pretvori u jednog od mojih najdražih likova iz lorea - Mazdamundija.
    Ovaj članak je prvi od njih par u kojima opisujem taj proces te ih namjeravam pisati kako nastaju; pa počnimo…

    Korak jedan: s obzirom da jako volim dinosaure, pratim i njihovu biologiju. Triceratops, uzor po kojem je nastao naš spomenuti stegadon, je dosta vitkiji i izgleda ko prava životinja, jer je i bio. Stegadon, koji je proizašao iz umova vrlo kreativnih ljudi, je zabavan model, malo goofy, jako zdepast, ali ne i „strašna zvijer“ koju opisuju u knjigama u Warhammer Fantasy-u. Barem ne u 2023.

    Naišao sam na internetu post na kojem je netko produžio noge na svom stegadonu i odmah se zaljubio u ideju. Vidio dodatnih par slika kako bi se to radilo i krenuo. Tako je prva stvar bila preprepiliti noge, na zglobovima ili praktičnim ringovima koji su na nogama. Sve noge sam onda zapunio green stuffom i probušio rupe za pinove.

    Click for enlarged picture

    Click for enlarged picture

    Sljedeće je bilo podići rep, jer je to anatomski čudna pozicija za rep te podsjeća na prikaze dinosaura iz prve polovice 20.st. Zanimljiv throwback, ali ne brijem na to. Tako da sam prepilio dijelove repa koji se povezuju s donjom polovicom tijela te podignuo ga i zapunio miliputom da se fiksira pozicija oko koje mogu dodavati volumen.

    Click for enlarged picture

    Idući korak je bio pinanje spajalicama noge na aproksimiranu visinu koja bi mi bila adekvatna, te postava pinova u cca poziciju noge, koji bi se onda nastavili kroz bazu i savili za čvršći spoj s bazom.

    Click for enlarged picture

    Kad sam bio cca zadovoljan s time, postavio bih miliput oko spajalica te oblikovao s mokrim alatima za skulpturiranje, imam neke jeftine s ebaya i nisam skroz zadovoljan, ali služe svrsi.

    Click for enlarged picture

    Na sličan način je ispunjen i oblikovan rep, tj. njegova donja strana. Gornju stranu sam odlučio popuniti green stuffom (s kojim imam više iskustva), njime sam oblikovao izbočine na gornjem dijelu kože.

    Click for enlarged picture

    Kad sam izravnao volumen repa, zagladio sam ga mokrim alatima i dodavao male ureze koji bi prikazivali nabore kože kakvi se vide na ostatku modela.

    Click for enlarged picture

    Time je prvi dio izrade Mazdamundijevog modela gotov - u nastavku izrađujem gornju konstrukciju na Stegadonu te smišljam kako postaviti veliki metalni (i teški!) model Slanna na plastični izbušeni model stegadona. To be continued…

    Click for enlarged picture

    Click for enlarged picture

    " ["created"]=> string(19) "2023-09-12 18:39:47" ["modified"]=> string(19) "2023-09-12 18:39:47" } ["Member"]=> array(10) { ["id"]=> string(3) "100" ["group_id"]=> string(1) "2" ["first_name"]=> string(5) "Mario" ["last_name"]=> string(7) "Grgurev" ["first_name_mask"]=> string(5) "mario" ["last_name_mask"]=> string(7) "grgurev" ["username"]=> string(9) "lepimario" ["password"]=> string(40) "11e0b1ecc2c467637dfa513774d2426f3b925264" ["born"]=> string(19) "2003-01-21 09:02:00" ["created"]=> string(19) "2022-01-21 09:02:32" } }
    Mario Grgurev, 12nd September 2023
  • Star Wars Container
              array(2) {
      ["Article"]=>
      array(10) {
        ["id"]=>
        string(3) "344"
        ["member_id"]=>
        string(2) "64"
        ["title_eng"]=>
        string(19) "Star Wars Container"
        ["title_hrv"]=>
        string(19) "Star Wars kontejner"
        ["mask_eng"]=>
        string(19) "star_wars_container"
        ["mask_hrv"]=>
        string(19) "star_wars_kontejner"
        ["content_eng"]=>
        string(4389) "

    Half a year ago I tested how I could quickly and easily make some interesting details for Star Wars dioramas or terrains. One of the common elements in all SW world locations (settlements, ships, wrecks) are cube transport containers. I made the first prototype from thicker paper and tried to "harden" it with Plasticator. More about it at the link.

    Now I decided to use the same technique, but on a different material. I used Plasticard 1 mm thick and drew a cube container grid on it. I carefully cut the net with the help of a ruler and a scalpel. Since the mesh has "cutting lines" and "folding lines", I was very careful which ones I cut. For plastic card of that thickness, it is enough to cut two or three times with a scalpel with light pressure, carefully so that the blade does not "dance" on the surface of the material.

    Click for enlarged picture

    Then with just one stroke of the scalpel, being careful not to cut through the entire material, I scored the "fold lines". I carefully folded all the surfaces of the container with my fingers. I was careful not to exceed an angle of 30-45 degrees when bending, so that the material would not break at the notch. I glued the edges of the plastic card with super glue.

    Click for enlarged picture

    Due to the thickness and stiffness of the material, gluing is simpler than on a paper model, you just have to worry about matching the edges. I additionally processed the triangular corners with a scalpel, beveled the edges for better fitting into the cavities between the surfaces. I glued the triangles with glue for plastic, because it provides the possibility of additional adjustment and filling in unevenness.

    Click for enlarged picture

    I covered all the glued joints with GSW's Green Putty in a tube to strengthen them in their final form, to cover up the roughness of the cut and to give the weld textures to the joints. After the filler dried, I removed the excess putty with sanding sponges and leveled the surfaces.

    Click for enlarged picture

    On 0.5 mm plastic card I drew and cut out the texture details of the container cells such as reinforcements and doors. Then I glued them with plastic glue to the large areas of the container.

    Click for enlarged picture

    Finally, I once again sanded the surfaces and edges of the container with sanding sponges, and then painting followed. I opted for gray-blue metallic shades, matte black inner surfaces and orange stripes for areas that should not be blocked to access the container.

    Click for enlarged picture

    It remains to add details, highlights and weathering depending on the environment where the container will be placed.

    As an idea for further development, there remains the creation of a variant with open container doors or damage from which the dangerous contents of the container come out or are monitored.

    " ["content_hrv"]=> string(4366) "

    Prije pola godine testirao sam kako bih mogao brzo i jednostavno napraviti neke zanimljive detalje za Star Wars diorame ili terene. Jedan od čestih elemenata na svim lokacijama SW svijeta (naselja, brodovi, olupine) su kockasti transportni kontejneri. Prvi prototip sam napravio od debljeg papira i pokušao „očvrsnuti“ Plasticatorom. Više o tome na ovom linku.

    Sada sam se odlučio iskoristiti istu tehniku, ali na drugačijem materijalu. Koristio sam Plasticard 1 mm debljine i na njemu nacrtao mrežu kockastog kontejnera. Mrežu sam pažljivo izrezao pomoći ravnala i skalpela. S obzirom da mreže ima „linije za rezanje“ i „linije za savijanje“ dobro sam pazio koje režem. Za plastikard te debljine dovoljno je dva-tri puta zarezati skalpelom uz lagani pritisak pažljivo da oštrica ne bih „plesala“ po površini materijala.

    Click for enlarged picture

    Zatim sam samo jednim potezom skalpela, pazeći da ne prerežem cijeli materijal zarezao „linije za savijanje“. Prstima sam pažljivo presavio sve plohe kontejnera. Pazio sam da pri savijanju ne pređem kut od 30-45 stupnjeva da mi materijal ne pukne na urezu. Zalijepio sam bridove plastikarda super ljepilom.

    Click for enlarged picture

    S obzirom na debljinu i krutost materijala lijepljenje je jednostavnije nego na papirnatom modelu, samo treba patiti na podudaranje rubova. Trokutaste uglove sam dodatno obradio skalpelom, nakosio bridove zbog boljeg nasjedanja u šupljine između ploha. Trokutiće sam lijepio ljepilom za plastiku, jer pruža mogućnost dodatnog prilagođavanja i popunjavanja neravnina.

    Click for enlarged picture

    Sve lijepljene spojeve sam prekrio GSWovim Green Putty-em u tubi kako bi ih ojačao u konačnom obliku, prikrio neravnine u rezanju i dobio teksture zavarivanja spojeva. Nakon što se filer posušio brusnim spužvicama sam uklonio višak puttya i poravnao površine.

    Click for enlarged picture

    Na plastikardu debljine 0,5 mm sam nacrtao i izrezao detalje teksture stanica kontejnera kao što su ojačanja i vrata. Zatim sam ih zalijepio ljepilom za plastiku na velike plohe kontejnera.

    Click for enlarged picture

    Za kraj sam još jednom brusnim spužvicama izbrusio površine i rubove kontejnera, a zatim je uslijedilo bojanje. Odlučio sam se za sivo-plavkaste metalik nijanse, mat crne unutrašnje površine i narančaste trake za područja koje se ne smiju blokirati za pristup kontejneru.

    Click for enlarged picture

    Ostaje još dodati detalje, highlighte i weathering ovisno o okolišu na kojem će kontejner biti smješten.

    Kao ideja za daljnju razradu ostaje izrada varijante s otvorenim vratima kontejnera ili oštećenjima iz kojih izlazi ili se nadzire opasni sadržaj kontejnera.

    " ["created"]=> string(19) "2023-09-12 18:38:08" ["modified"]=> string(19) "2023-09-12 18:38:08" } ["Member"]=> array(10) { ["id"]=> string(2) "64" ["group_id"]=> string(1) "2" ["first_name"]=> string(9) "Krunoslav" ["last_name"]=> string(8) "Belinić" ["first_name_mask"]=> string(9) "krunoslav" ["last_name_mask"]=> string(7) "belinic" ["username"]=> string(5) "Kruno" ["password"]=> string(40) "eb3fda45fbec0258e90d809803b10491c548b22f" ["born"]=> string(19) "2015-01-18 09:19:00" ["created"]=> string(19) "2015-01-18 09:20:39" } }
    Krunoslav Belinić, 12nd September 2023
  • Comic Style Mechas
              array(2) {
      ["Article"]=>
      array(10) {
        ["id"]=>
        string(3) "343"
        ["member_id"]=>
        string(3) "100"
        ["title_eng"]=>
        string(18) "Comic Style Mechas"
        ["title_hrv"]=>
        string(19) "Comic Style Mechovi"
        ["mask_eng"]=>
        string(18) "comic_style_mechas"
        ["mask_hrv"]=>
        string(19) "comic_style_mechovi"
        ["content_eng"]=>
        string(4628) "

    In today's article, I will show my way of coloring cartoon or comic style, whichever suits you. I implement it on mech figures, specifically from the game Heavy Gear Blitz. As soon as I saw them, they inspired me to try to imitate the retro animation from the anime studios of the 80s and 90s, of which I am a huge fan. I say imitations because it's not easy to transfer the feeling of an animated character to the world of miniatures, it's a question of the amount of detail and lighting - two factors that I'm still trying to perfect.

    Click for enlarged picture

    The idea is not to create NMM (Non-Metallic Metal), although it can look like that, but this is a Cel-shading approach to colors and lighting that segments surfaces into clearly separated tones. The comparison with NMM is in how it handles light on the miniature, where the parallel is drawn because you determine the source and amount of light that is shown in the shading yourself.

    My examples in this article are reminiscent of NMM because I shade separate panels, trying to get highlights and slight color fades individually, but if we look at the examples in the animation, the model is often shaded by itself and the transition of shadow and light is only in a few places.

    Similar to NMM, the approach is a little more complicated, but the technique is simple: we choose which side the light comes from - the panels facing the light are always brighter, the others are darker. Then we determine the direction of the light and shade so that wash or contrast paint from GW falls, but in controlled layers with clearly defined edges between tones. The final highlight is white, it's standard in cartoons. All edges, or at least all visible, are black lines.

    Black lines can be obtained in three ways, one is with the side of the brush on the raised edge, the second is with the prominent tip of the brush in the recesses, while the third is with thin felt-tip pens. The third one is considered mild cheating in our hobby, but I strongly believe that such a term does not exist in our dictionary, if we are talking about manual techniques.

    Click for enlarged picture

    You have to be careful with felt-tip pens, because sometimes they can flow too much on a small edge, but that can all be painted over.

    My personal procedure is as follows: I paint the entire model with the darkest color, then determine the side that is lit - in these cases, the front. After that I start shading the mech panels, roughly with triangular shapes to emphasize the light from above. So I lighten all the panels in one or two layers before adding a final highlight with white. After that, I blacken the edges for a "cartoon feel". The inevitable fix for edge blackening bugs is at an end.

    Click for enlarged picture

    Click for enlarged picture

    For the bases, I decided to make a freehand drawing instead of a 3D base as we usually do, I thought it was appropriate that the drawings are in a flat environment. Since the game is mostly played on desert terrain, I used a few colors to show the small "dunes", black lines and, here and there, some shaded rocks. The bases were completed in this way relatively quickly.

    Click for enlarged picture

    Click for enlarged picture

    " ["content_hrv"]=> string(4508) "

    U današnjem članku prikazat ću svoj način bojanja cartoon iliti comic stylea, kako vam god paše. Implementiram ga na mech figurama, točnije iz igre Heavy Gear Blitz. Čim sam ih vidio, inspirirale su me na pokušaj imitacije retro animacije iz studija animea 80-ih i 90-ih, čiji sam veliki fan. Kažem imitacije jer nije jednostavno prebaciti osjećaj animiranog lika u svijet minijatura, pitanje je količine detalja i osvjetljenja - dva faktora koje i dalje pokušavam usavršiti.

    Click for enlarged picture

    Ideja nije stvaranje NMM-a (Non-Metallic Metala), iako tome može ličiti, već je ovo Cel-shading pristup bojama i osvjetljenju koje segmentira plohe na jasno odijeljene tonove. Usporedba s NMM-om je u tome kako se barata svjetlom na minijaturi, tu se povlači paralela zbog toga što sami odredite izvor i količinu svjetla koji se prikazuju u sjenčanju.

    Moji primjeri u ovom članku podsjećaju na NMM zbog toga što ja sjenčam zasebne panele, pokušavajući dobiti highlighte i blagi fade boje pojedinačno, no gledamo li primjere u animaciji, često se sjenča model za sebe te je prijelaz sjene i svjetla tek na par mjesta.

    Slično NMM-u, pristup je malo kompliciraniji, no tehnika je jednostavna: odaberemo s koje strane dolazi svjetlo - paneli okrenuti prema svjetlu su uvijek svjetliji, ostali su tamniji. Onda odredimo smjer svjetla i sjenčamo kako bi padao wash ili contrast paint od GW-a, ali u kontroliranim slojevima s jasno određenim rubovima između tonova. Krajnji highlight je bijeli, to je standard u crtanim filmovima. Svi rubovi, ili barem svi vidljivi, crne su linije.

    Crne linije se mogu dobiti na tri načina, jedan je s bočnom stranom kista po uzdignutom rubu, drugi s istaknutim vrhom kista u udubinama, dok je treći s tankim flomasterima. Treći se smatra blagim varanjem u našem hobiju, ali sam snažnog uvjerenja da takav pojam ne postoji u našem rječniku, ukoliko pričamo o tehnikama rukom.

    Click for enlarged picture

    Treba paziti i s flomasterima jer nekad znaju previše teći po kakvom manjem rubu, no to se sve može prefarbati.

    Moja osobna procedura je sljedeća: s najtamnijom bojom ofarbam cijeli model, onda odredim stranu koja je osvijetljena – u ovim slučajevima prednja. Nakon toga krenem sa sjenčanjem panela mechova, ugrubo s trokutastim oblicima da se naglasi svjetlo odozgora. Tako osvijetlim sve panele u jedan ili dva sloja prije dodavanja zadnjeg highlighta bijelom. Nakon toga zacrnjujem rubove za „cartoon feel“. Neminovno popravljanje grešaka crnjenja rubova je na kraju.

    Click for enlarged picture

    Click for enlarged picture

    Za baze sam odlučio freehandom napraviti crtež umjesto 3D baze kakvu inače radimo, smatrao sam da je prikladno da se crteži nalaze u plošnom okruženju. S obzirom da se igra većinom igra na pustinjskom terenu, koristio sam par boja za prikaz malih „dina“, crne linije i, tu i tamo, pokoji osjenčani kamen. Baze su na ovaj način bile gotove relativno brzo.

    Click for enlarged picture

    Click for enlarged picture

    " ["created"]=> string(19) "2023-09-12 18:36:02" ["modified"]=> string(19) "2023-09-12 18:36:02" } ["Member"]=> array(10) { ["id"]=> string(3) "100" ["group_id"]=> string(1) "2" ["first_name"]=> string(5) "Mario" ["last_name"]=> string(7) "Grgurev" ["first_name_mask"]=> string(5) "mario" ["last_name_mask"]=> string(7) "grgurev" ["username"]=> string(9) "lepimario" ["password"]=> string(40) "11e0b1ecc2c467637dfa513774d2426f3b925264" ["born"]=> string(19) "2003-01-21 09:02:00" ["created"]=> string(19) "2022-01-21 09:02:32" } }
    Mario Grgurev, 12nd September 2023

All articles

Latest battle-reports

All battle-reports