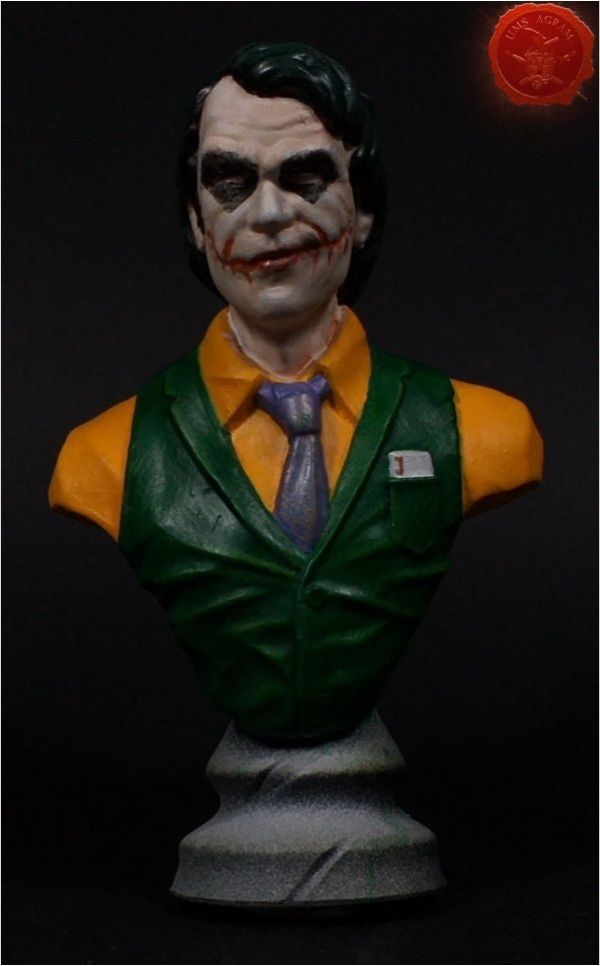
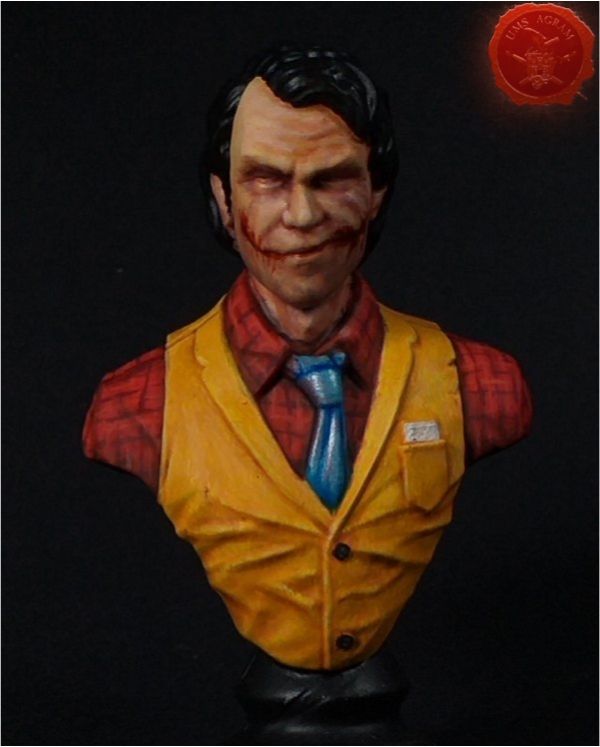
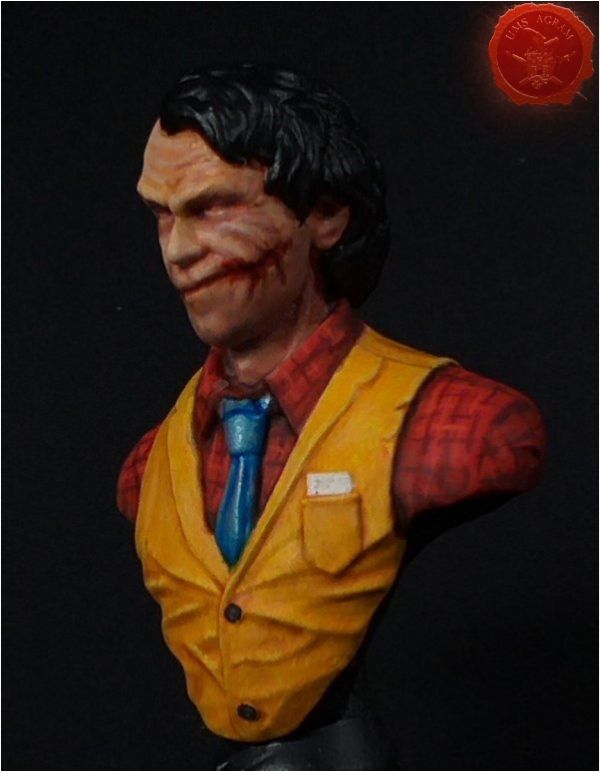
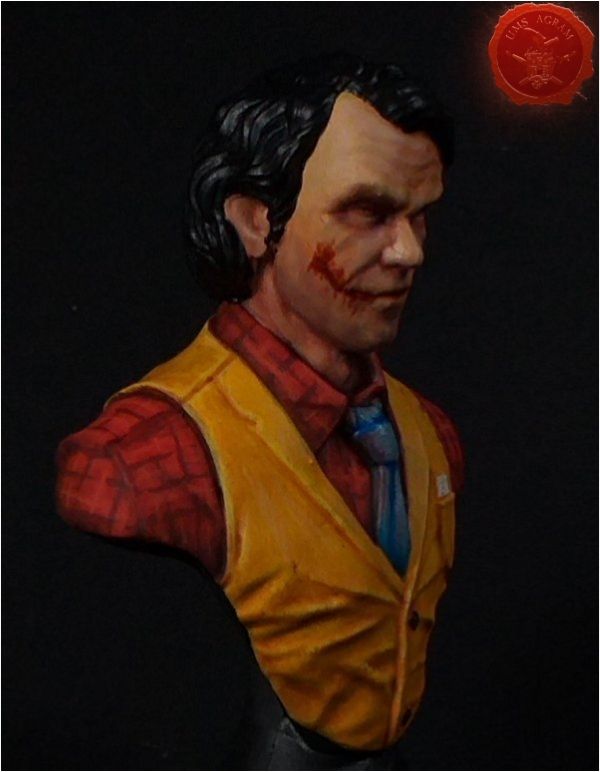
Step by Step – Painting a Joker bust

Marko Paunović, 30th October 2020

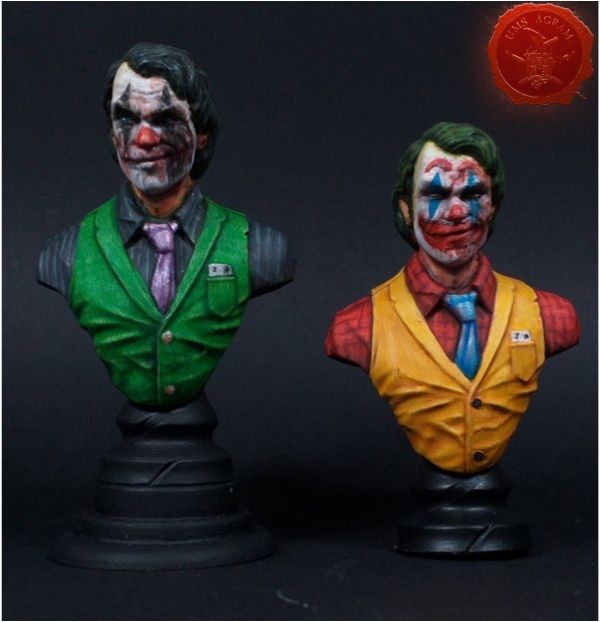
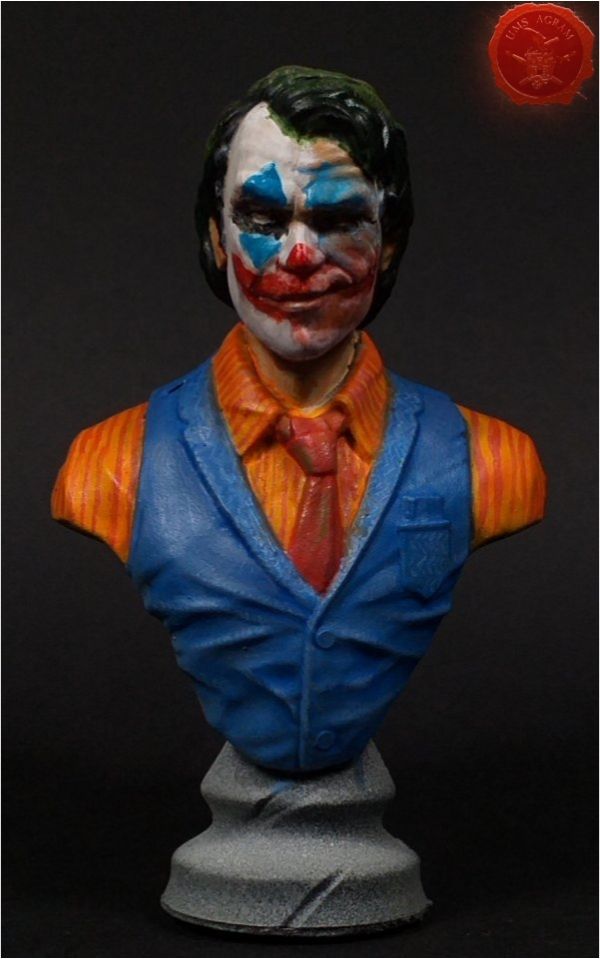
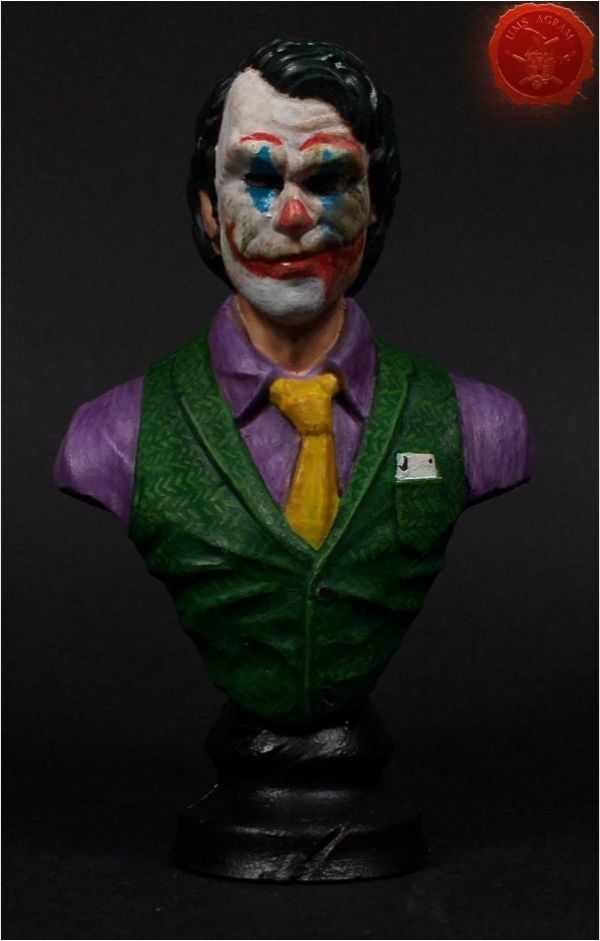
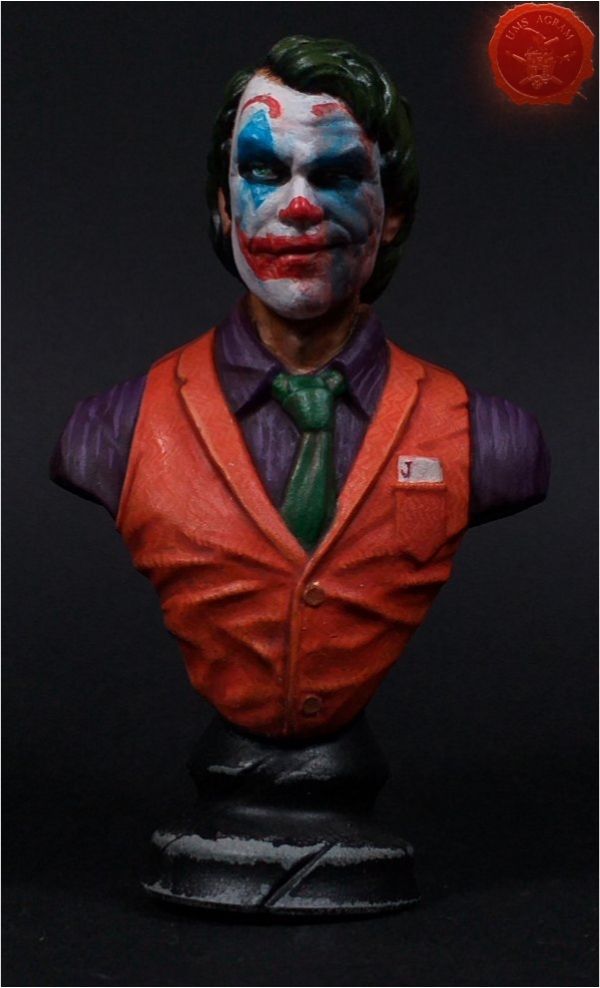
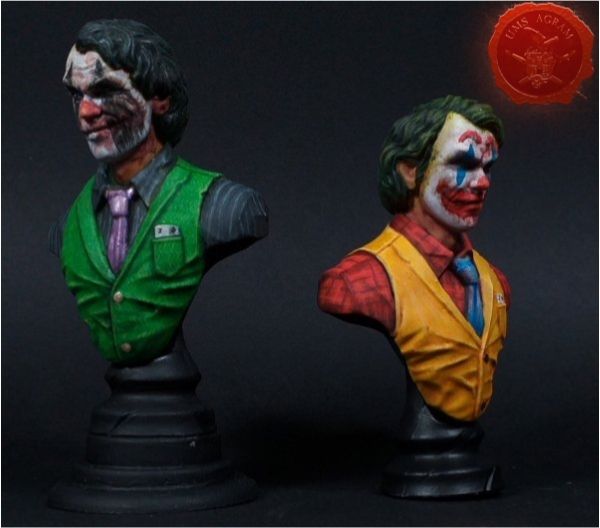
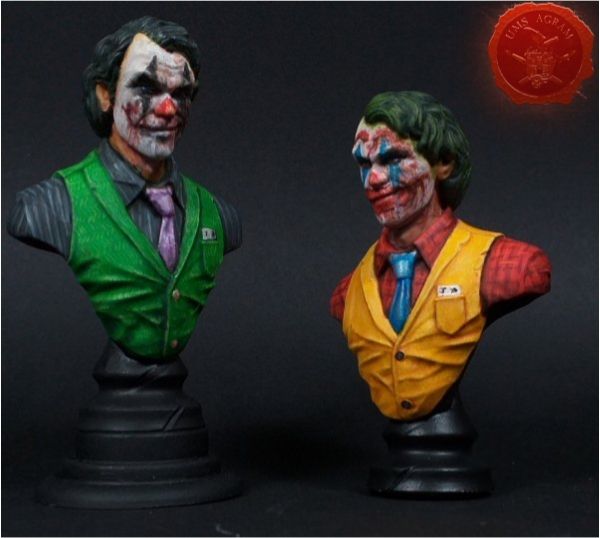
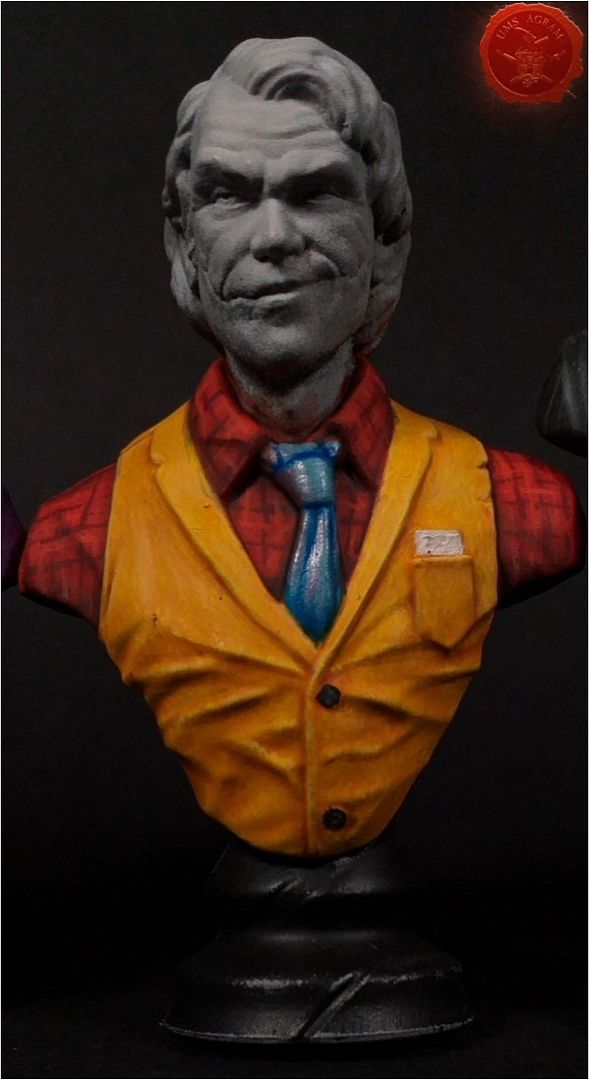
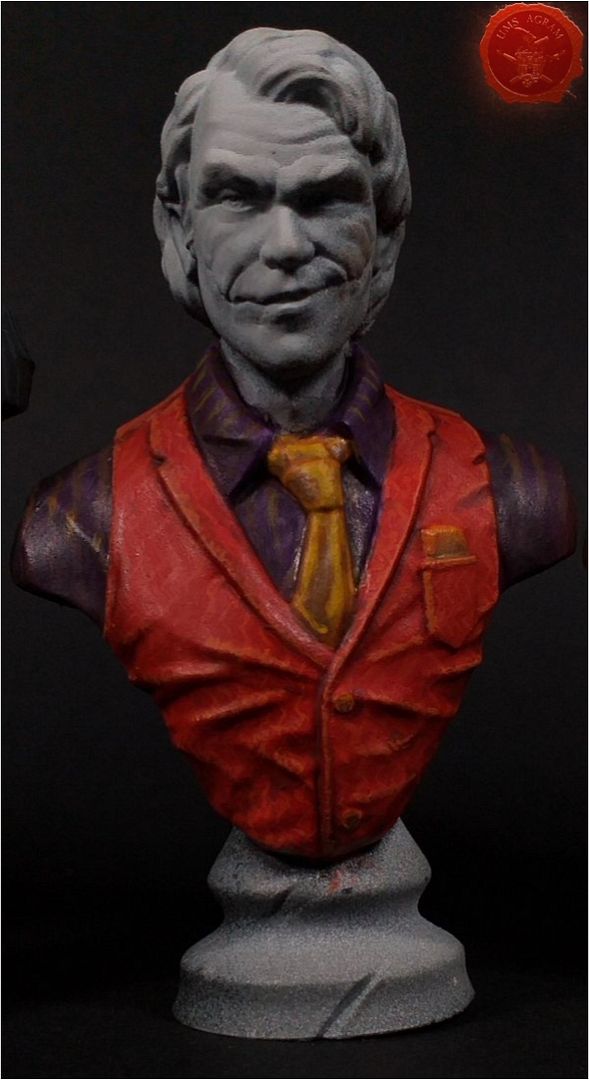
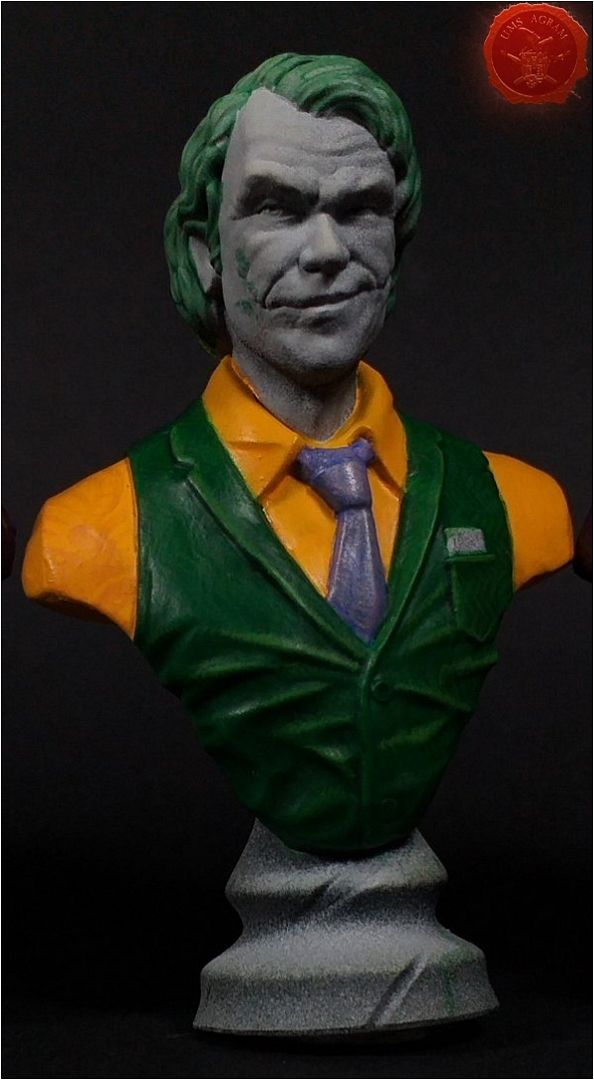
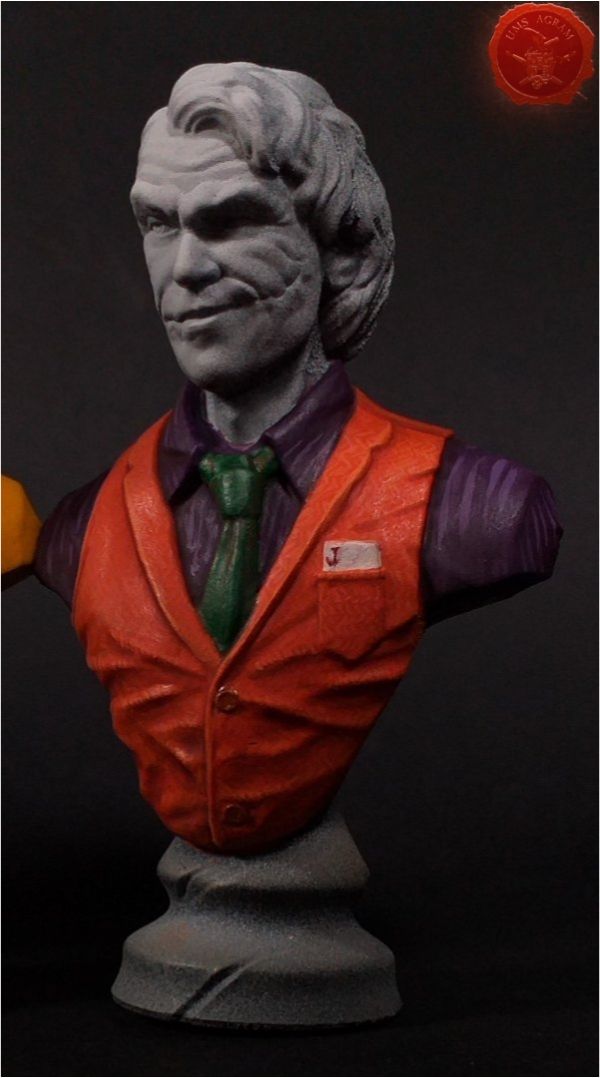
In this article I will describe the steps and techniques covered in the third weekend Miniature Painting Workshop of 2020 using a Joker bust by FC Model Trend.

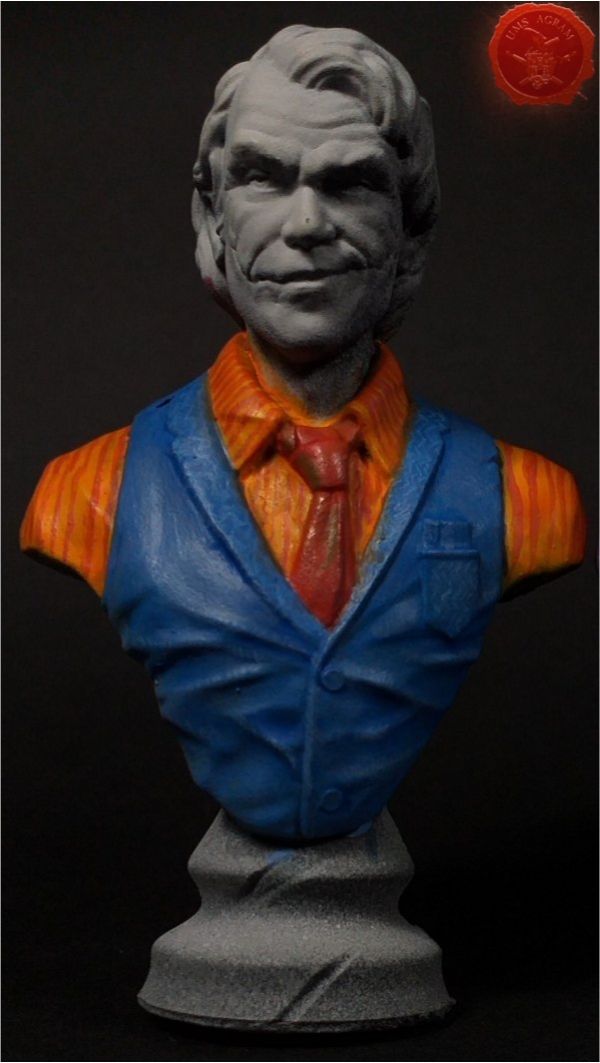
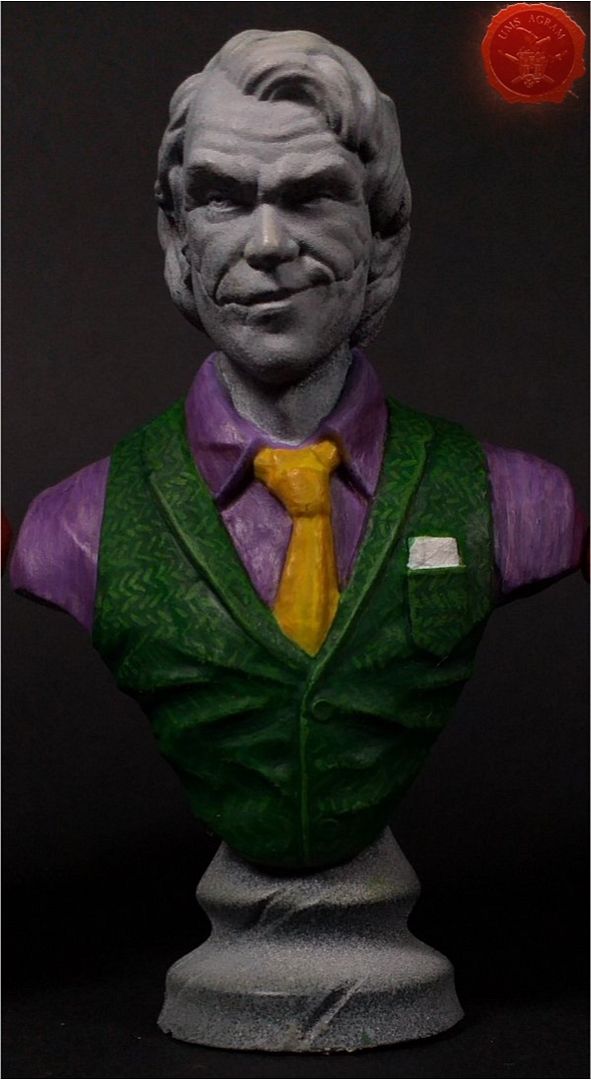
The bust was undercoated using a black primer and then the zenital light was applied using a white sprey.

The whole workshop was based around two distinctive „projects“. One was all the textile surfaces – on Saturday, the other the head (with skin tones, scars, face paint and hair) – on Sunday. Since I was not sure how the attendees would tackle the textile surfaces and how much time it would take them, I decided to do that first – and if need be to extend the alotted time to Sunday as well. Luckily, it was not needed.
Click for enlarged picture

I'm writing this to explain why we started with the textile. Normally, I would start with the head. Which is how I will explain the process to you here.

I used mostly Scale 75 colors and Citadel washes/shades and glazes so I will use those names (you can easily use a paint conversion chart to determine which colors from different manufacturers you can use).

Click for enlarged picture Click for enlarged picture

Click for enlarged picture Click for enlarged picture

FACE

The idea behind painting the skin is to use a really light skin tone as a base coat ( I used S75 Light Skin). Using glazes made from S75 Basic Flesh and then S75 Indian Shaddow, I added shades. How to make glazes? Use small ammount of paint and add some Citadel Lahmian Medium and a drop or two of water until the mixture is milky, semi transparent. Then just add layer upon layer of those glazes.

I used a relatively large brush (size 1) to do the shades because the color in that state flows relatively freely in each pore.

If you are not in a mood to wait for the layers to dry, use a hairdryer to speed up the process.

Once the shades were done, I started with the highlights. Again, I mixed a glaze from S75 Pale Skin and Lahmian Medium. The highlights were applied with a small brush (000 – like the ones in this box). Why? Because you paint the highlights, almost draw them… so brush control is vital.

To end the process, you can add some Druchii Violet Shade under the eyes and inside and around the scars. I suggest diluting the Shade with some Lahmian Medium and doing it in several layers.

SCARS

Next up were the fresh scars – they are done with Tamiya Clear Red paint mixed with Nuln Oil and Agrax Earthshade.

Click for enlarged picture

Click for enlarged picture

Click for enlarged picture

FACE PAINT

Half the face (not smeared part) was painted with glazes of S75 White. The other half was done with Ammo by Mig Jimenez Washable White Camo. Apply it, leave to dry for about 5-10 minutes and then using a damp brush remove the excess paint in places where you want the face paint removed.

The black/blue/red face paint was done using Ammo by Mig Jimenez Oilbrushers. Apply them carefully drawing the patterns you want. Then using Odourless Thinner (also by Ammo) remove excess paint and smear it downwards or along the creases in the face/scars.

HAIR

Hair was painted using a grey and white drybrush (just be careful not to smudge the face). Once dry, I again applied several green oilbrushers and using Odourless Thinner smeared them along the length of the hair. If needed, in the end, add some Nuln Oil in the deepest recesses of the hair as shade.

Click for enlarged picture

Click for enlarged picture

This marks the end of the face painting part. We now turn to textile. We covered three different textures: silk (for the tie), cotton (for the shirt) and tweet (for the vest).

All three have the same first step. Pure basecoat of some light color (doesn't matter what color you choose, just pick a light shade of it). Paint in thin layers until you get an even coverage.

TIE

We started with the simplest job – tie. The silky feel is created by adding some metallic paint to the original color. I added some silver to the light blue. Using a Blue Glaze I added some shades, and then added white to the metallic blue mixture did several highlights. Also, the silk tends to reflect light in a sort of colourshift fashion so you can add some red/purple to the mix in the deepest shades.

If you are doing a light and vibrant, warm colour (orange, yellow etc), instead of metallic silver, I recommend using a golden color.

SHIRT

Next up was the shirt. I added some stripes with a lighter color and then with a darker color than the basecoat. Upon reflection, I decided to make a checked pattern so I added some perpendicular lines as well. Once this was done, it was time to shade the shirt. I used Citadel Red Glaze to which I added more and more Ogryn Fleshshade with more and more Lahmian Medium. When the shading was done, I used the lighter shades of the stripes on the raised parts of the shirt to make the highlights.

VEST

The trickiest part to paint as it requires a lot of patience. Again, using a lighter color than the basecoat, I started drawing small zig zag patterns (fishbone). Easiest part to start with would be the pocket and then the collar. By the time you finish with them, you should have the motion in your hand to dfinish the rest of the vest.

Once the pattern is drawn, you can add the shades. Again, I used Citadel Yellow Glaze to which I added more and more Seraphim Sepia Shade with more and more Lahmian Medium. Carefully apply the layers to the bottom of the creases as shades.

When I was done with the shading, I used a lighter tone of yellow (than I used on the fishbone pattern) and carefully added highlights to the creases. Don't use lines on the highlights in this case. Apply small dots (to mimic the light reflection off the weave).

The backside of the vest usually doesn't have the pattern, so to the basecoat I just applied lighter dots using stippling method. The shading was done as with the front part of the vest.

Click for enlarged picture Click for enlarged picture

Click for enlarged picture Click for enlarged picture

Click for enlarged picture Click for enlarged picture

Latest articles

  • Back to Basics Workshops in Medveščak Library
              array(2) {
      ["Article"]=>
      array(10) {
        ["id"]=>
        string(3) "476"
        ["member_id"]=>
        string(2) "64"
        ["title_eng"]=>
        string(47) "Back to Basics Workshops in Medveščak Library"
        ["title_hrv"]=>
        string(68) "Back to Basics radionice bojanja minijatura u Knjižnici Medveščak"
        ["mask_eng"]=>
        string(45) "back_to_basics_workshops_in_medvescak_library"
        ["mask_hrv"]=>
        string(65) "back_to_basics_radionice_bojanja_minijatura_u_knjiznici_medvescak"
        ["content_eng"]=>
        string(5094) "

    Click for enlarged picture

    During October and November, we held our Back to Basics miniature painting workshops for the youngest at the Zagreb City Libraries.

    Click for enlarged picture

    Click for enlarged picture

    The first set of three workshops was held in the Youth Department of the Medveščak Library on October 2, 9 and 11, 2025.

    Click for enlarged picture

    Click for enlarged picture

    During the workshops, our youngest participants painted chibi figures from the UMS Agram line and made a castle from upcycled materials.

    Click for enlarged picture

    Click for enlarged picture

    Click for enlarged picture

    Click for enlarged picture

    Click for enlarged picture

    Click for enlarged picture

    Click for enlarged picture

    Click for enlarged picture

    More photos can be found on our social media.

    Click for enlarged picture

    " ["content_hrv"]=> string(5118) "

    Click for enlarged picture

    Tijekom listopada i studenog u Knjižnicama Grada Zagreba smo održali naše Back to Basics radionice bojanja minijatura za najmlađe. 

    Click for enlarged picture

    Click for enlarged picture

    Prvi set od tri radionice održan je u Odjelu za mlade Knjižnice Medveščak 2., 9. i 11.10.2025. 

    Click for enlarged picture

    Click for enlarged picture

    Tijekom radionica naši najmlađi polaznici su bojali chibi figure iz linije UMS Agram te izrađivali dvorac od upcycle materijala.

    Click for enlarged picture

    Click for enlarged picture

    Click for enlarged picture

    Click for enlarged picture

    Click for enlarged picture

    Click for enlarged picture

    Click for enlarged picture

    Click for enlarged picture

    Više fotografija potražite na našim socijalnim mrežama!

    Click for enlarged picture

    " ["created"]=> string(19) "2025-10-13 09:20:17" ["modified"]=> string(19) "2025-10-13 09:20:17" } ["Member"]=> array(10) { ["id"]=> string(2) "64" ["group_id"]=> string(1) "1" ["first_name"]=> string(9) "Krunoslav" ["last_name"]=> string(8) "Belinić" ["first_name_mask"]=> string(9) "krunoslav" ["last_name_mask"]=> string(7) "belinic" ["username"]=> string(5) "Kruno" ["password"]=> string(40) "eb3fda45fbec0258e90d809803b10491c548b22f" ["born"]=> string(19) "2015-01-18 09:19:00" ["created"]=> string(19) "2015-01-18 09:20:39" } }
    Krunoslav Belinić, 13th October 2025
  • Gaslands - Tutorial II
              array(2) {
      ["Article"]=>
      array(10) {
        ["id"]=>
        string(3) "475"
        ["member_id"]=>
        string(2) "35"
        ["title_eng"]=>
        string(22) "Gaslands - Tutorial II"
        ["title_hrv"]=>
        string(37) "Gaslands - bojanje autića - nastavak"
        ["mask_eng"]=>
        string(22) "gaslands_-_tutorial_ii"
        ["mask_hrv"]=>
        string(36) "gaslands_-_bojanje_autica_-_nastavak"
        ["content_eng"]=>
        string(5350) "

    Click for enlarged picture

    In this article I will briefly describe how I painted another set of three cars for Gaslands. Same as last time, I started with a black undercoat.

    Click for enlarged picture

    As I decided to keep the colour of the vehicles matt black, I left it at that and proceeded to paint the windshields. Using much the same method I used for the yellow crew, I applied the chosen paint scheme. Unlike blue windshields with the yellow crew, here I decided to use the yellow/red combo.

    Click for enlarged picture

    I then added chrome.

    Click for enlarged picture

    In the end, I added metallic details such as guns etc.

    Click for enlarged picture

    It was time to add the decals. I first painted all the surfaces with gloss varnish. Then I added the decals and after they set properly, I covered everything with Ultra Matt Varnish..

    Click for enlarged picture

    And thus ended the painting process.

    Click for enlarged picture

    GALLERY OF THE TWO FINISHED CREWS

    Click for enlarged picture

    Click for enlarged picture

    Click for enlarged picture

    Click for enlarged picture

    Click for enlarged picture

    Click for enlarged picture

    Click for enlarged picture

    " ["content_hrv"]=> string(5419) "

    Click for enlarged picture

    U ovom ću  članku opisati kako sam obojao drugi set od tri autića za Gaslands demo partije. Kao i prošli puta, krenuo sam s crnim undercoatom. 

    Click for enlarged picture

    S obzirom da sam odlučio da ovaj crew bude mat crn, farbanje karoserija sam tu prekinuo i počeo sam sa staklima. Slično kao i prošli put, koristio sam sličnu shemu, ali u drugim bojama. Za razliku od plavih refleksija na žutim autima, na crnima sam se odlučio za žuto/crvenu kombinaciju. 

    Click for enlarged picture

    Dodao sam krom.

    Click for enlarged picture

    I na kraju dodao metalne dijelove poput oružja.

    Click for enlarged picture

    Na ovim autima, odlučio sam dodati i naljepnice. Prvo sam na površine s naljepnicama stavio gloss lak. Potom sam postavio naljepnicce i nakon što su se dobro osušile sam te iste površine prekrio mat lakom. 

    Click for enlarged picture

    Time sam završio posao...

    Click for enlarged picture

    GALERIJA ZAVRŠENIH RADOVA!

    Click for enlarged picture

    Click for enlarged picture

    Click for enlarged picture

    Click for enlarged picture

    Click for enlarged picture

    Click for enlarged picture

    Click for enlarged picture

    " ["created"]=> string(19) "2025-10-13 07:21:57" ["modified"]=> string(19) "2025-10-13 07:21:57" } ["Member"]=> array(10) { ["id"]=> string(2) "35" ["group_id"]=> string(1) "1" ["first_name"]=> string(5) "Marko" ["last_name"]=> string(9) "Paunović" ["first_name_mask"]=> string(5) "marko" ["last_name_mask"]=> string(8) "paunovic" ["username"]=> string(5) "marko" ["password"]=> string(40) "3bd37b326d19d1880d3b93a4b32e8fb3a90fa122" ["born"]=> string(19) "2033-03-07 20:35:00" ["created"]=> string(19) "2009-06-02 20:37:03" } }
    Marko Paunović, 13th October 2025
  • GASLANDS - tutorial
              array(2) {
      ["Article"]=>
      array(10) {
        ["id"]=>
        string(3) "474"
        ["member_id"]=>
        string(2) "35"
        ["title_eng"]=>
        string(19) "GASLANDS - tutorial"
        ["title_hrv"]=>
        string(43) "GASLANDS - bojanje autića za postapoc igru"
        ["mask_eng"]=>
        string(19) "gaslands_-_tutorial"
        ["mask_hrv"]=>
        string(42) "gaslands_-_bojanje_autica_za_postapoc_igru"
        ["content_eng"]=>
        string(2790) "

    Click for enlarged picture

    In this article I will briefly describe how I painted a set of three cars for Gaslands. I started with a black undercoat and then applied a silver (Leadbelcher) spray as the base color.

    Click for enlarged picture

    Then I used the Rust effect from Dirty Down. Once the effect was dry, I sprayed the cars with a clear matte varnish to protect the layer of rust (which is activated when exposed to moisture). After the spray dried, I applied the Scratches and Heavy Chipping effect from Ammo by Mig Jimenez with a brush. After about fifteen minutes of drying, I sprayed the cars in yellow and let it dry for about 15 minutes. I used a brush to apply water over the cars and used a stiff brush, wooden skewer and cotton swab to remove the excess paint that was activated due to the Scratches and Heavy Chipping effects.

    Click for enlarged picture

    Then came the painting. First I covered all the details that would not be yellow in black. Then I used blue to draw out the reflections on the glass. Added the metal details (engines and weapons). And finally added the chrome effects (using GSW paint). For the very end I left the engine shine effects.

    Click for enlarged picture

    The painting of the cars for Gaslands is now complete.

    Click for enlarged picture

    " ["content_hrv"]=> string(2794) "

    Click for enlarged picture

    U ovom članku ću ukratko opisati kako sam bojao set od tri autića za Gaslands. Krenuo sam sa crnim undercoatom na kojeg sam stavio srebrni (Leadbelcher) sprej kao osnovnu boju.

    Click for enlarged picture

    Potom sam koristio Rust efekt od tvrtke Dirty Down. Kada se posušio efekt, autiće sam posprejao bezbojnim mat lakom da zaštitim sloj hrđe (koja se aktivira u doticaju sa vlagom). Nakon što se sprej osušio, kistom sam nanio Scratches i Heavy Chipping efekt od Ammo by Mig Jimenez. Nakon petnaestak minuta sušenja, autiće sam posprejao u žuto i ostavio da se osuši cca 15 minuta. Kistom sam premazao vodu preko autića i tvrdim kistom, drvenim ražnjićem i štapićem za uši sam uklonio višak boje koji se aktivirao zbog Scratches i Heavy Chipping efekata.

    Click for enlarged picture

    Zatim je uslijedilo bojanje. Prvo sve detalje koji neće biti žuti sam prekrio u crnu boju. Zatim sam izvukao plavom bojom refleksije na staklima. Dodao metalne detalje (motori i oružja). I na kraju dodao krom efekte (koristeći boju tvrtke GSW). Za sami kraj ostavio sam efekte sjaja motora.

    Click for enlarged picture

    TIme je završeno bojanje autića za Gaslands.

    Click for enlarged picture

    " ["created"]=> string(19) "2025-10-02 07:39:25" ["modified"]=> string(19) "2025-10-02 07:39:25" } ["Member"]=> array(10) { ["id"]=> string(2) "35" ["group_id"]=> string(1) "1" ["first_name"]=> string(5) "Marko" ["last_name"]=> string(9) "Paunović" ["first_name_mask"]=> string(5) "marko" ["last_name_mask"]=> string(8) "paunovic" ["username"]=> string(5) "marko" ["password"]=> string(40) "3bd37b326d19d1880d3b93a4b32e8fb3a90fa122" ["born"]=> string(19) "2033-03-07 20:35:00" ["created"]=> string(19) "2009-06-02 20:37:03" } }
    Marko Paunović, 2nd October 2025
  • UMS Agram at CK2025
              array(2) {
      ["Article"]=>
      array(10) {
        ["id"]=>
        string(3) "473"
        ["member_id"]=>
        string(2) "64"
        ["title_eng"]=>
        string(19) "UMS Agram at CK2025"
        ["title_hrv"]=>
        string(42) "UMS Agram na CK2025 u Stubičkim toplicama"
        ["mask_eng"]=>
        string(19) "ums_agram_at_ck2025"
        ["mask_hrv"]=>
        string(41) "ums_agram_na_ck2025_u_stubickim_toplicama"
        ["content_eng"]=>
        string(2737) "

    Click for enlarged picture

    Click for enlarged picture

    Click for enlarged picture

    Click for enlarged picture

    Click for enlarged picture

    Click for enlarged picture

    Click for enlarged picture

    Click for enlarged picture

    For more photos check our social media!

    " ["content_hrv"]=> string(2864) "

    U subotu, 27.9.2025. naši članovi su nastupili na CK2025 u Stubičkim toplicama.

    Click for enlarged picture

    Click for enlarged picture

    Click for enlarged picture

    Click for enlarged picture

    Click for enlarged picture

    Click for enlarged picture

    Click for enlarged picture

    Click for enlarged picture

    Za više fotografija posjetite naše socijalne mreže!

    " ["created"]=> string(19) "2025-10-02 07:28:26" ["modified"]=> string(19) "2025-10-02 07:28:26" } ["Member"]=> array(10) { ["id"]=> string(2) "64" ["group_id"]=> string(1) "1" ["first_name"]=> string(9) "Krunoslav" ["last_name"]=> string(8) "Belinić" ["first_name_mask"]=> string(9) "krunoslav" ["last_name_mask"]=> string(7) "belinic" ["username"]=> string(5) "Kruno" ["password"]=> string(40) "eb3fda45fbec0258e90d809803b10491c548b22f" ["born"]=> string(19) "2015-01-18 09:19:00" ["created"]=> string(19) "2015-01-18 09:20:39" } }
    Krunoslav Belinić, 2nd October 2025
  • UMS Agram at Days of Technical Culture 2025
              array(2) {
      ["Article"]=>
      array(10) {
        ["id"]=>
        string(3) "472"
        ["member_id"]=>
        string(2) "96"
        ["title_eng"]=>
        string(43) "UMS Agram at Days of Technical Culture 2025"
        ["title_hrv"]=>
        string(41) "UMS Agram na 14. danima tehničke kulture"
        ["mask_eng"]=>
        string(43) "ums_agram_at_days_of_technical_culture_2025"
        ["mask_hrv"]=>
        string(39) "ums_agram_na_14_danima_tehnicke_kulture"
        ["content_eng"]=>
        string(6577) "

    Click for enlarged picture

    Click for enlarged picture

    Click for enlarged picture

    Click for enlarged picture

    Click for enlarged picture

    Click for enlarged picture

    Click for enlarged picture

    Click for enlarged picture

    Click for enlarged picture

    Click for enlarged picture

    Click for enlarged picture

    Click for enlarged picture

    Click for enlarged picture

    Click for enlarged picture

    Click for enlarged picture

    Click for enlarged picture

    Click for enlarged picture

    Click for enlarged picture

    Click for enlarged picture

    Click for enlarged picture

    For more photos check our social media!

    " ["content_hrv"]=> string(7407) "

    19. i 20.9. nastupili smo na XIV danima tehničke kulture u Kulturnom centru Dubrava. Dani je organizirala Zagrebačka zajednica tehničke kulture.

    Click for enlarged picture

    Click for enlarged picture

    Na Dane smo došli sa izložbenim prostorom i prostorom za radionice.

    Click for enlarged picture

    Click for enlarged picture

    Click for enlarged picture

    Click for enlarged picture

    Click for enlarged picture

    U sklopu nastupa organizirali smo:

    - predstavljanje Agramera, linije chibi minijatura 

    Click for enlarged picture

    Click for enlarged picture

    - promociju knjige Tabletop Scenery for Beginners 

    Click for enlarged picture

    A s ponosom objavljujemo i da smo za naš rad u 2024. primili godišnju nagradu tehničke kulture dr. Oton Kučera

    Click for enlarged picture

    Click for enlarged picture

    Click for enlarged picture

    Također smo organizirali i besplatne:

    - pokazne demonstracije minijaturističkih tehnika - sculpting i bojanje minijatura u petak 

    Click for enlarged picture

    Click for enlarged picture

    Click for enlarged picture

    Click for enlarged picture

    Click for enlarged picture

    - Back to Basics radionice bojanja minijatura za najmlađe u subotu

    Click for enlarged picture

    Click for enlarged picture

    Za više fotografija posjetite naše socijalne mreže!

    " ["created"]=> string(19) "2025-09-23 08:18:45" ["modified"]=> string(19) "2025-09-23 08:20:36" } ["Member"]=> array(10) { ["id"]=> string(2) "96" ["group_id"]=> string(1) "2" ["first_name"]=> string(6) "Antoni" ["last_name"]=> string(10) "Pastuović" ["first_name_mask"]=> string(6) "antoni" ["last_name_mask"]=> string(9) "pastuovic" ["username"]=> string(6) "antoni" ["password"]=> string(40) "5dfa823ee30df1936c1792d4c8348a4bcf4c64e2" ["born"]=> string(19) "2005-04-04 18:52:00" ["created"]=> string(19) "2019-04-04 18:53:09" } }
    Antoni Pastuović, 23th September 2025

All articles

Latest battle-reports

All battle-reports