Ana Polanšćak
Status u udruzi:
Od aktualnih igara u udruzi Ana igra "Wyrd - Malifaux", "Hobističko natjecanje u bojanju minijatura Black Queen" i "GW - Mordheim", a kolekcija vojski sastoji mu se od "Outcasts (Wyrd - Malifaux)" i "Ressurectionists (Wyrd - Malifaux)".
Najnoviji članci
-
Agram Group Build #7 – Amon Hen, dio 9
array(2) { ["Article"]=> array(10) { ["id"]=> string(3) "536" ["member_id"]=> string(2) "35" ["title_eng"]=> string(39) "Agram Group Build #7 – Amon Hen, pt.9" ["title_hrv"]=> string(40) "Agram Group Build #7 – Amon Hen, dio 9" ["mask_eng"]=> string(32) "agram_group_build_7_amon_hen_pt9" ["mask_hrv"]=> string(34) "agram_group_build_7_amon_hen_dio_9" ["content_eng"]=> string(7797) "Marko Paunović, 12.11.2026.Agram Group Build is back. For this seventh installment, the team decided to create a gaming board/diorama for Amon Hen. To that end, we fulfilled a childhood dream and acquired the original Forge World Amon Hen terrain (released around 2000) along with the accompanying set of miniatures. This series of articles will document the entire project—from crafting the terrain to assembling and painting the miniatures.
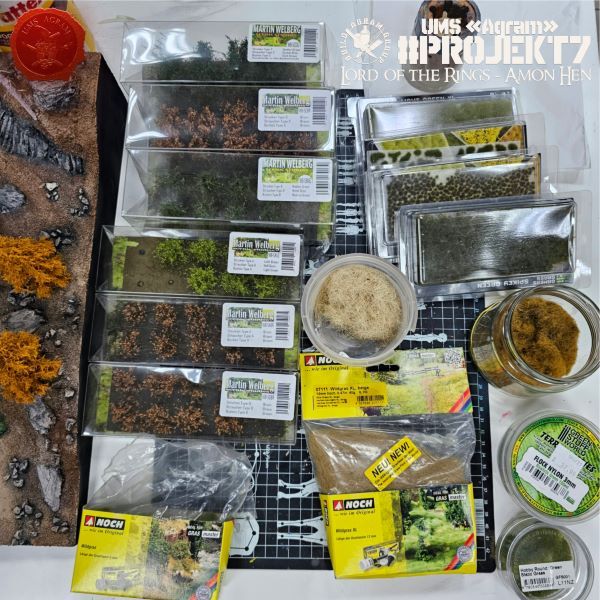
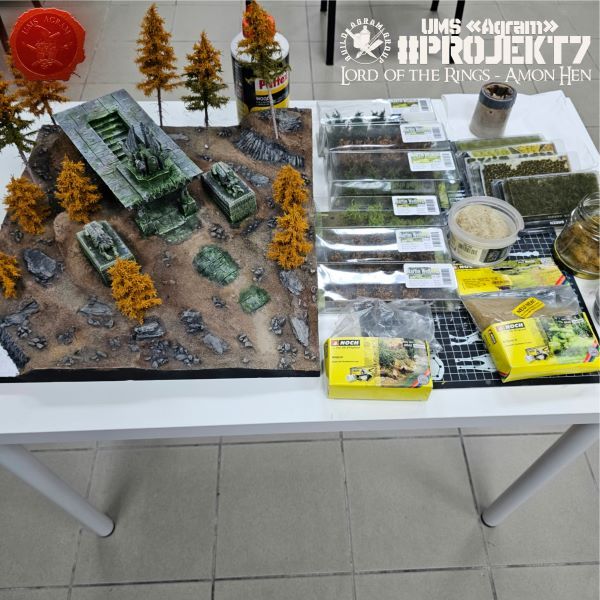
The following steps were carried out more or less in parallel: painting the figures and adding vegetation. For the sake of clarity, we decided to cover these two processes in separate articles. Therefore, this article focuses on the addition of vegetation, which was completed in two separate sessions. For the vegetation, we used products from the following companies: Martin Welberg, GSW, Gamer's Grass, Noch, and GModel Miniatures.
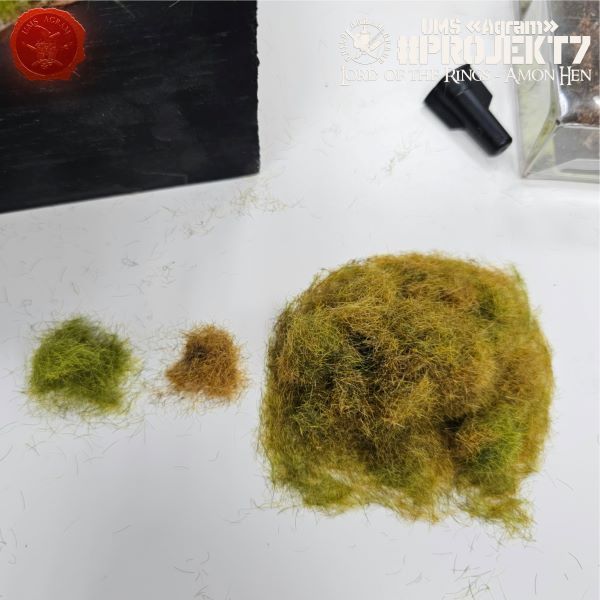
First, I decided to apply static grass. I used products from Noch—two shades: green and a dry beige. By mixing the two, I created a third shade. I applied PVA glue in sections, spreading it over the terrain with a little water, and then sprinkled on the desired shades.
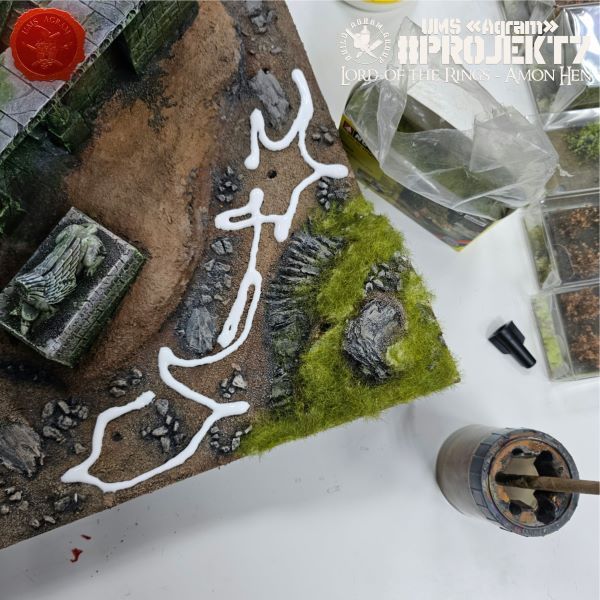
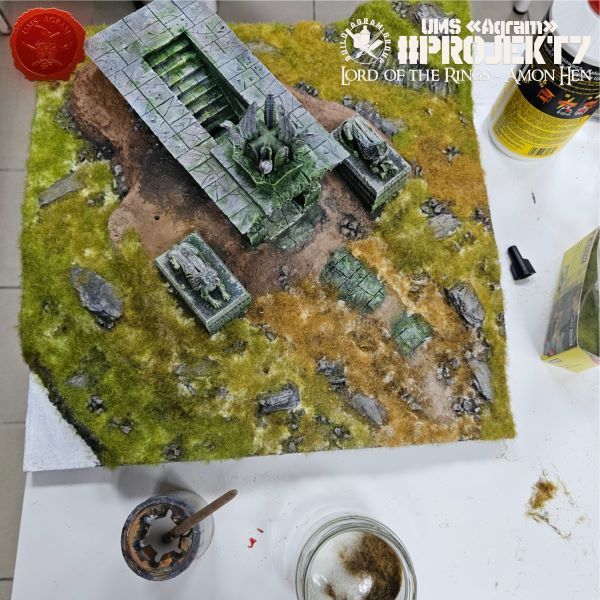
Next came the planting of trees from GModels Miniatures. I applied PVA glue into the pre-drilled holes and inserted the trees.
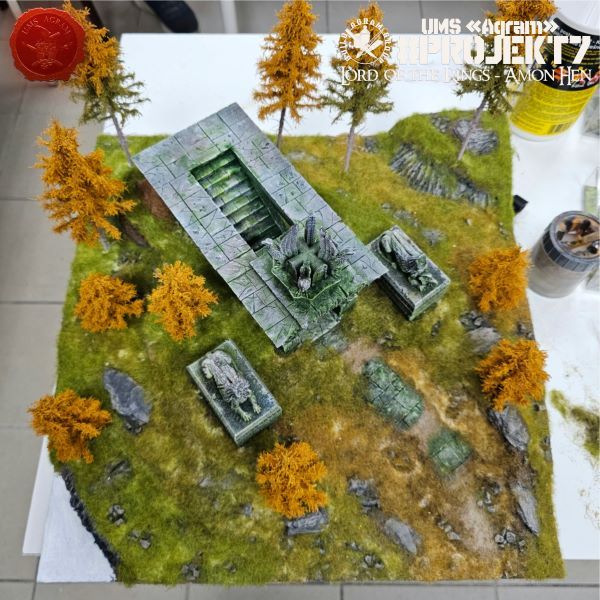
Before the end of the session, I sprayed the entire terrain with a clear matte varnish to further secure the static grass, as well as the flocking on the trees.
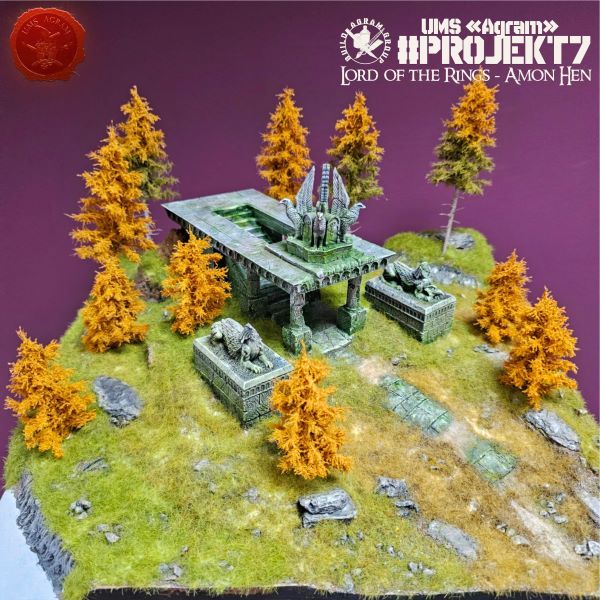
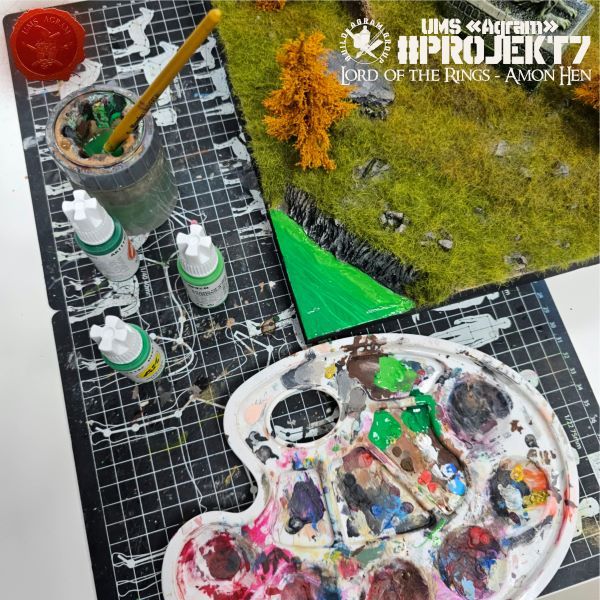
The first task the following week was painting a corner of the board in the colors of a river. I used shades of green and carefully painted the riverbank.
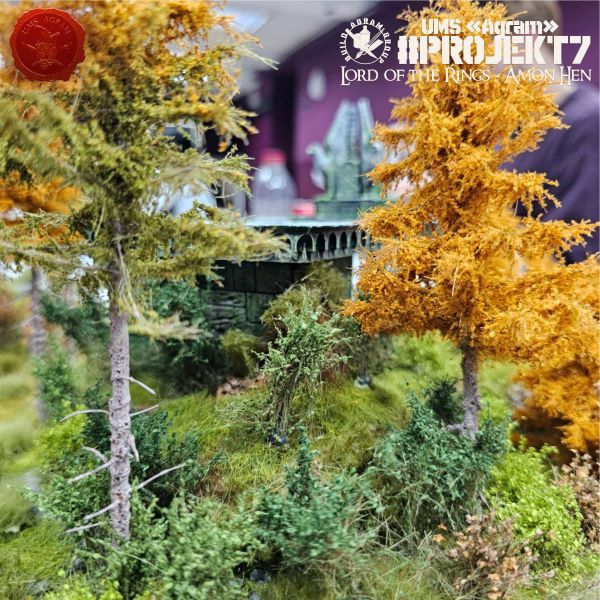
Next, we proceeded to add vegetation. We decided to work from the tallest elements down to the shortest. Furthermore, since the figures were not yet finished, their final placement on the board was not yet determined. Given this, we decided to be cautious regarding the amount of vegetation used. We placed tall vegetation only in areas where the figures definitely would not be positioned (we transformed one corner of the board into a dense thicket and woodland). The bushes we used are products by Martin Welberg.
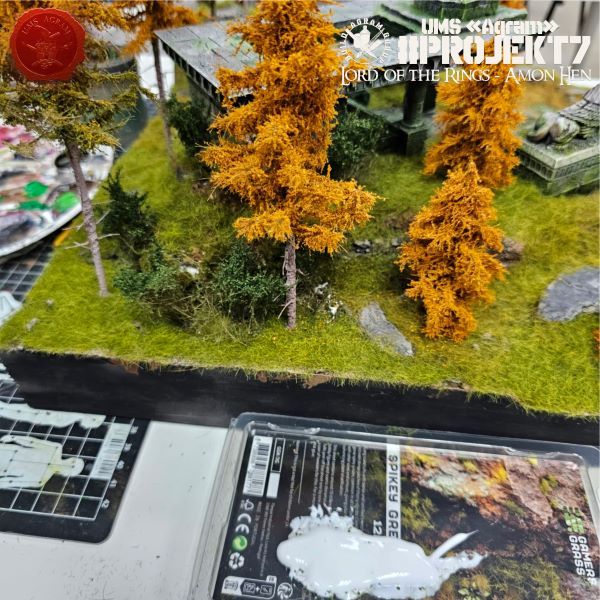
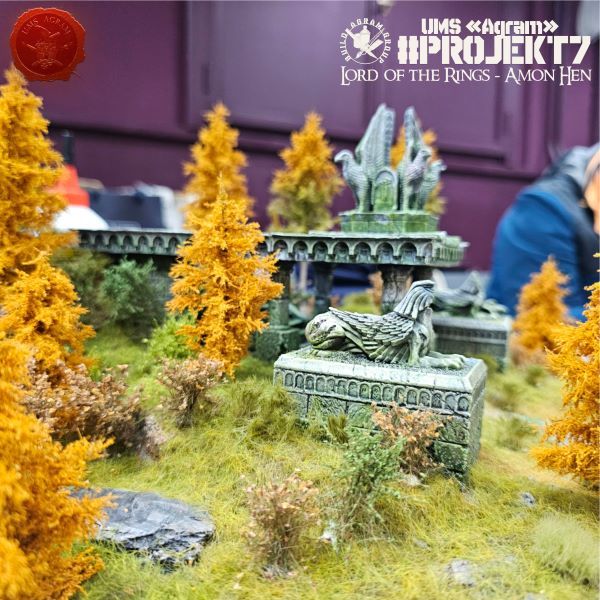
Next up were the tufts from GSW and Gamer's Grass. We decided to use them sparingly until the miniatures were placed. Once the miniatures are in position, we will add more as needed.
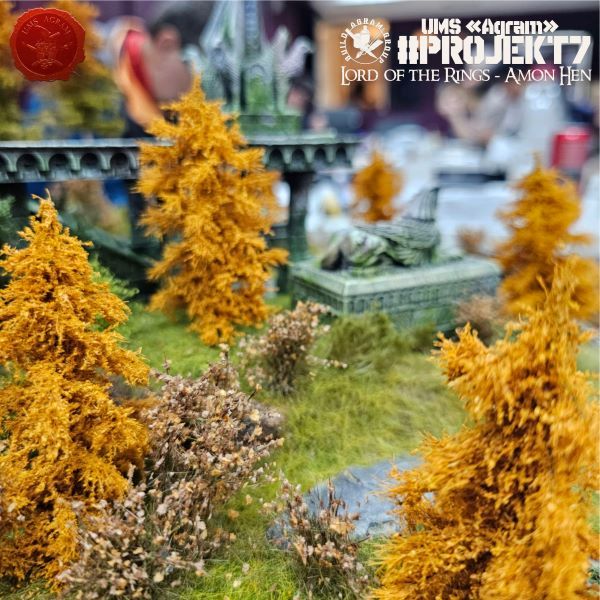
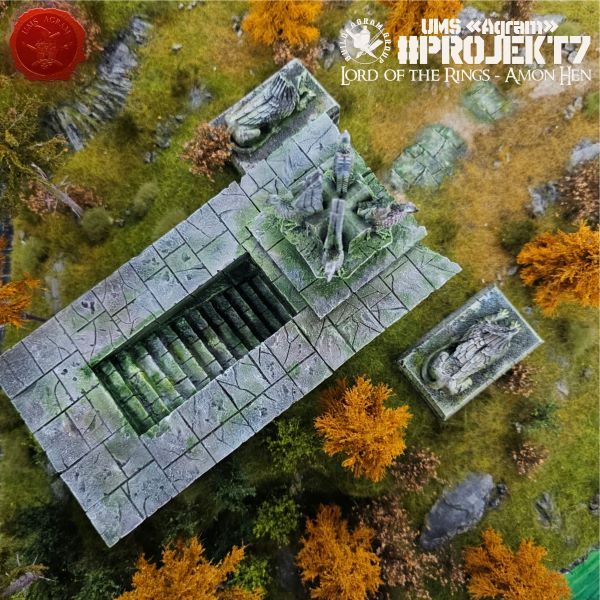
Finally, we added moss—tiny tufts about 1 mm high from Gamer's Grass.
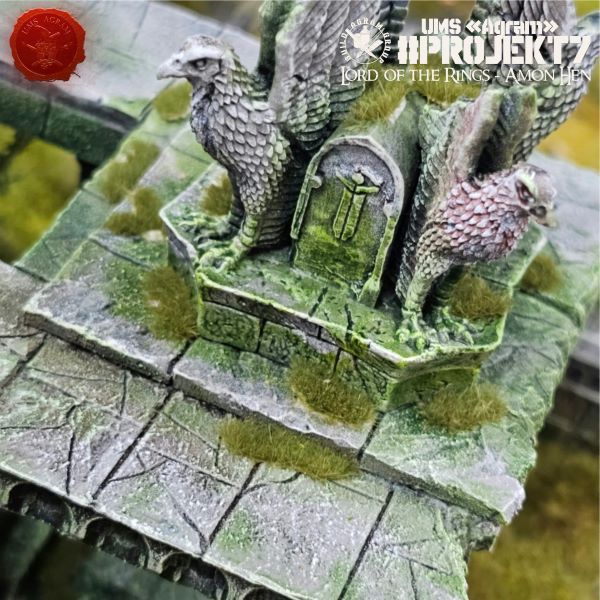
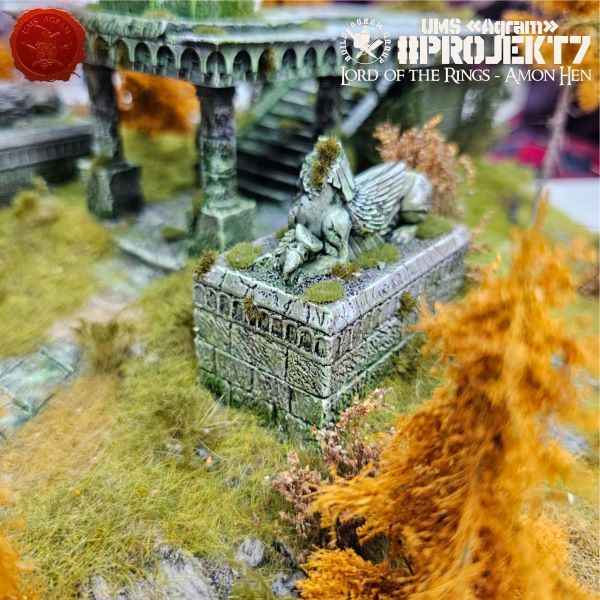
Just before the end of the session, we sprayed the area again to secure the top dressing on the newly added vegetation.
" ["content_hrv"]=> string(7692) "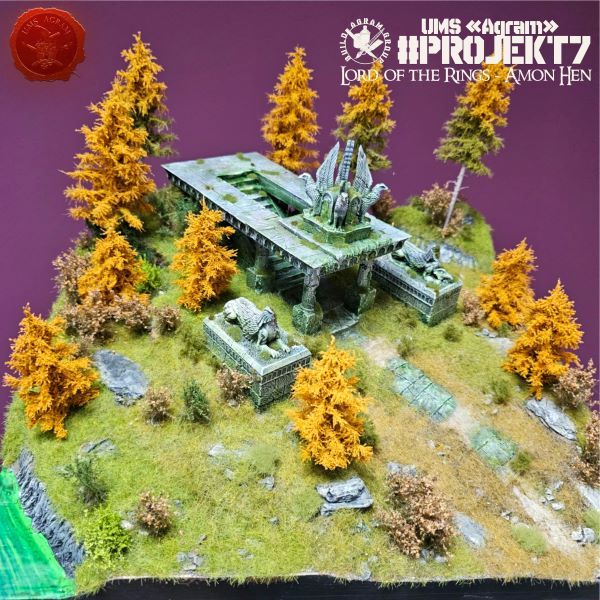
Agram Group Build se vraća. U svojoj sedmoj instalaciji, ekipa je odlučila izraditi igraću tablu / dioramu za Amon Hen. Za tu potrebu, ispunili smo si dječačke sne i nabavili originalni Forge World teren Amon Hena (izašao negdje cca 2000.) sa setom pripadajućih figura. Ova serija članaka pratit će izradu cijelog projekta – kako izrade terena, tako i sastavljanja i bojanja figura.
Sljedeći koraci odrađeni su manje-više paralelno. Bojanje figura i postavljanje vegetacije. Radi bolje preglednosti, odlučili smo ta dva procesa odraditi u zasebnim člancima. Stoga ćemo u ovom članku opisati postavljanje vegetacije koje je odrađeno u dva zasebna termina. Za vegetaciju, koristili smo proizvode sljedećih tvrtki: Martin Welberg, GSW, Gamer's Grass, Noch i GModel Miniatures.
Prvo sam se odlučio za postavljanje statičke trave. Koristio sam proizvode od Noch-a. Dvije nijanse, zelena i suha bež boja. Mješavinom obje boje sam dobio i treću nijansu. Po segmentima sam nanosio PVA ljepilo te uz malo vode ga razmazao po terenu. Potom sam posipao željenim nijansama.
Zatim je uslijedilo sađenje stabala od GModels Miniatures. U prethodno izbušene rupe za stabla sam stavio PVA ljepila i zapiknuo stabla.
Prije kraja termina, posprejao sam cijeli teren s prozirnim mat lakom kako bi dodatno učvrstio statičku travu, ali i posip na stablima.
Prvi posao idućeg tjedna bilo je bojanje kuta table u boje rijeke. Koristio sam zelene nijanse i pažljivo obojao obalu.
Zatim smo nastavili sa dodavanjem vegetacije. Odlučili smo krenuti od više prema nižoj. Također, budući da figure nisu još bile gotove, njihov konačni raspored na tabli nije bio poznat. S obzirom na tu činjenicu, odlučili smo paziti sa količinom vegetacije. Visoku vegetaciju smo postavili samo na mjesta gdje sigurno neće biti figura (jedan kut table smo pretvorili u gusto šipražje sa šumom. Grmlje koje smo koristili proizvodi su od Martina Welberga.
Zatim su došli na red tuft-ovi od GSW i Gamer's Grassa. Njih smo odlučili koristiti u manjoj mjeri dok ne postavimo figure. Nakon postavljanja figura, dodat ćemo prema potrebi.

Na kraju smo postavili mahovinu. Sitne tuftove visine cca 1 mm tvrtke Gamer's Grass.

Prije samog kraja termina, opet smo posprejali teren da učvrstimo posipe na dodanoj vegetaciji.
" ["created"]=> string(19) "2026-11-12 08:29:25" ["modified"]=> string(19) "2026-11-12 08:38:14" } ["Member"]=> array(10) { ["id"]=> string(2) "35" ["group_id"]=> string(1) "1" ["first_name"]=> string(5) "Marko" ["last_name"]=> string(9) "Paunović" ["first_name_mask"]=> string(5) "marko" ["last_name_mask"]=> string(8) "paunovic" ["username"]=> string(5) "marko" ["password"]=> string(40) "3bd37b326d19d1880d3b93a4b32e8fb3a90fa122" ["born"]=> string(19) "2033-03-07 20:35:00" ["created"]=> string(19) "2009-06-02 20:37:03" } } -
Agram Group Build #7 – Amon Hen, dio 8
array(2) { ["Article"]=> array(10) { ["id"]=> string(3) "535" ["member_id"]=> string(2) "35" ["title_eng"]=> string(39) "Agram Group Build #7 – Amon Hen, pt.8" ["title_hrv"]=> string(40) "Agram Group Build #7 – Amon Hen, dio 8" ["mask_eng"]=> string(32) "agram_group_build_7_amon_hen_pt8" ["mask_hrv"]=> string(34) "agram_group_build_7_amon_hen_dio_8" ["content_eng"]=> string(3235) "Marko Paunović, 03.11.2026.Agram Group Build is back. For this seventh installment, the team decided to create a gaming board/diorama for Amon Hen. To that end, we fulfilled a childhood dream and acquired the original Forge World Amon Hen terrain (released around 2000) along with the accompanying set of miniatures. This series of articles will document the entire project—from crafting the terrain to assembling and painting the miniatures.
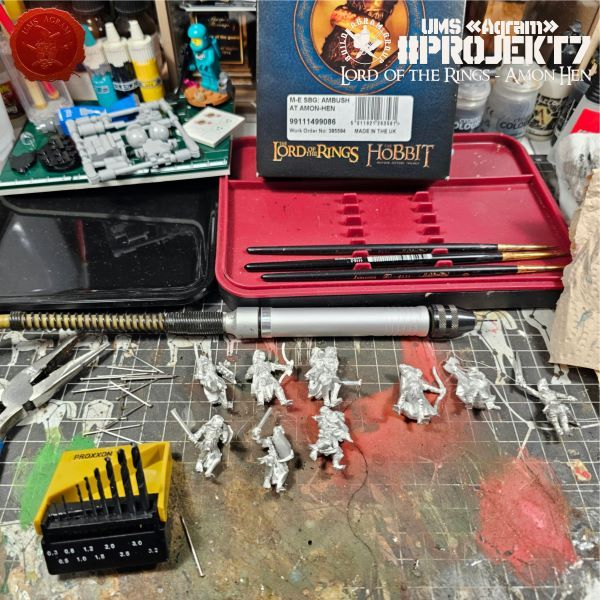
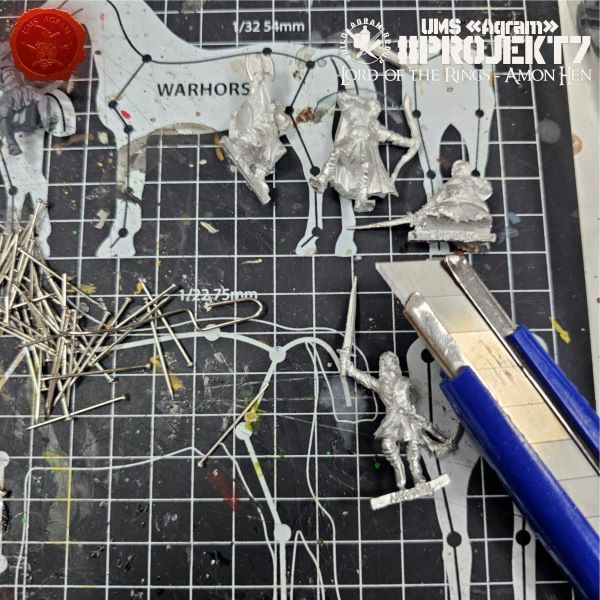
In this article, we continue our work on the figures. Last time, we prepared the plastic components; now, it is time to pin the metal ones. For this, we need a mini electric drill and some paperclips or pins. Additionally, you will need superglue.
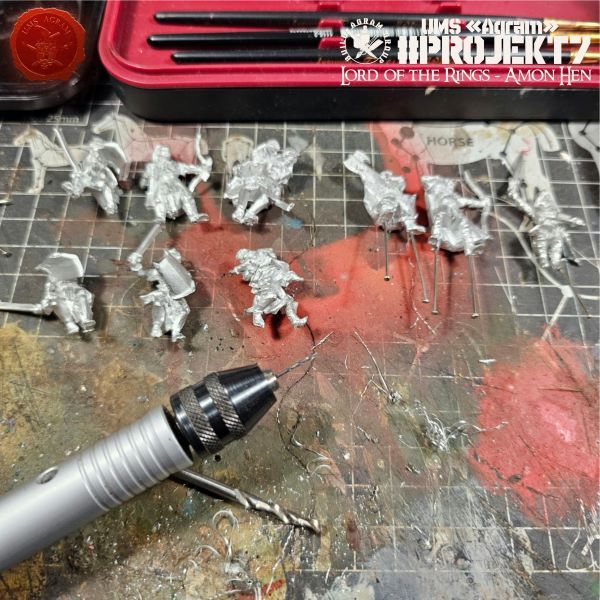
Select a drill bit about the size of a pin—in our case, 0.8 mm in diameter. Carefully drill holes approximately 2–3 mm deep into the feet, using at least one pin per figure.
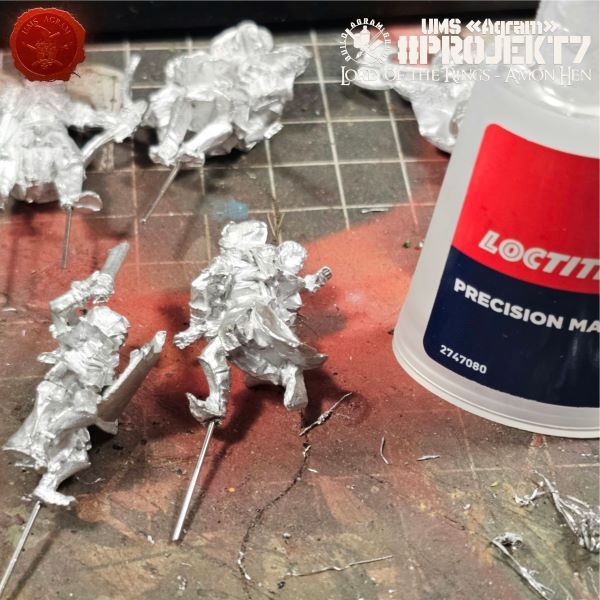
Apply a drop or two of superglue to the pin and push it as deep as possible into the hole. Let it dry, then reattach the head.
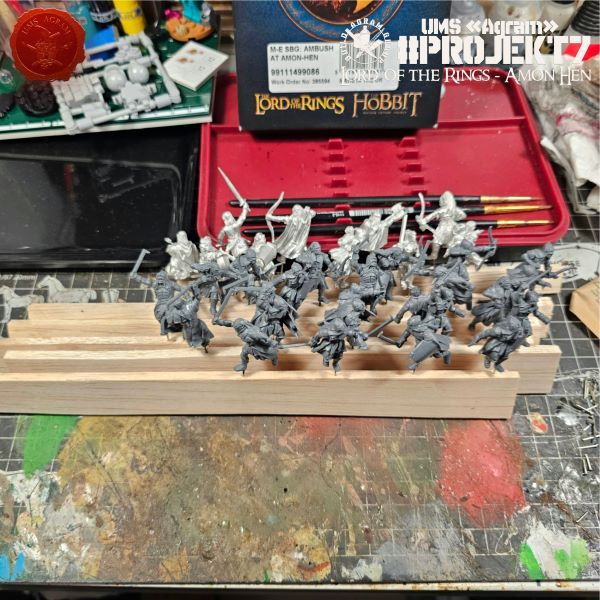
Once we had prepared all the figures in this way, we mounted them onto balsa wood strips. We pushed pins into the balsa, and the figures were ready to be spray-painted black.
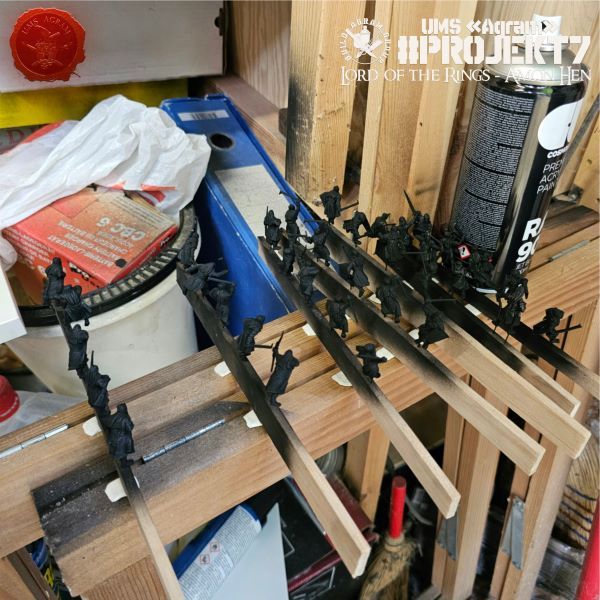
After spraying, the figures are ready for painting.
" ["content_hrv"]=> string(3194) "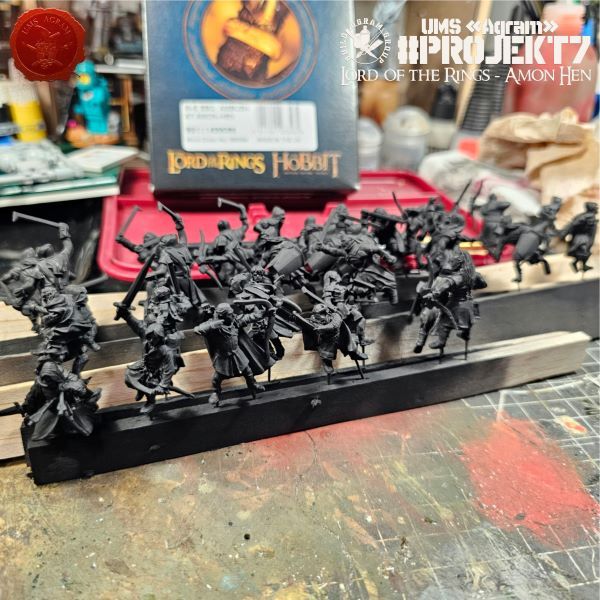
Agram Group Build se vraća. U svojoj sedmoj instalaciji, ekipa je odlučila izraditi igraću tablu / dioramu za Amon Hen. Za tu potrebu, ispunili smo si dječačke sne i nabavili originalni Forge World teren Amon Hena (izašao negdje cca 2000.) sa setom pripadajućih figura. Ova serija članaka pratit će izradu cijelog projekta – kako izrade terena, tako i sastavljanja i bojanja figura.
Nastavak rada na figurama pratimo u ovom članku. Prošli put smo pripremili plastični dio figura, a sada je na redu piniranje metalnih. Za to nam je potrebna mini električna bušilica i spajalice/špenadle. Osim toga, bit će potrebno i superljepilo.
Izaberemo svrdlo veličine špenadle. U našem slučaju to je promjer 0,8mm. Pažljivo izbušimo rupe dubine cca 2-3 mm u stopala. Barem jedan pin po figuri.
Kapnemo kap dvije superljepila na pin i nabijemo ga što dublje u rupu. Pustimo da se osuši i održemo glavu.
Kada smo tako pripremili sve figure, postavili smo ih na letvice od balze. Pinove smo zabili u balzu i figure su bile spremne za sprejanje u crno.
Nakon sprejanja, figure su spremne za bojanje.
" ["created"]=> string(19) "2026-11-03 13:24:18" ["modified"]=> string(19) "2026-11-03 13:24:18" } ["Member"]=> array(10) { ["id"]=> string(2) "35" ["group_id"]=> string(1) "1" ["first_name"]=> string(5) "Marko" ["last_name"]=> string(9) "Paunović" ["first_name_mask"]=> string(5) "marko" ["last_name_mask"]=> string(8) "paunovic" ["username"]=> string(5) "marko" ["password"]=> string(40) "3bd37b326d19d1880d3b93a4b32e8fb3a90fa122" ["born"]=> string(19) "2033-03-07 20:35:00" ["created"]=> string(19) "2009-06-02 20:37:03" } } -
Back to Basics radionice bojanja minijatura u Knjižnici Medveščak - jesen 2026
array(2) { ["Article"]=> array(10) { ["id"]=> string(3) "534" ["member_id"]=> string(2) "64" ["title_eng"]=> string(70) "Back to Basics Workshops for kids in Medveščak Library - Autumn 2026" ["title_hrv"]=> string(81) "Back to Basics radionice bojanja minijatura u Knjižnici Medveščak - jesen 2026" ["mask_eng"]=> string(68) "back_to_basics_workshops_for_kids_in_medvescak_library_-_autumn_2026" ["mask_hrv"]=> string(78) "back_to_basics_radionice_bojanja_minijatura_u_knjiznici_medvescak_-_jesen_2026" ["content_eng"]=> string(5920) "Krunoslav Belinić, 30.10.2026.This autumn, we once again held our "Back to Basics" miniature painting workshops for children at the Medveščak Library.
Over the course of three weeks, our youngest participants painted our "Agramers" and learned the ropes of miniature painting.
A big thank you to the parents for their trust, and to the Children and Youth Department of the Medveščak Library for their support!
See you next spring!
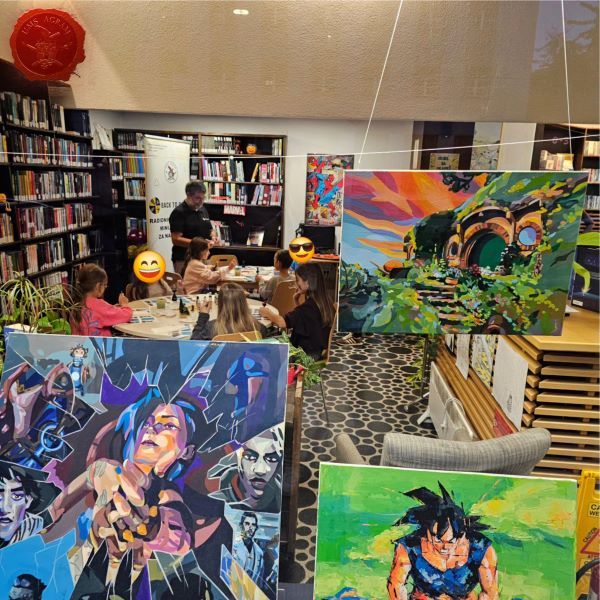
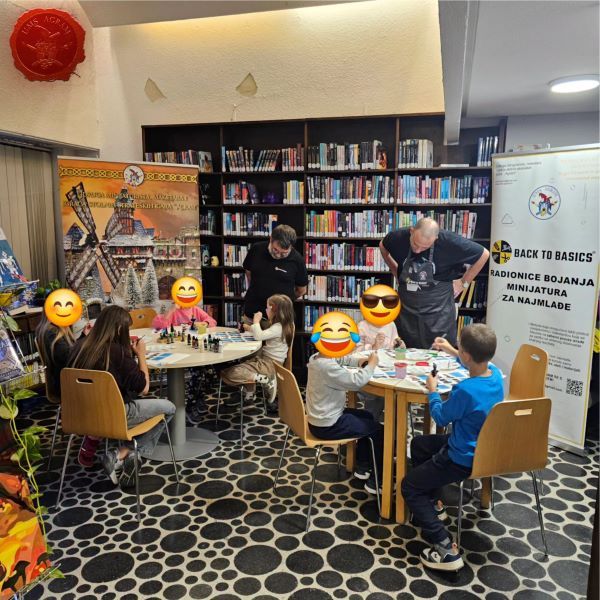
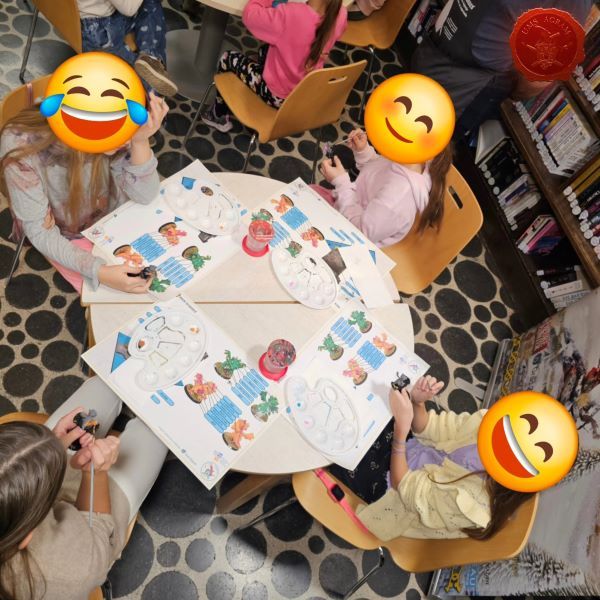
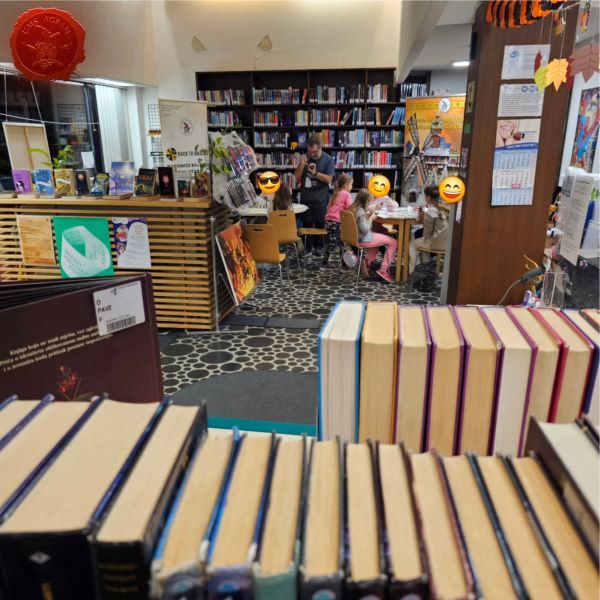
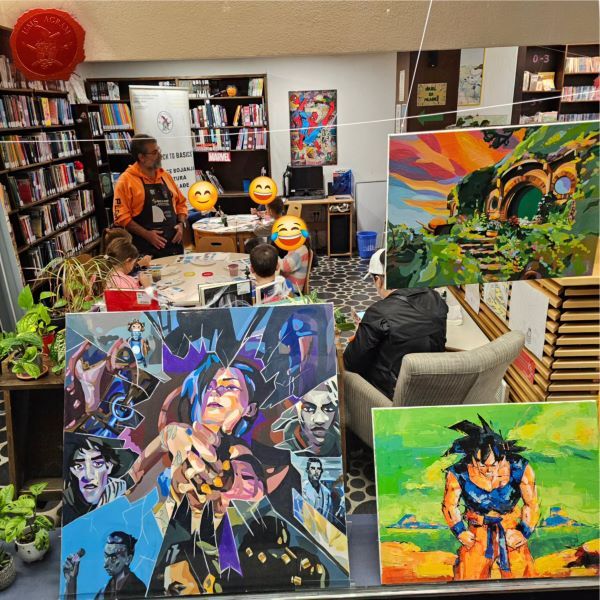
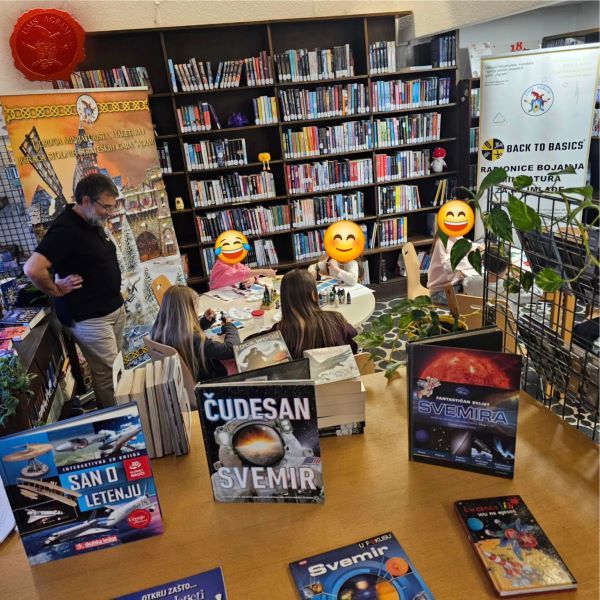
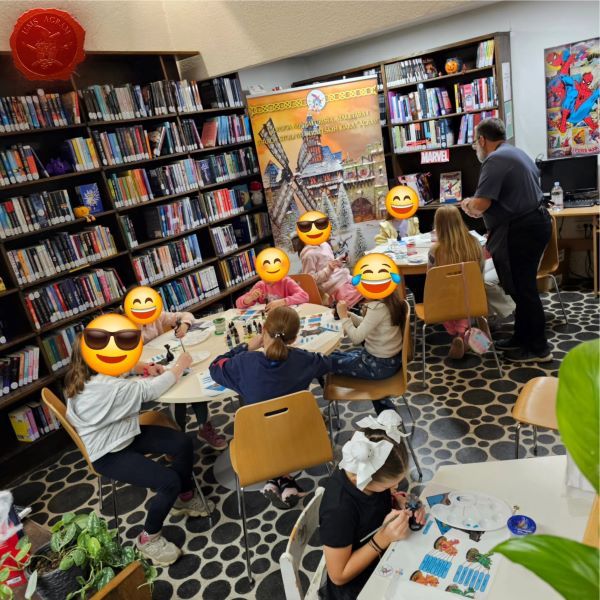
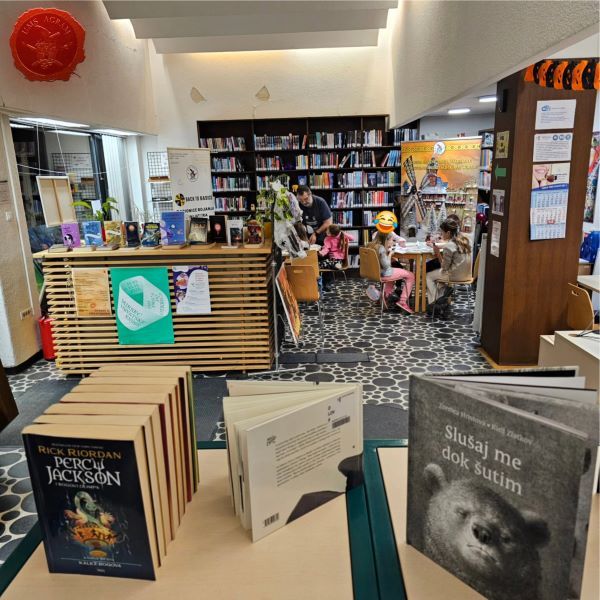
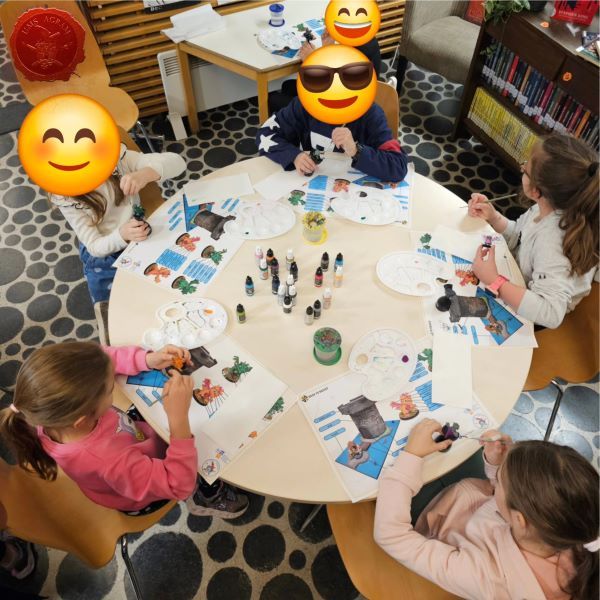
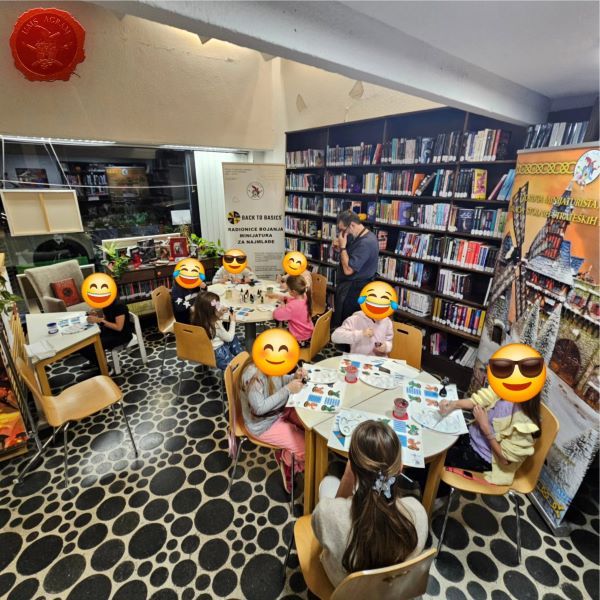
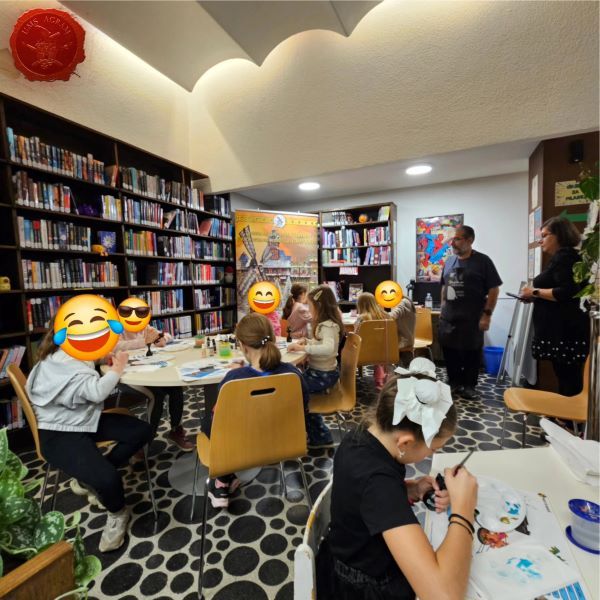
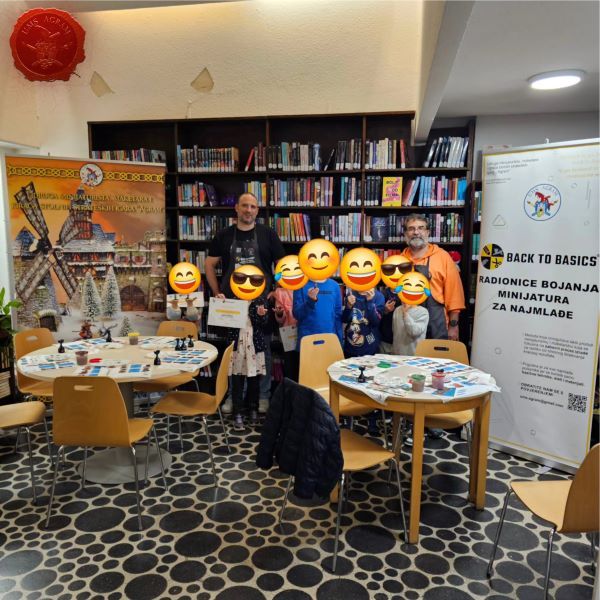
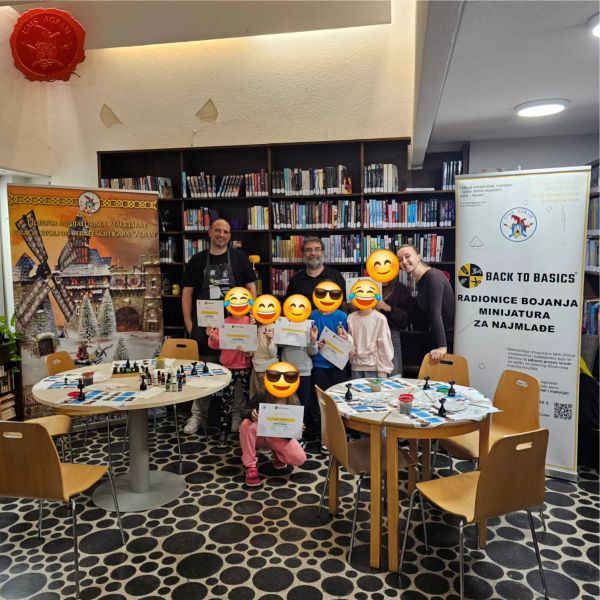
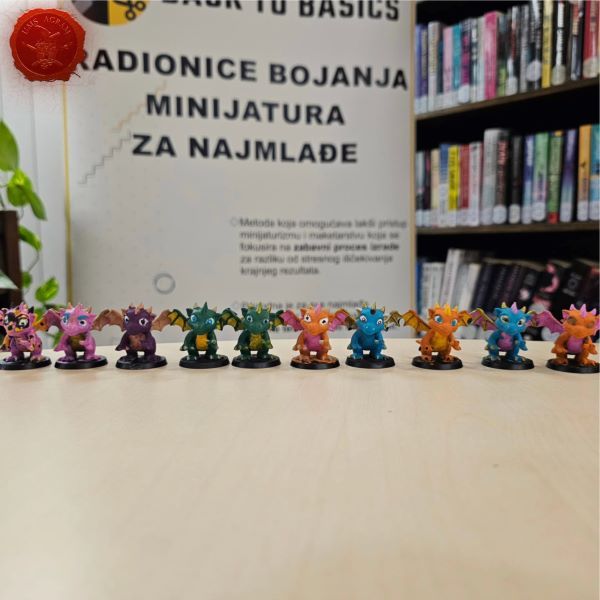
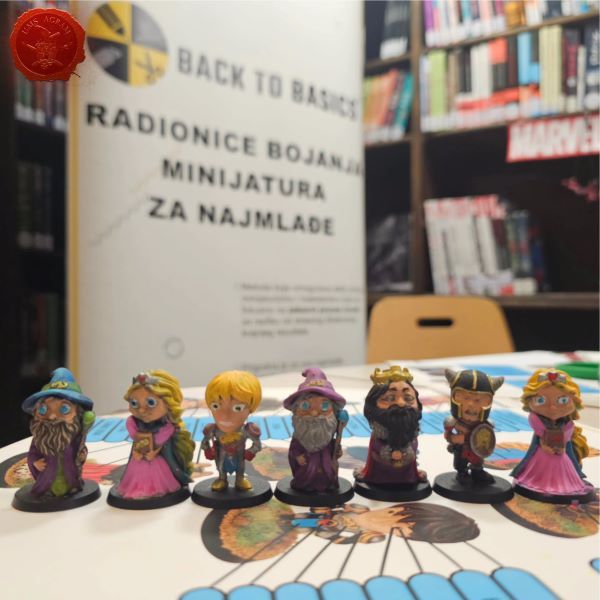
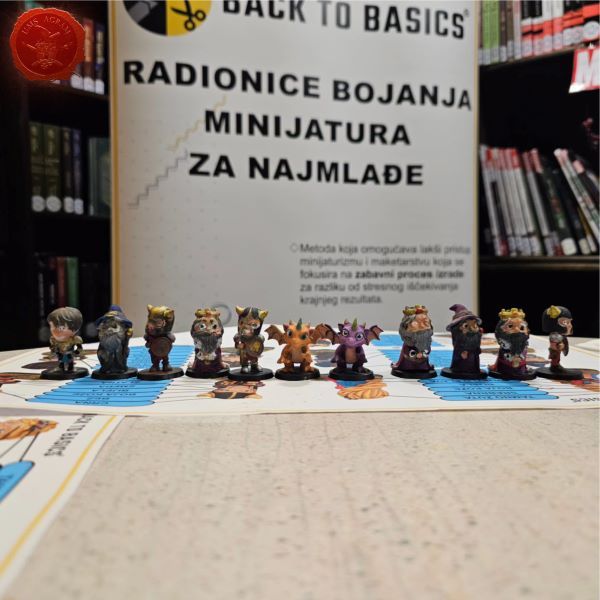
You can find more photos on our social networks!
" ["content_hrv"]=> string(5773) "I ove jeseni održali smo Back to Basics radionice bojenja minijatura za najmlađe u Knjižnica Medveščak.
Kroz tri tjedna naši najmlađi polaznici su bojali naše Agramere i upoznali se sa bojanjem minijatura.
Veliko hvala roditeljima na povjerenju i Odjelu za djecu i mlade Knjižnice Medveščak na podršci !
Vidimo se sljedeće godine na proljeće
Više fotografija možete pronaći na našim društvenim mrežama!
" ["created"]=> string(19) "2026-10-30 09:12:21" ["modified"]=> string(19) "2026-10-30 09:12:21" } ["Member"]=> array(10) { ["id"]=> string(2) "64" ["group_id"]=> string(1) "1" ["first_name"]=> string(9) "Krunoslav" ["last_name"]=> string(8) "Belinić" ["first_name_mask"]=> string(9) "krunoslav" ["last_name_mask"]=> string(7) "belinic" ["username"]=> string(5) "Kruno" ["password"]=> string(40) "eb3fda45fbec0258e90d809803b10491c548b22f" ["born"]=> string(19) "2015-01-18 09:19:00" ["created"]=> string(19) "2015-01-18 09:20:39" } } -
Agram Group Build #7 – Amon Hen, dio 7
array(2) { ["Article"]=> array(10) { ["id"]=> string(3) "533" ["member_id"]=> string(2) "64" ["title_eng"]=> string(39) "Agram Group Build #7 – Amon Hen, pt.7" ["title_hrv"]=> string(40) "Agram Group Build #7 – Amon Hen, dio 7" ["mask_eng"]=> string(32) "agram_group_build_7_amon_hen_pt7" ["mask_hrv"]=> string(34) "agram_group_build_7_amon_hen_dio_7" ["content_eng"]=> string(6275) "Krunoslav Belinić, 30.10.2026.Agram Group Build is back. For this seventh installment, the team decided to create a gaming board/diorama for Amon Hen. To that end, we fulfilled a childhood dream and acquired the original Forge World Amon Hen terrain (released around 2000) along with the accompanying set of miniatures. This series of articles will document the entire project—from crafting the terrain to assembling and painting the miniatures.
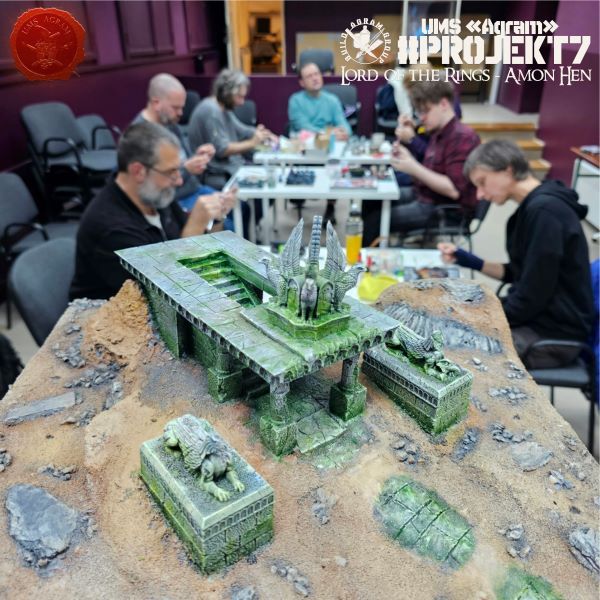
The first thing we did this week was finish painting the terrain. All that remained were the stone statues and the temple. A light drybrush of grey and white paint was all that was needed, following the layers of washes we had applied the week before.
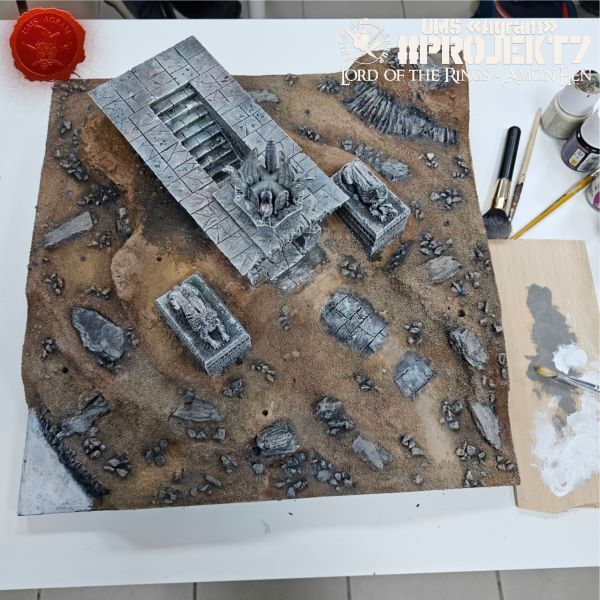
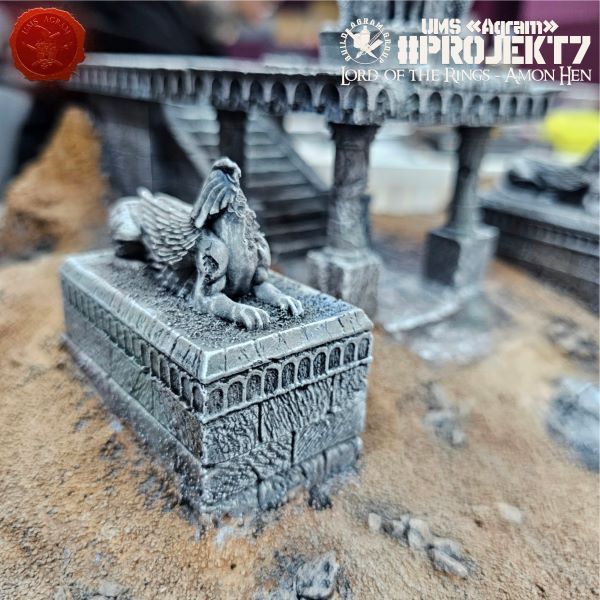
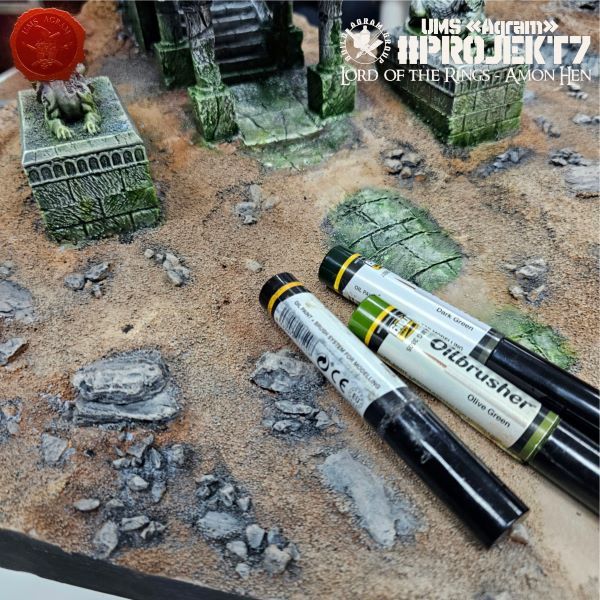
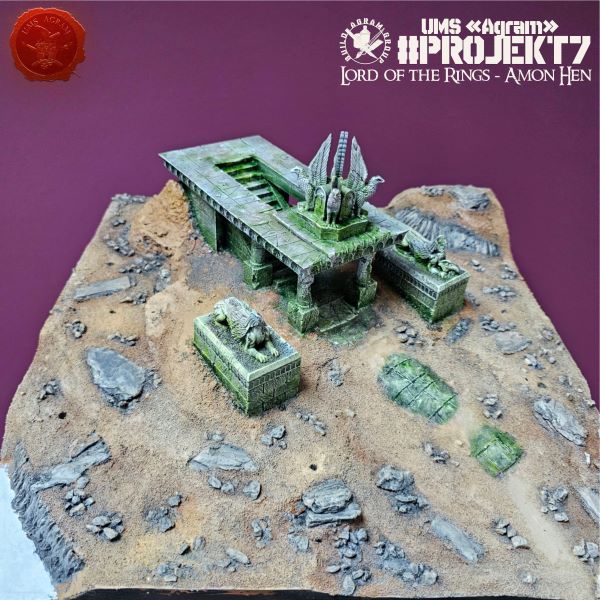
Next came the aging process using oil paints. We used several shades of green, as well as black and a beige/white tone. First, we coated the surfaces with Odourless Thinner, then applied a few small dots of each shade, and finally used a dry brush to blend them and remove any excess pigment.
Meanwhile, the other part of the team continued the work of cleaning the plastic Uruk-hai.
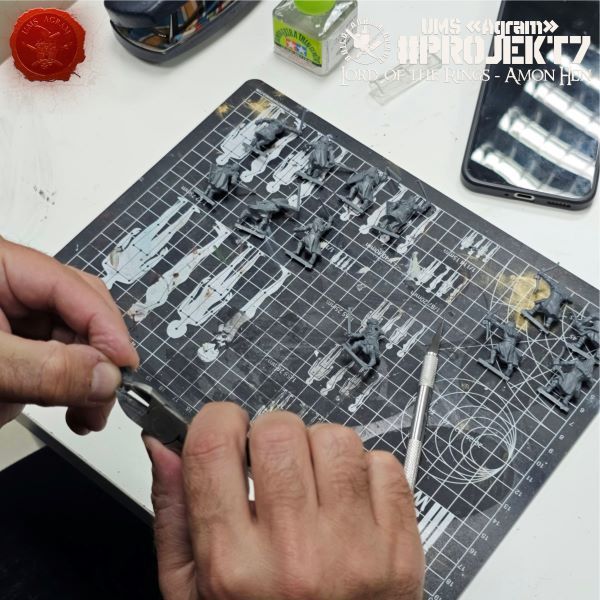
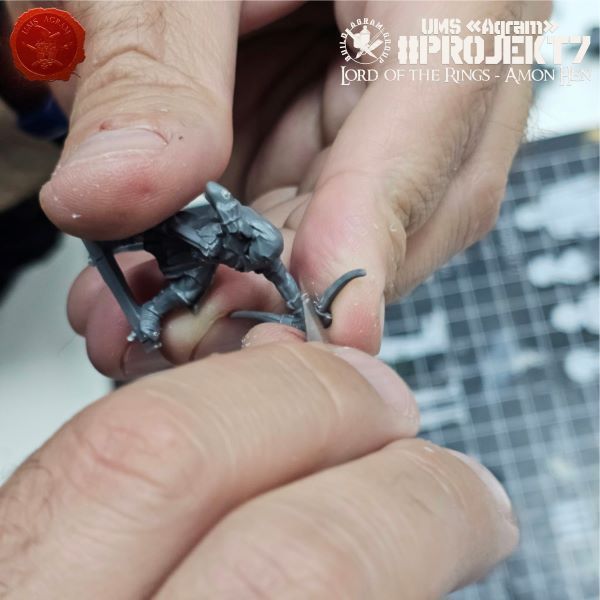
Next came the pinning of the plastic miniatures. For the quickest results, you will need: pliers, sewing pins, and a lighter.
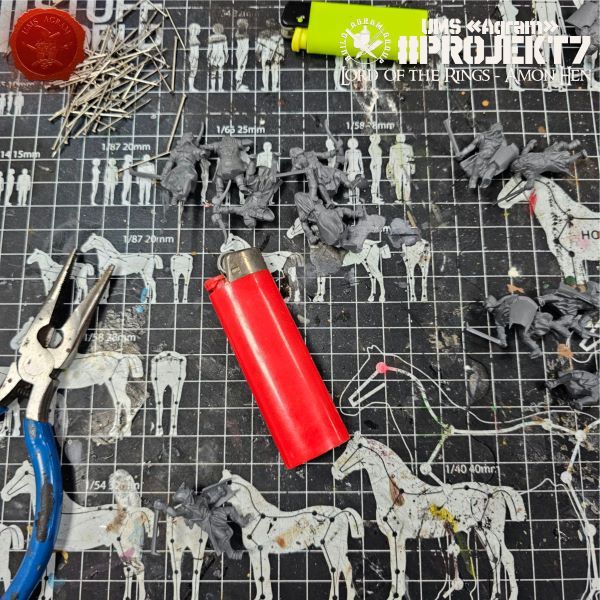
First, use a lighter to heat a sewing pin until it is red-hot, then press it into the Uruk-hai's leg. As the metal enters the plastic, the heat causes the plastic to expand, allowing the pin to slide in easily. However, as it enters, it also cools down; the plastic then contracts, holding the pin firmly in place. You do not need any glue. Once you have inserted the pins, use pliers to snip off the ends—the parts with the heads.

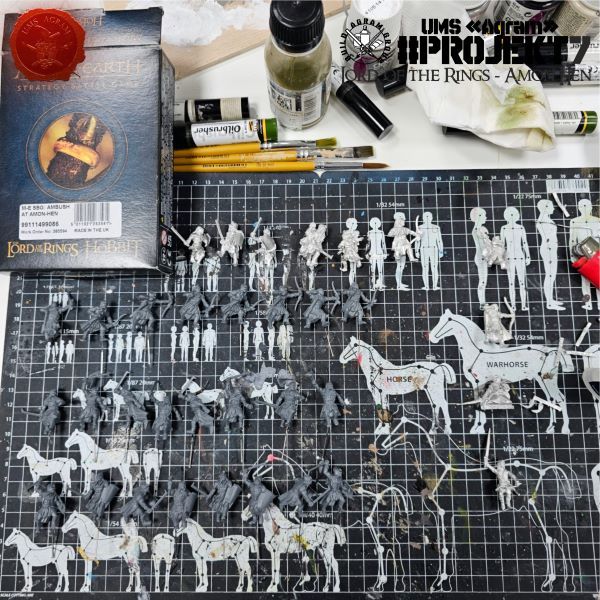
The final task for this week was to remove the tabs from the metal figures and prepare them for pinning. Unfortunately, the previous method cannot be applied to metal figures, so we will have to use an electric drill—but more on that next time.
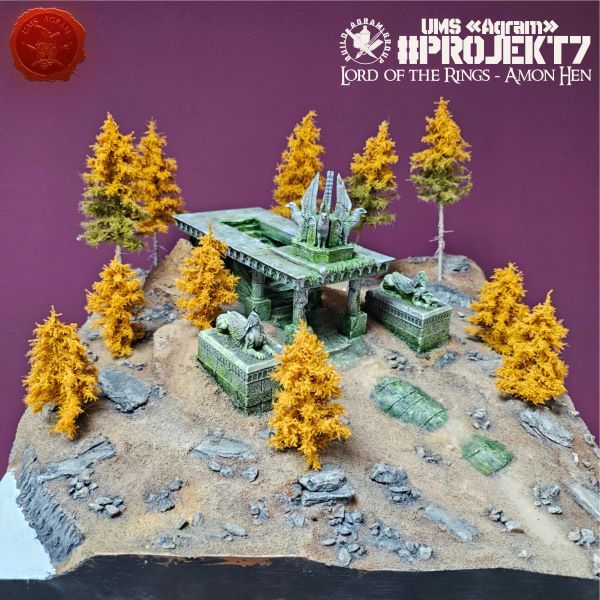
In the end, we arranged the trees on the painted base so we could admire them a bit.
" ["content_hrv"]=> string(6205) "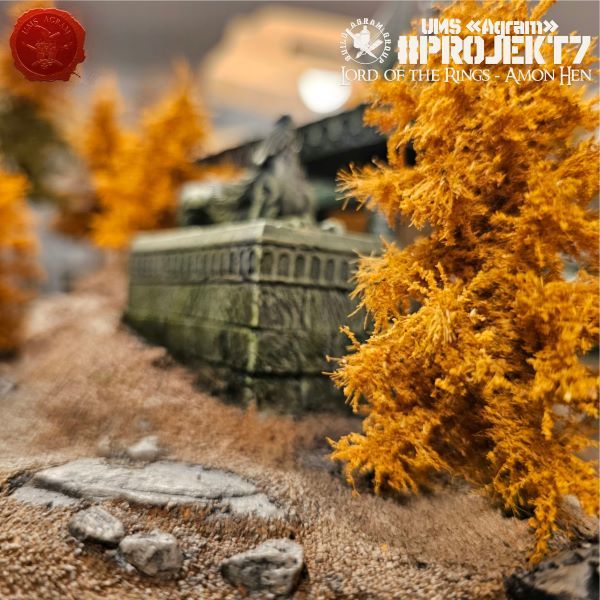
Agram Group Build se vraća. U svojoj sedmoj instalaciji, ekipa je odlučila izraditi igraću tablu / dioramu za Amon Hen. Za tu potrebu, ispunili smo si dječačke sne i nabavili originalni Forge World teren Amon Hena (izašao negdje cca 2000.) sa setom pripadajućih figura. Ova serija članaka pratit će izradu cijelog projekta – kako izrade terena, tako i sastavljanja i bojanja figura.
Prvu stvar koju smo ovaj tjedan napravili je dovršavanje bojanja terena. Ono što je ostalo jest kameni kipovi i hram. Lagani drybrush sive i bijele boje je bilo sve što je bilo potrebno nakon slojeva washeva koje smo odradili tjedan ranije.
Zatim je uslijedilo dodavanje starenja uljnim bojama. Koristili smo nekoliko zelenih, crnu i bež/bijelu nijansu. Prvo smo površine prekrili Odourless Thinnerom, zatim nanijeli po nekoliko točkica svih nijansi, i onda suhim kistom pomiješali i maknuli višak pigmenta.
Za to vrijeme, drugi dio ekipe je nastavio posao na čišćenju plastičnih Uruk Haia.
Zatim je uslijedilo piniranje plastičnih minijatura. Za najbrže rezultate potrebni su vam: kliješta, špenadle i upaljač.
Prvo upaljačem zagrijete špenadlu do usijanja, zatim ju utisnete Uruk Haiju u nogu. Kako metal ulazi u plastiku, toplina širi plastiku tako da pin može lagano ući. Međutim, kako ulazi tako se i hladi pa se plastika skuplja i drži pin na mjestu. Nikakvo ljepilo vam nije potrebno. Kad ste utisnuli špenadle, vrhove s glavom odrežite kliještima.
Zadnji zadatak za ovaj tjedan bio je maknuti tabove sa metalnih figura i pripremiti ih za piniranje. Prethodna metoda na žalost nije primjenjiva na metalnim figurama pa ćemo morati koristiti električnu bušilicu, ali o tome više sljedeći put.
Na kraju smo posložili drveće na obojanu bazu da se malo divimo.
" ["created"]=> string(19) "2026-10-30 08:03:11" ["modified"]=> string(19) "2026-10-30 08:55:41" } ["Member"]=> array(10) { ["id"]=> string(2) "64" ["group_id"]=> string(1) "1" ["first_name"]=> string(9) "Krunoslav" ["last_name"]=> string(8) "Belinić" ["first_name_mask"]=> string(9) "krunoslav" ["last_name_mask"]=> string(7) "belinic" ["username"]=> string(5) "Kruno" ["password"]=> string(40) "eb3fda45fbec0258e90d809803b10491c548b22f" ["born"]=> string(19) "2015-01-18 09:19:00" ["created"]=> string(19) "2015-01-18 09:20:39" } } -
Agram Group Build #7 – Amon Hen, dio 6
array(2) { ["Article"]=> array(10) { ["id"]=> string(3) "532" ["member_id"]=> string(2) "35" ["title_eng"]=> string(39) "Agram Group Build #7 – Amon Hen, pt.6" ["title_hrv"]=> string(40) "Agram Group Build #7 – Amon Hen, dio 6" ["mask_eng"]=> string(32) "agram_group_build_7_amon_hen_pt6" ["mask_hrv"]=> string(34) "agram_group_build_7_amon_hen_dio_6" ["content_eng"]=> string(7024) "Marko Paunović, 22.10.2026.Agram Group Build is back. For this seventh installment, the team decided to create a gaming board/diorama for Amon Hen. To that end, we fulfilled a childhood dream and acquired the original Forge World Amon Hen terrain (released around 2000) along with the accompanying set of miniatures. This series of articles will document the entire project—from crafting the terrain to assembling and painting the miniatures.
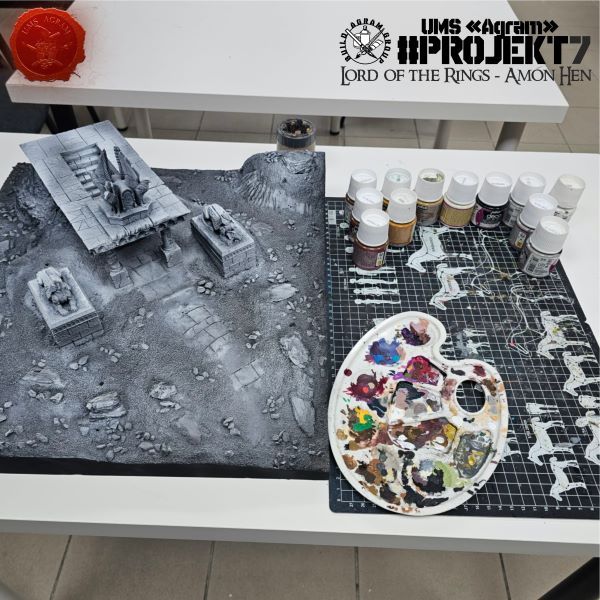
As we announced, this time we are starting with the painting process. The first step was applying a black primer (via spray), followed by white to highlight the details.
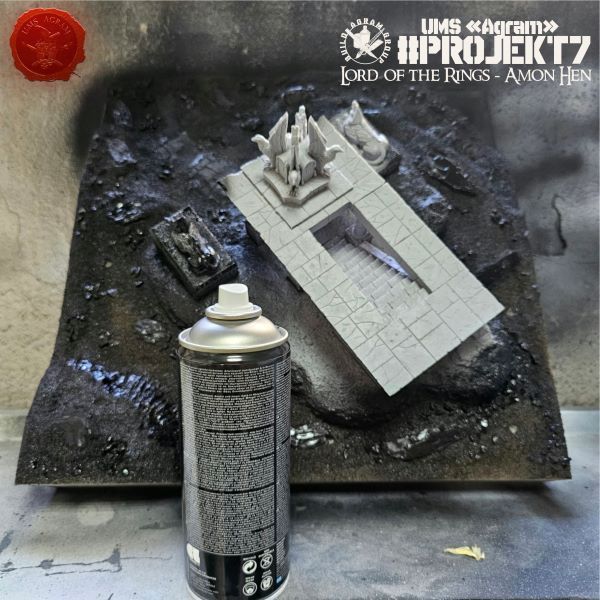
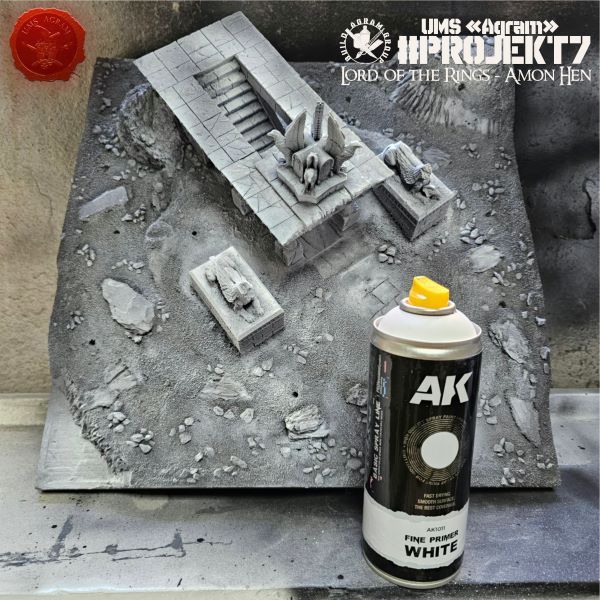
Next came the painting of the terrain. As always, we used a palette of brown and gray paints from the Pebeo Deco brand. These are acrylic paints—relatively affordable and quite thick—which allow for easy coverage or a quick drybrush, should the need arise. We started with the brown tones, beginning with the darker shades and finishing with the lighter ones.
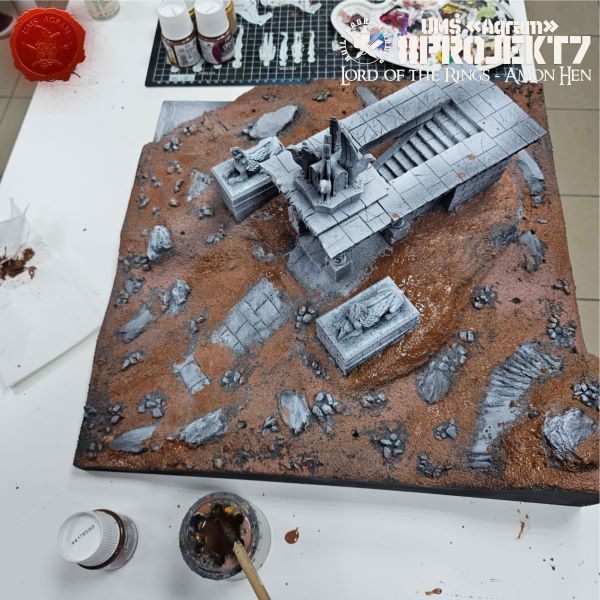
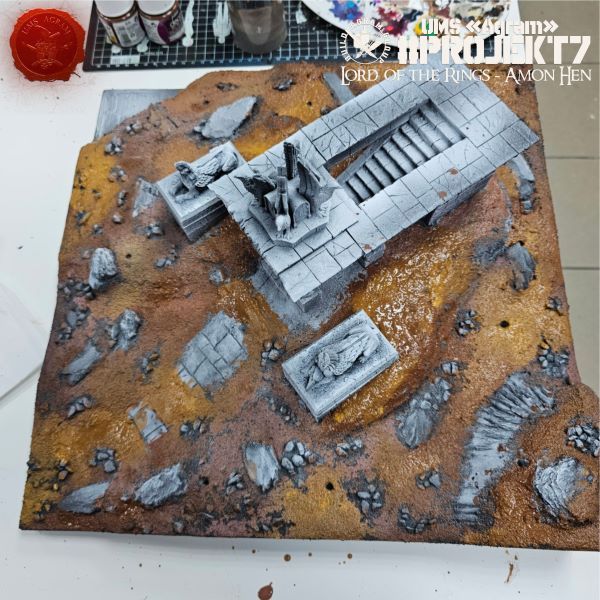
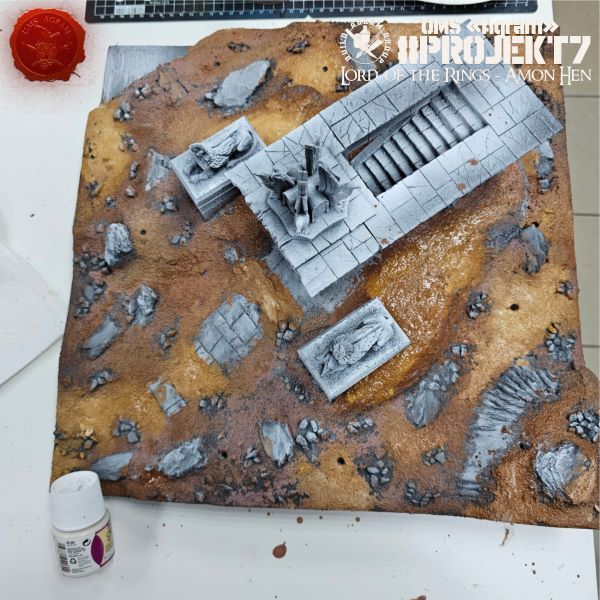
Next, we highlighted the stone surfaces with black paint, then lightened them using shades of gray, ranging from darker to lighter tones. We left the temple and the statues covered only with the spray paints applied in the first step.
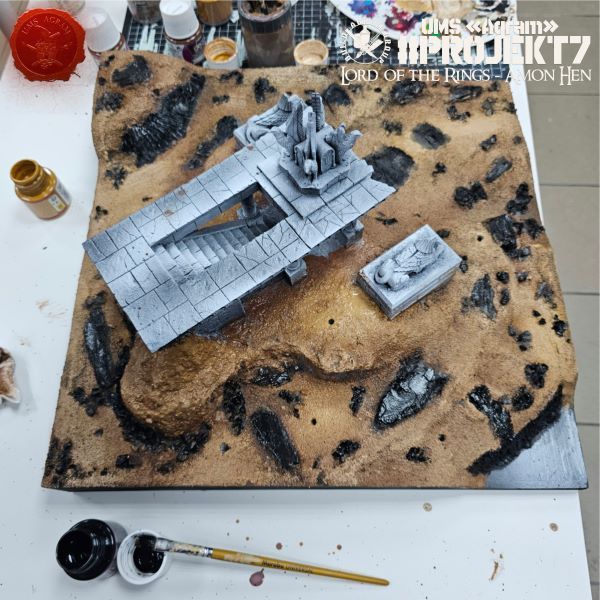
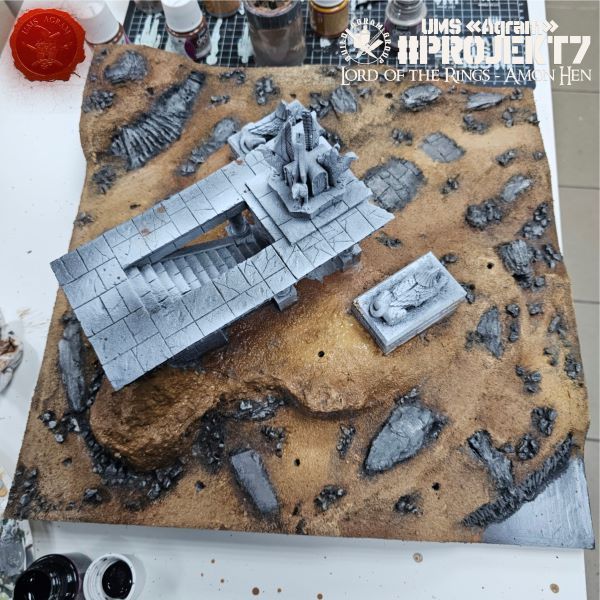
Once the base was finished, we turned our attention to the temple and the statues. The first layer of paint we applied over the black-and-white undercoat consisted of washes. We took 5 or 6 different shades and randomly dabbed them across all the surfaces.
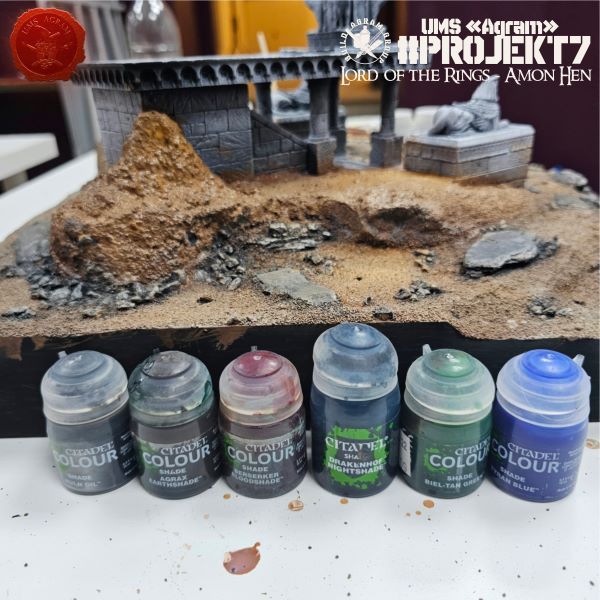
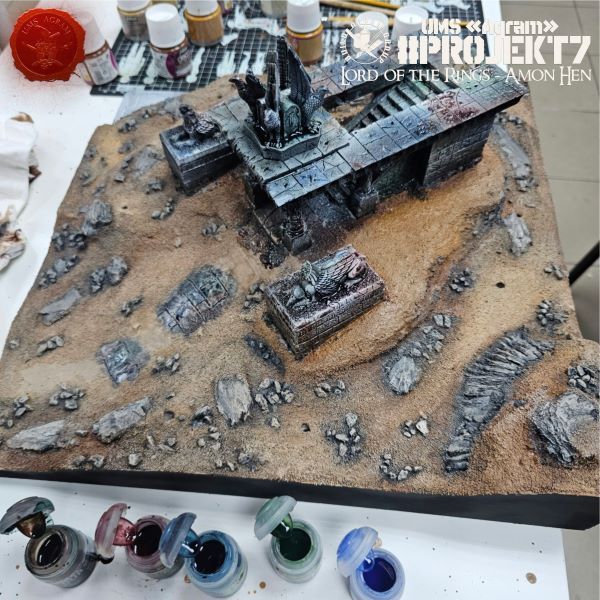
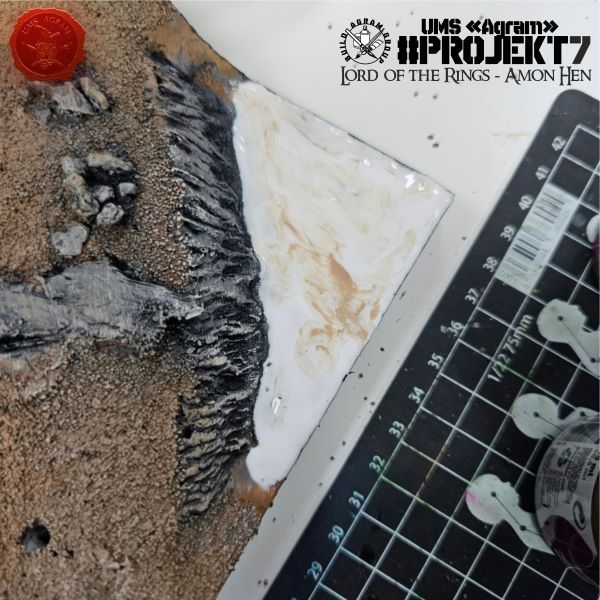
Since our time was running out, we decided to stop painting there and give the washes a chance to dry thoroughly. The final step for the board was applying a thick layer of PVA glue to the corner where the river would be. We did this to smooth out the surface, as we had decided to simply paint the river rather than adding any "depth."
Meanwhile, Kruno set to work preparing the newly arrived Uruk-hai figures. He removed the first half of the figures from the sprue and cleaned off the flash.
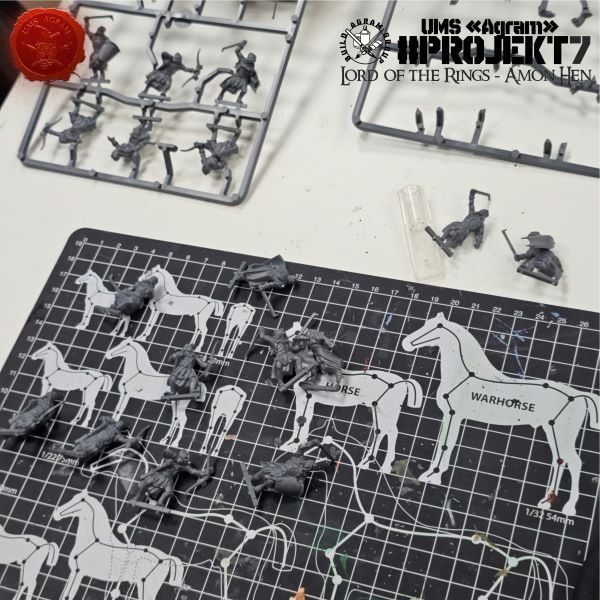
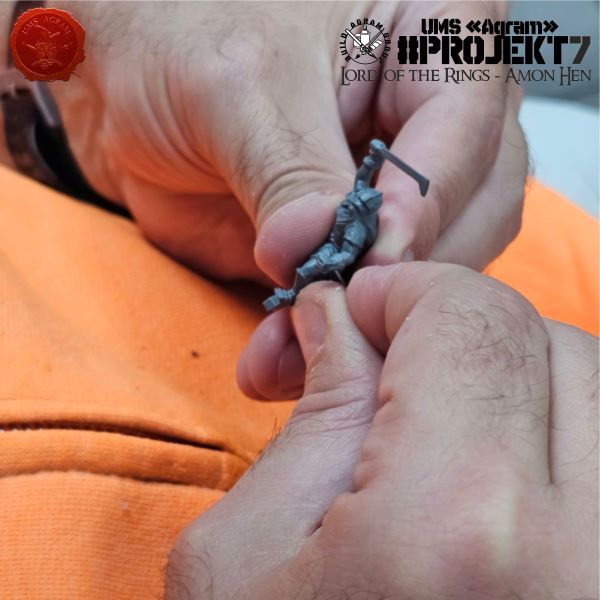
He organized them and removed the tabs for the bases. Next time, he will continue with the second half.
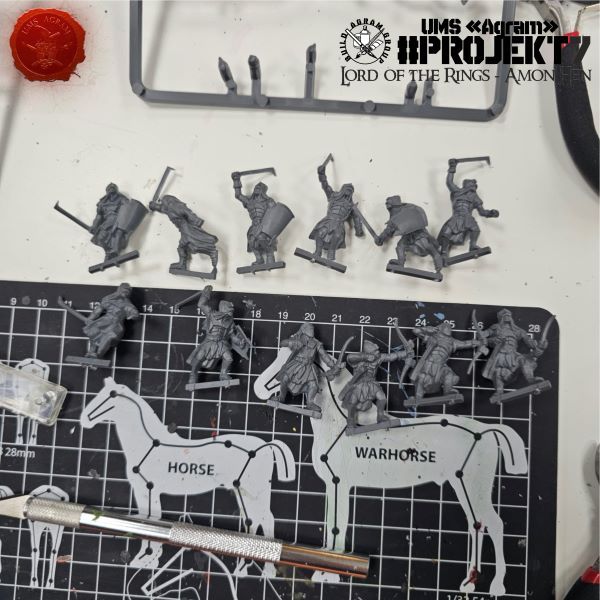
" ["content_hrv"]=> string(6871) "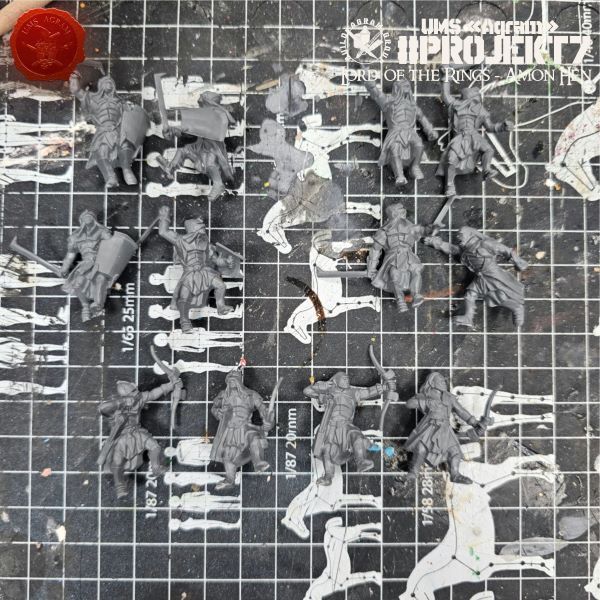
Agram Group Build se vraća. U svojoj sedmoj instalaciji, ekipa je odlučila izraditi igraću tablu / dioramu za Amon Hen. Za tu potrebu, ispunili smo si dječačke sne i nabavili originalni Forge World teren Amon Hena (izašao negdje cca 2000.) sa setom pripadajućih figura. Ova serija članaka pratit će izradu cijelog projekta – kako izrade terena, tako i sastavljanja i bojanja figura.

Kao što smo najavili, ovaj put započinjemo sa bojanjem. Prvi korak bio je nanošenje crne temeljne boje (sprejem) i onda bijele da istakne detalje.
Zatim je uslijedilo bojanje terena. Kao i uvijek, koristimo paletu smeđih i sivih boja marke Pebeo Deco. To su akrilne boje, relativno pristupačne cijenom, a dosta guste tako da omogućava lagano prekrivanje ili brzi drybrush ako nam zatreba. Prvo smo odradili smeđe nijanse, krenuvši prvo od tamnijih i završivši sa svjetlijim nijansama.
Zatim smo kamene plohe istaknuli crnom bojom i onda posvjetljavali sivim nijansama od tamnijih do svijetlijih. Hram i kipove smo ostavili prekrivene samo sprejevima iz prvog koraka.
Kad je baza bila gotova, okrenuli smo se hramu i kipovima. Prvi sloj boje koje smo stavili na crno-bijeli undercoat bili su washevi. Uzeli smo 5, 6 nijansi i nasumično tapkali po svim plohama.
S obzirom da nam se termin bližio kraju, tu smo odlučili stati sa bojanjem i dati washevima priliku da se pošteno osuše. Zadnji korak na tabli bilo je dodavanje debelog sloja PVA ljepila na kut u kojem će biti rijeka. To smo napravili da izgladimo površinu s obzirom da smo odlučili da rijeku samo obojamo, bez dodavanja „dubine“.
Za to vrijeme, Kruno se bacio na pripremu novopridošlih figura Uruk Haia. Prvu polovicu figura je maknuo sa okvira (sprue) te očistio srhove.
Složio ih je i maknuo tabove za baze. Sljedeći put nastavlja s drugom polovicom.
" ["created"]=> string(19) "2026-10-22 09:56:04" ["modified"]=> string(19) "2026-10-22 09:56:04" } ["Member"]=> array(10) { ["id"]=> string(2) "35" ["group_id"]=> string(1) "1" ["first_name"]=> string(5) "Marko" ["last_name"]=> string(9) "Paunović" ["first_name_mask"]=> string(5) "marko" ["last_name_mask"]=> string(8) "paunovic" ["username"]=> string(5) "marko" ["password"]=> string(40) "3bd37b326d19d1880d3b93a4b32e8fb3a90fa122" ["born"]=> string(19) "2033-03-07 20:35:00" ["created"]=> string(19) "2009-06-02 20:37:03" } }
















Najnoviji izvještaji s bojišta
- Kill Team - Blooded vs. Vespid Stingwings 28.02.2025., GW - Warhammer 40.000, i Antoni Pastuović (Imperial Guard)
- Dark Angels protiv T'au Battlereport 22.04.2022., GW - Warhammer 40.000, Borna Pleše (Space Marines) i Kristijan Kliska (Tau Empire)
- Sisters of Battle protiv Ultramarines 17.11.2021., GW - Warhammer 40.000, i Nino Marasović (Space Marines)